Here we go! Dual Rib Roasts On the Vintage @webergrills Simpson’s  Kettle 

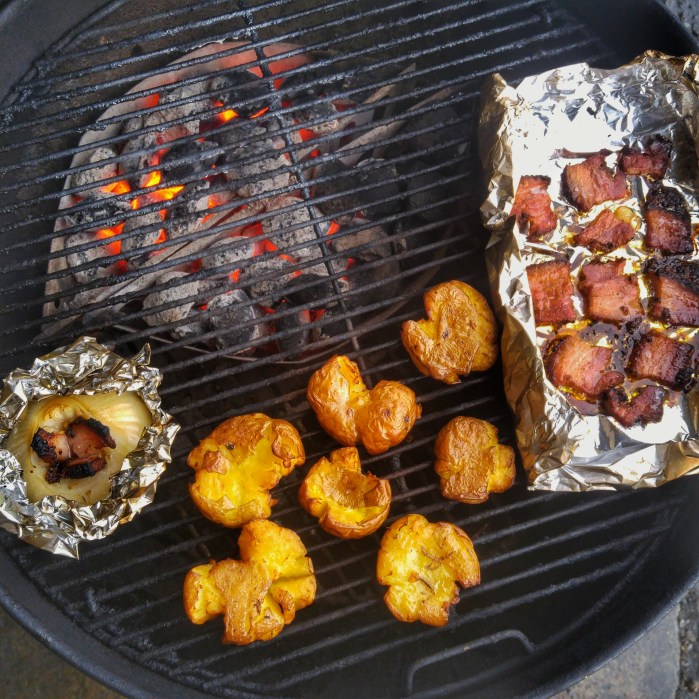
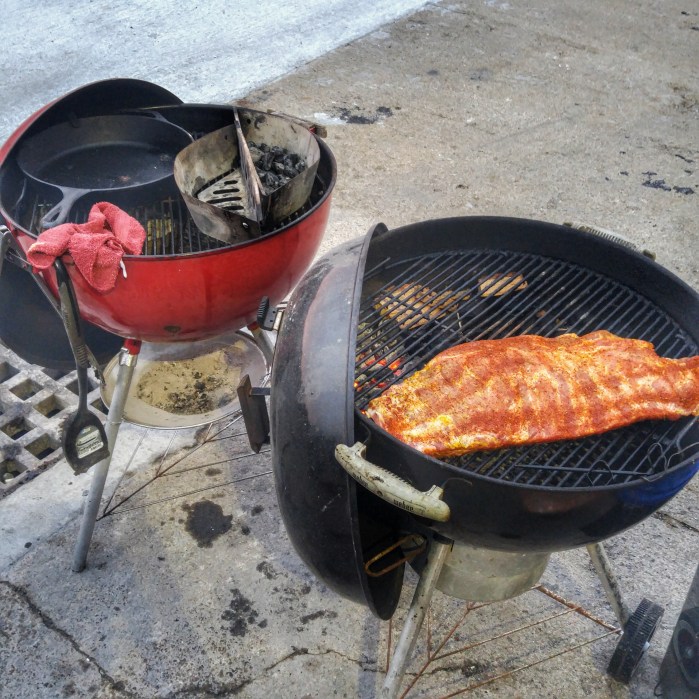
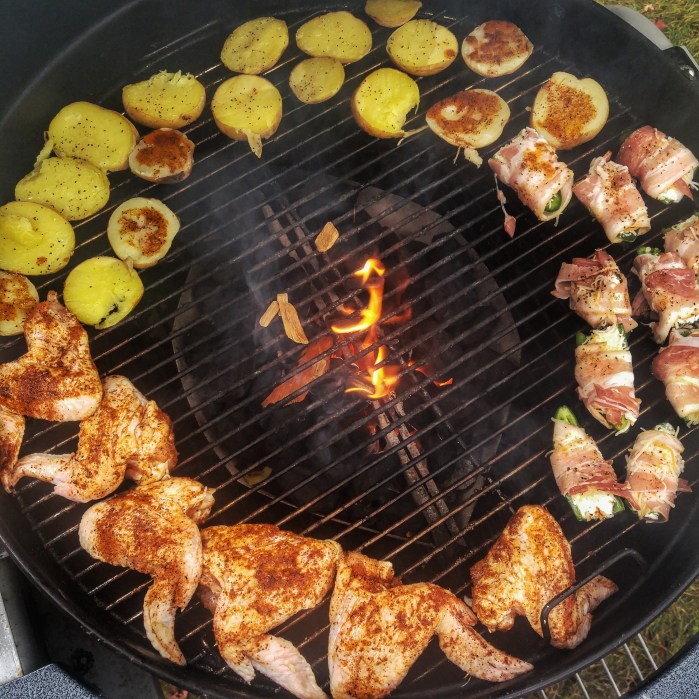
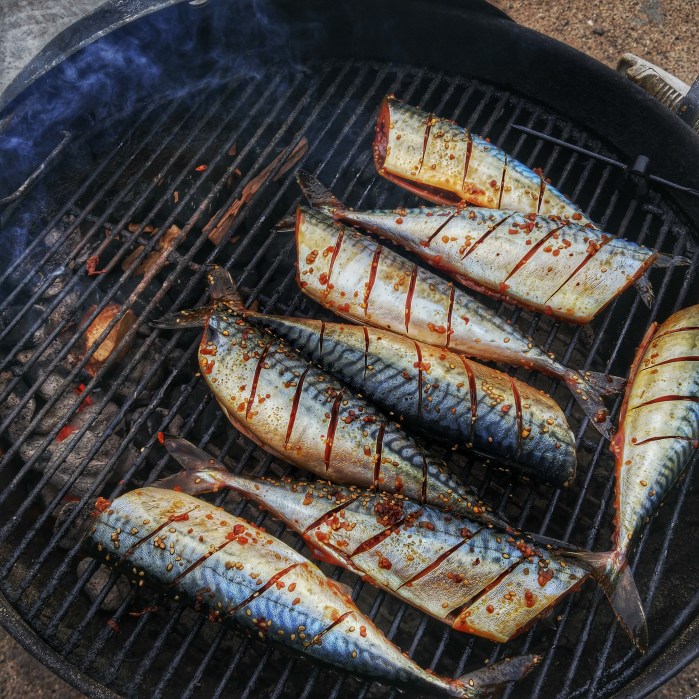
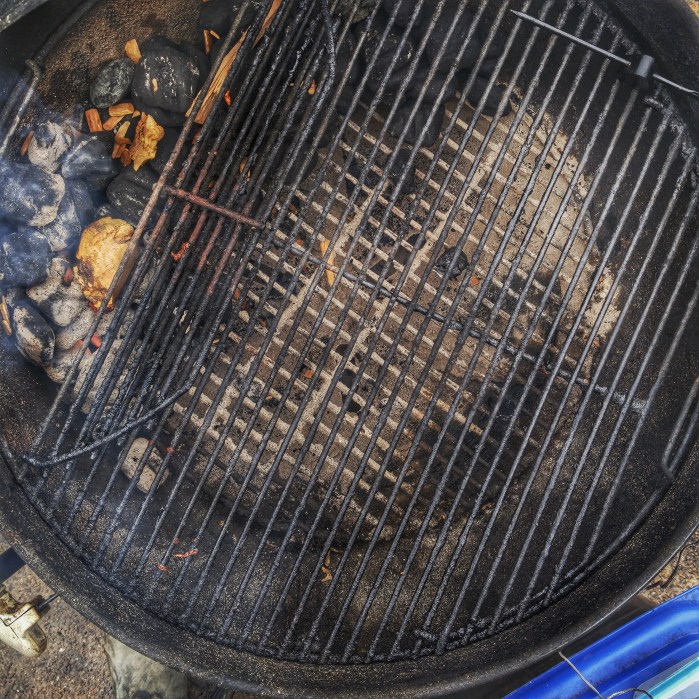
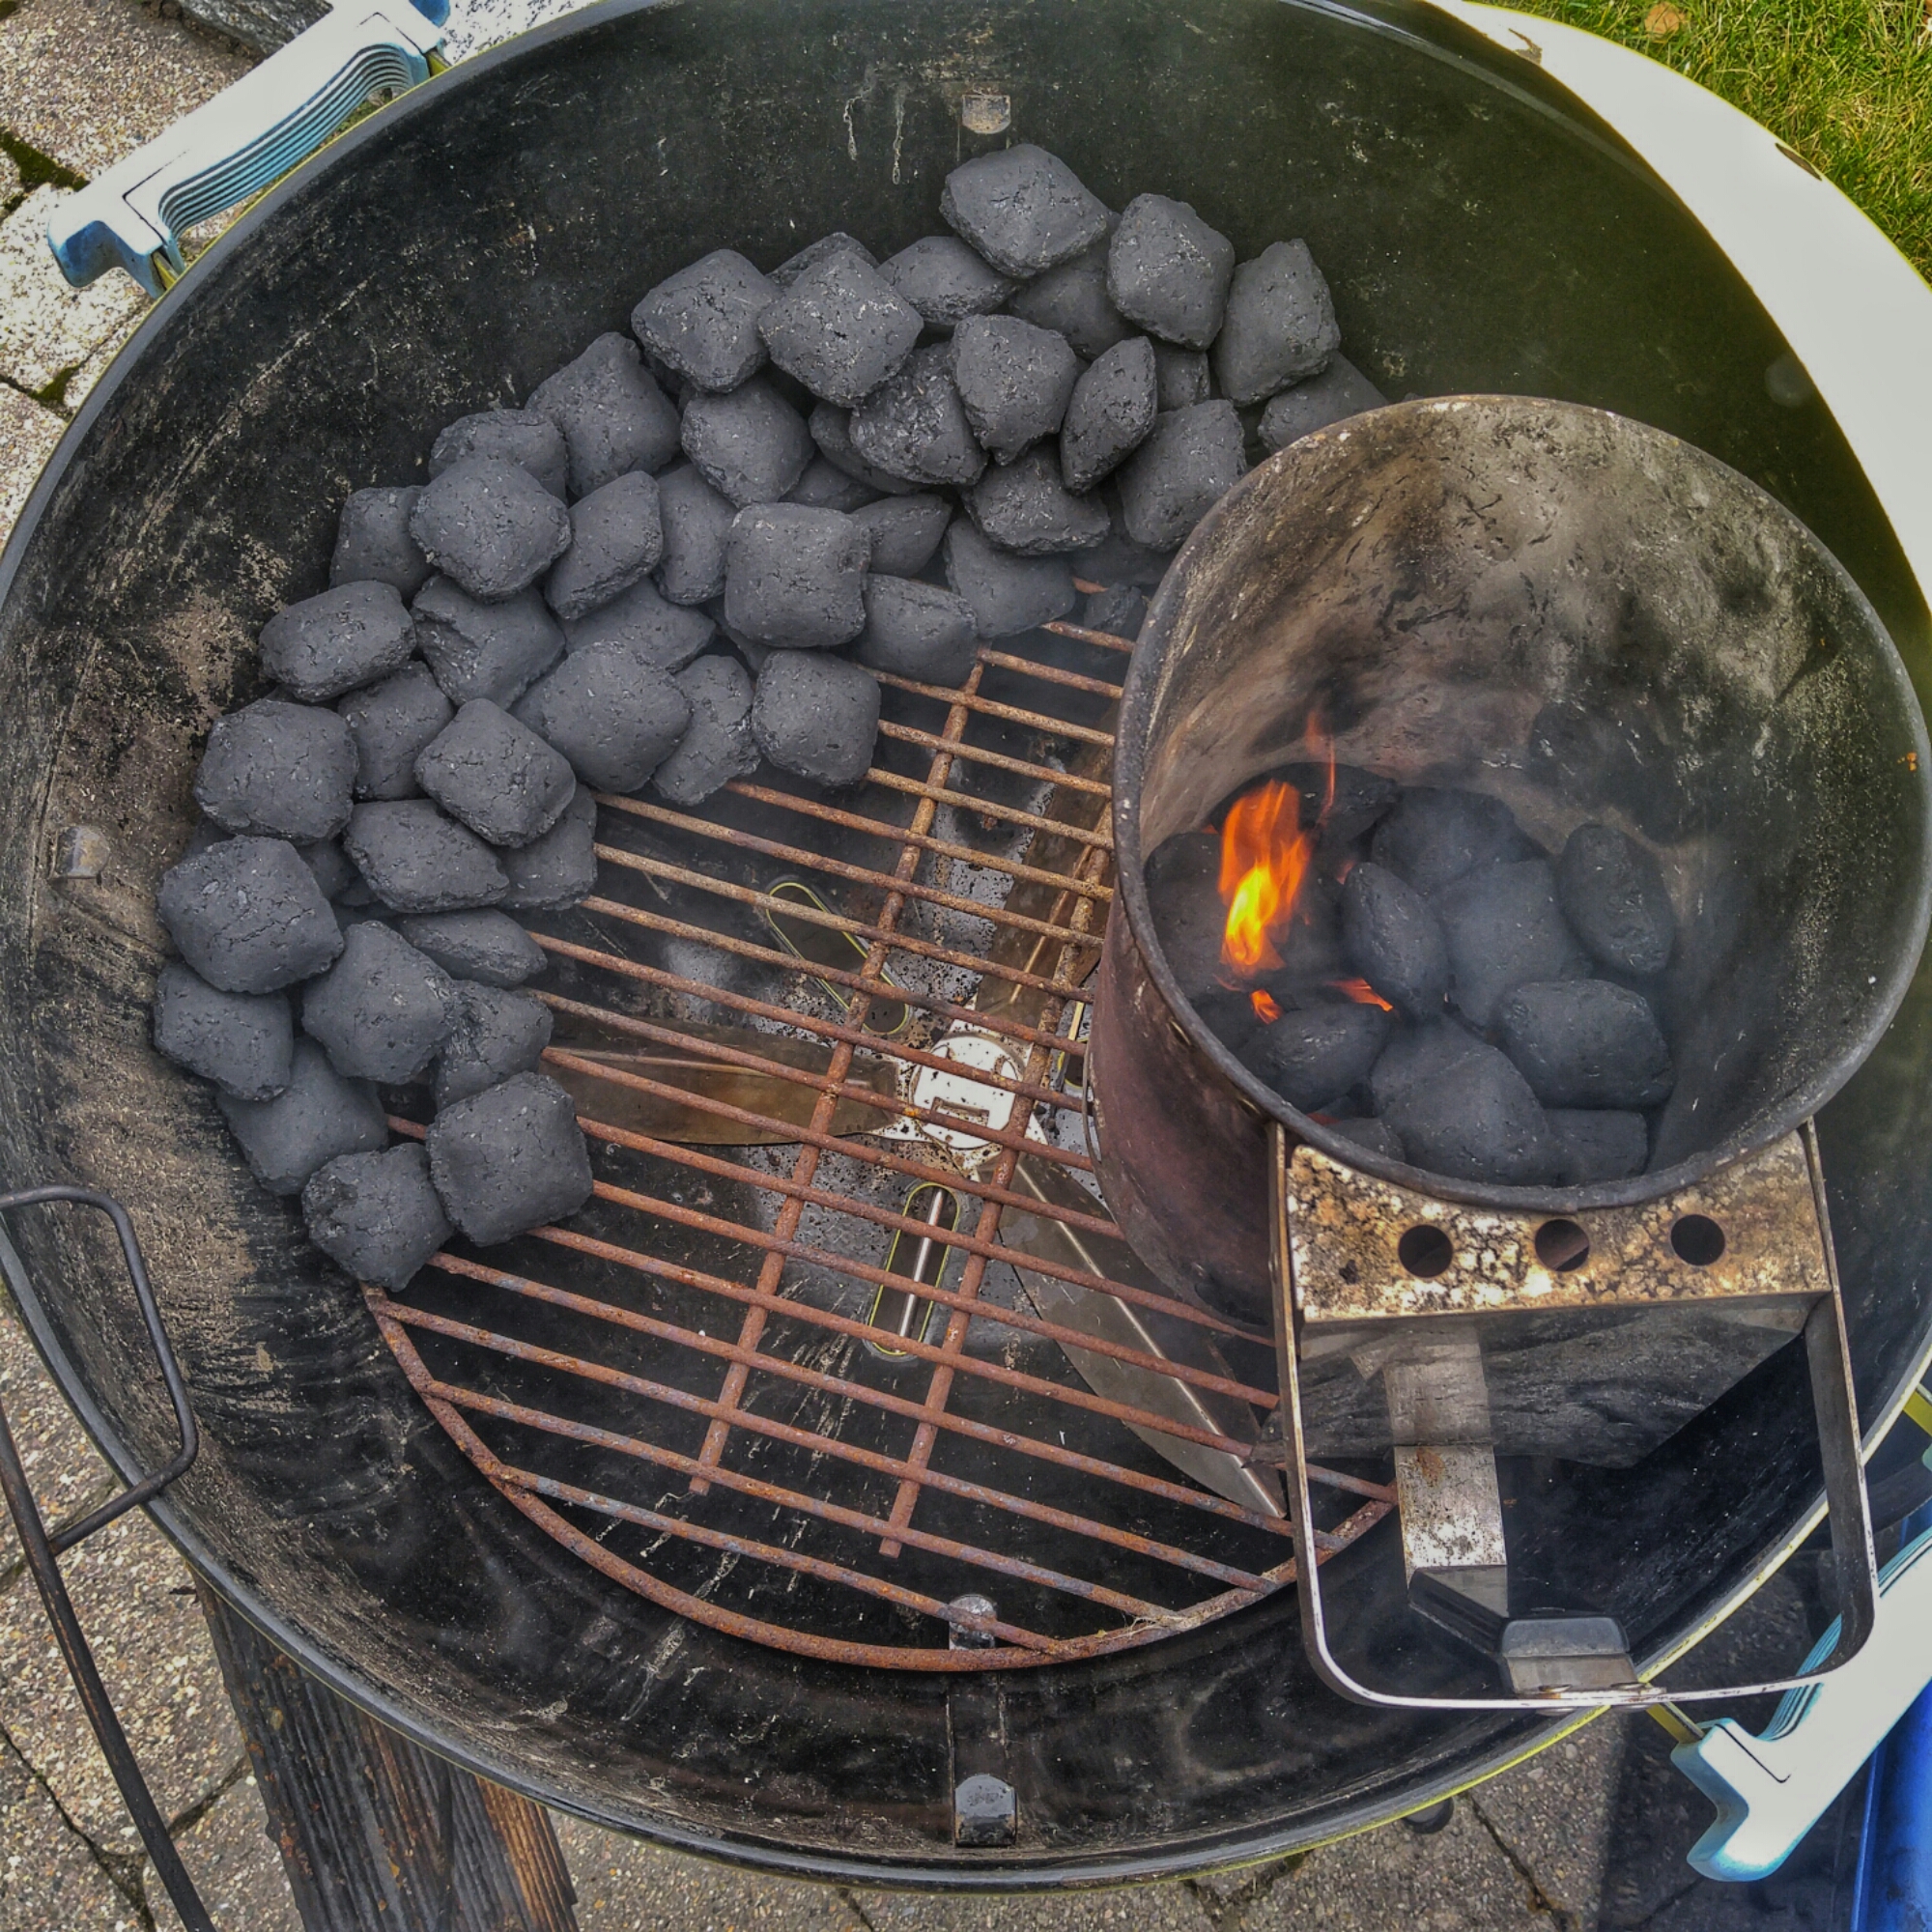
Set up the kettle for snake method cooking where we light about a dozen briquettes and once they are going we put them on the start of the fuse or snake and let the coals work their way around the bowl for a low and slow cook  rather than what you’d do with a steak, searing it directly over high heat.

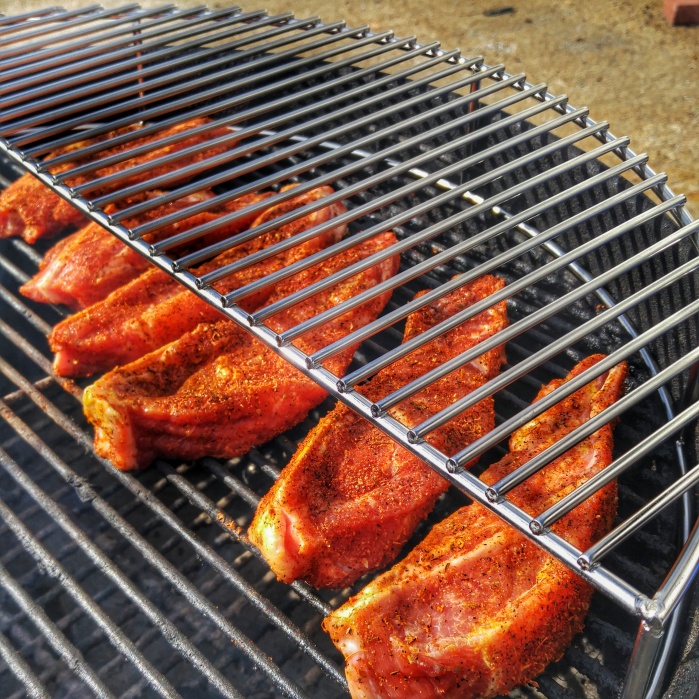
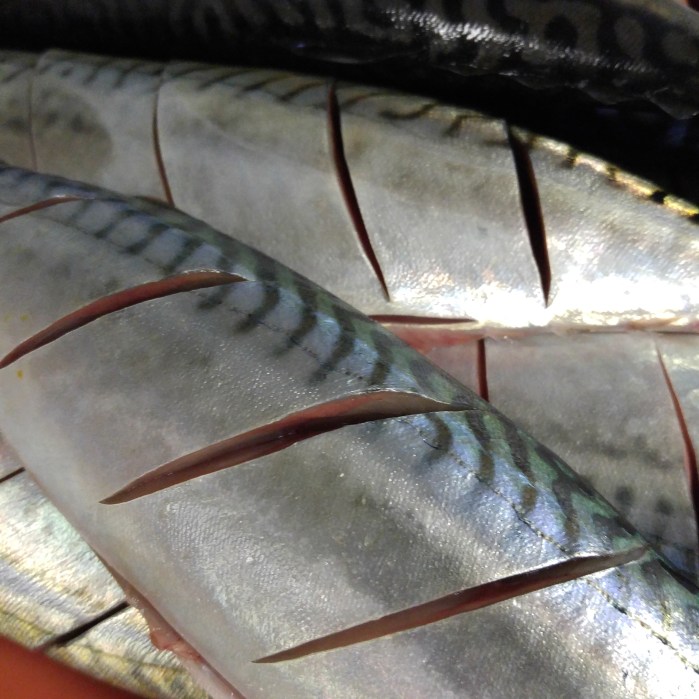
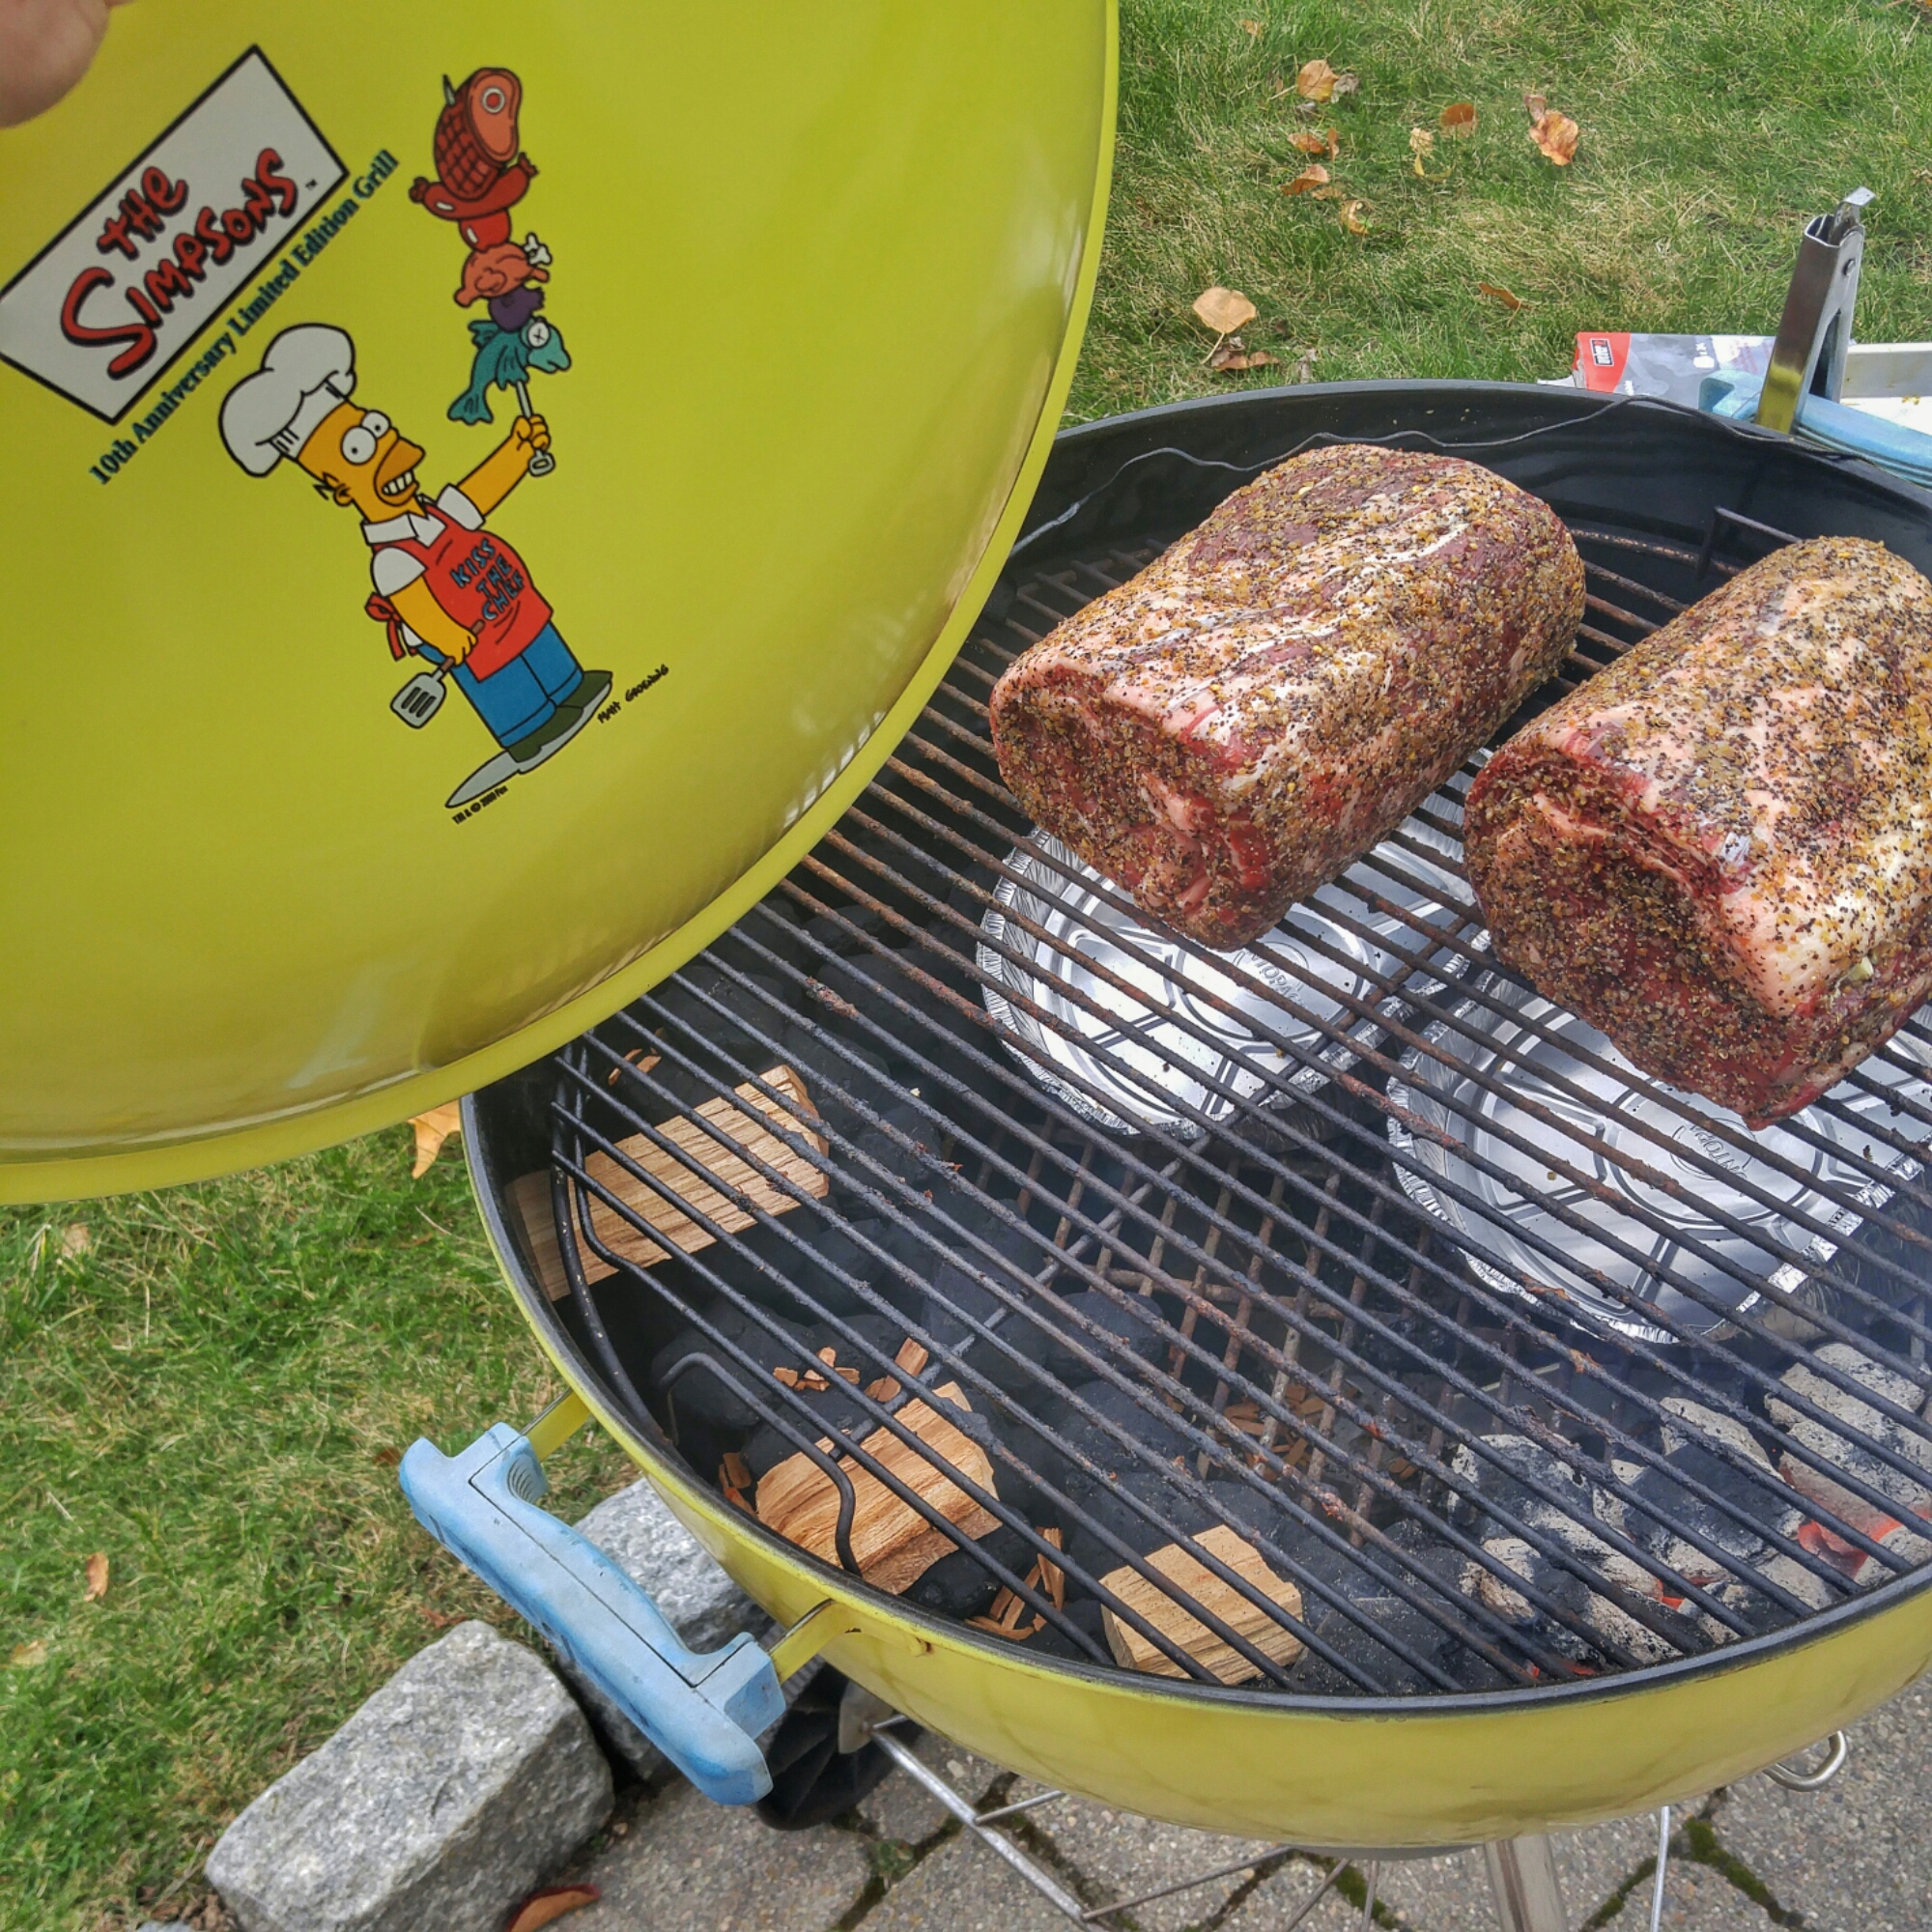
To prepare the roasts, I slathered them with EVOO and cut six slits in the top of each roast, inserting cloves of garlic.  Then a generous rubbing of Montreal steak seasoning all over.  Placing the roasts over tin pans to collect the drippings for gravy offset of the coals and also adding about a cup of water to each pan to keep a moist cooking environment inside the kettle.

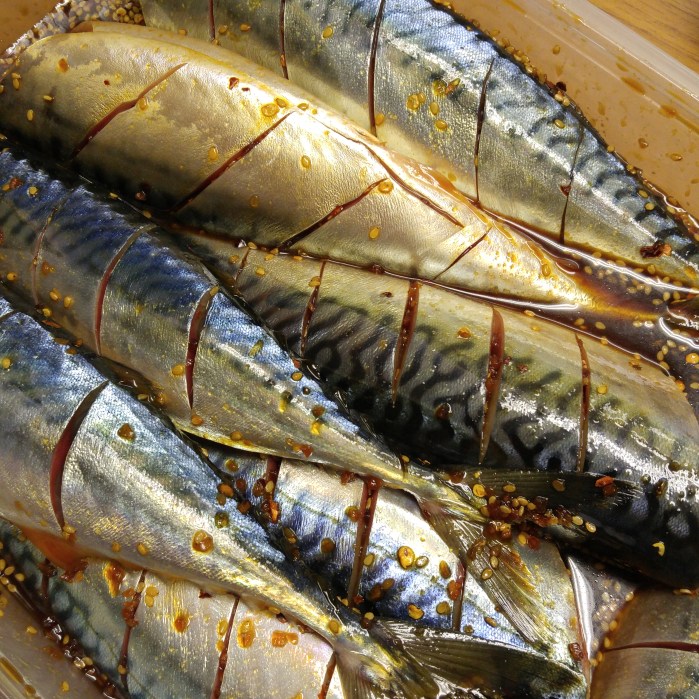
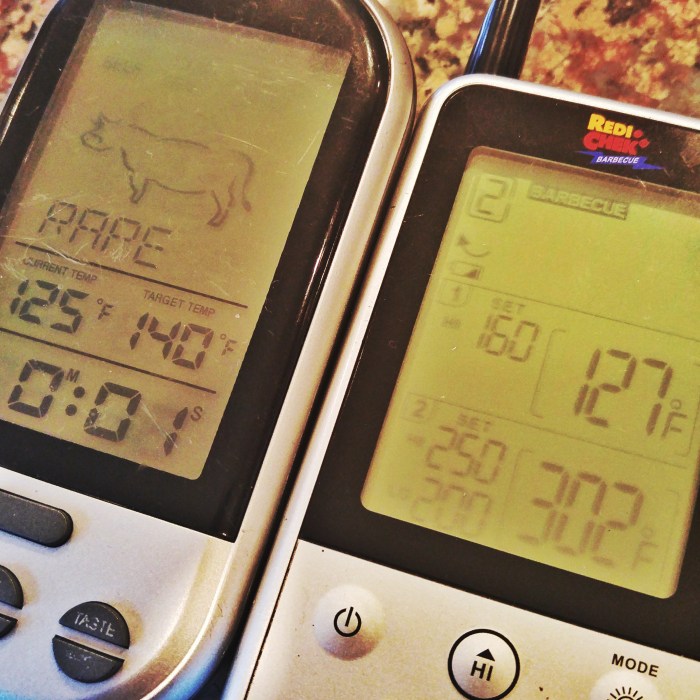
Apple chunks and cherry wood chips for smoke.  Key is the temperature probes that will tell us the temp inside the kettle and more importantly the temps inside each roast.  We’re looking to cook at a grate temp about 275 degrees and pull the roasts off when they hit 125 internally for a nice rare roast.

The Roasts Go on at 9:49AM:

20161124_094944-01.jpeg

Haven’t had to adjust the vents once, this is because of the snake method.  Only so many coals are going at a time as it works it’s way around the bowl.  For this cook 95% of the time grate temp was between 264-279.

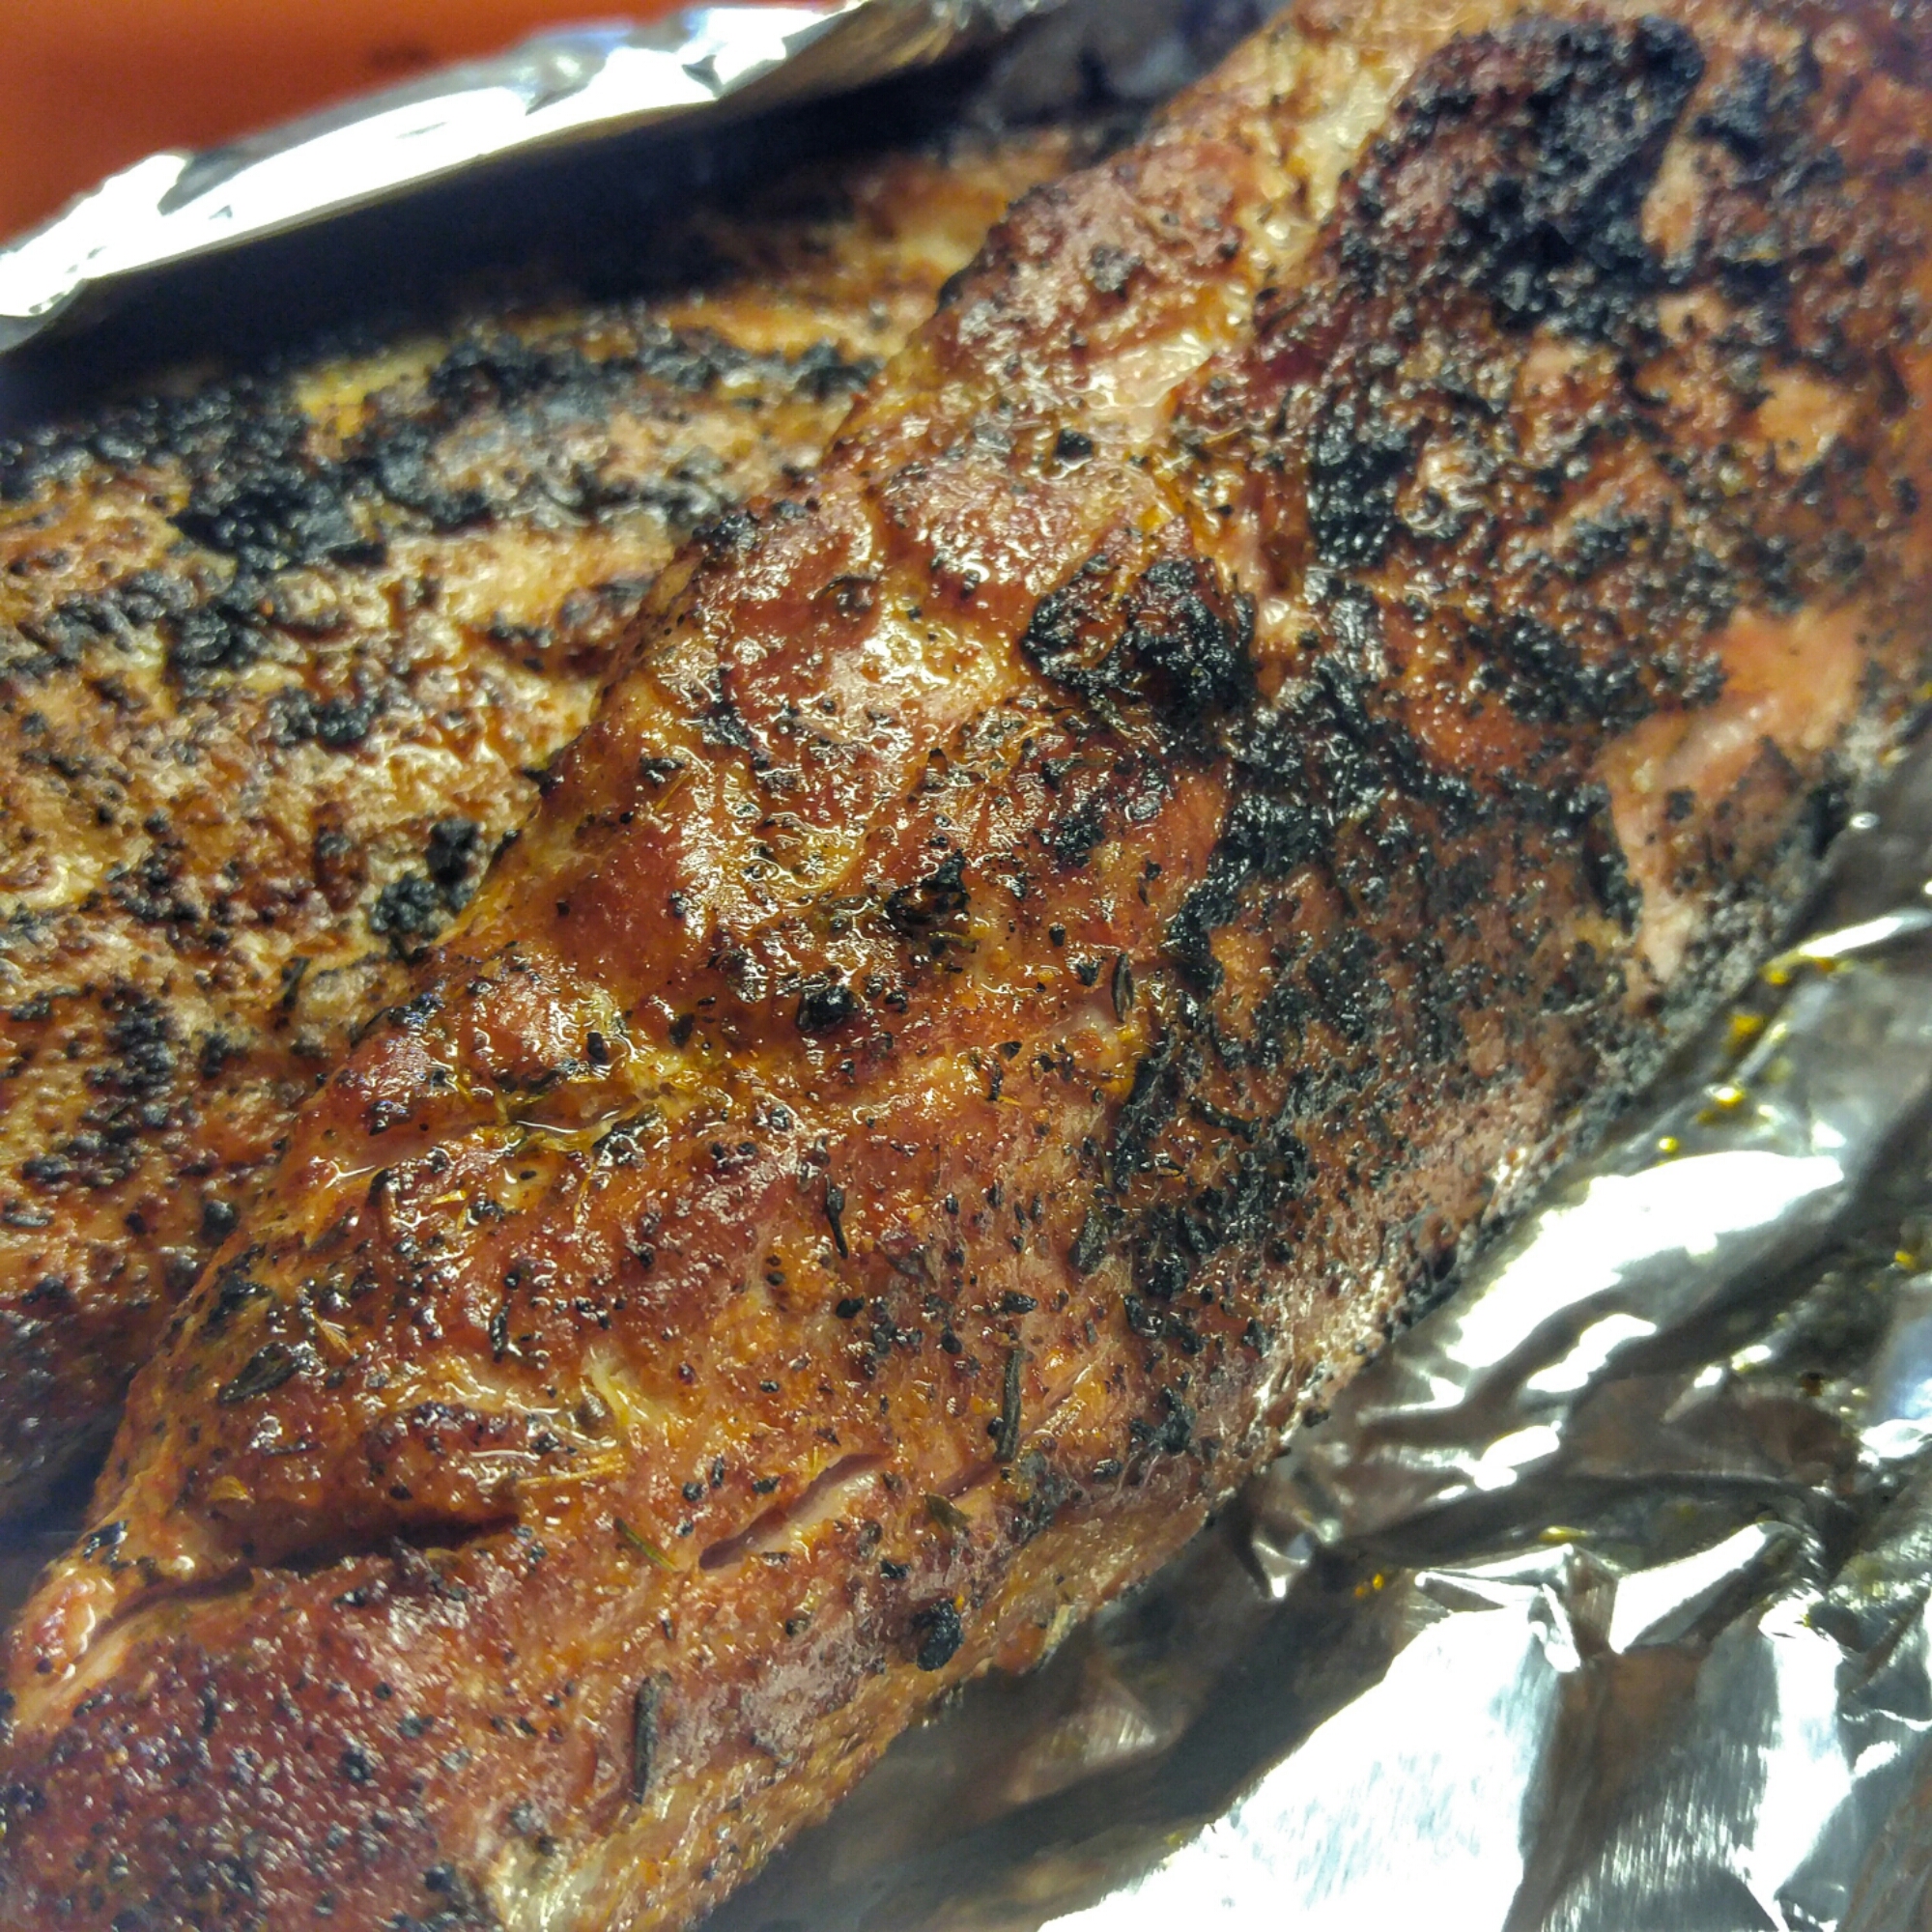
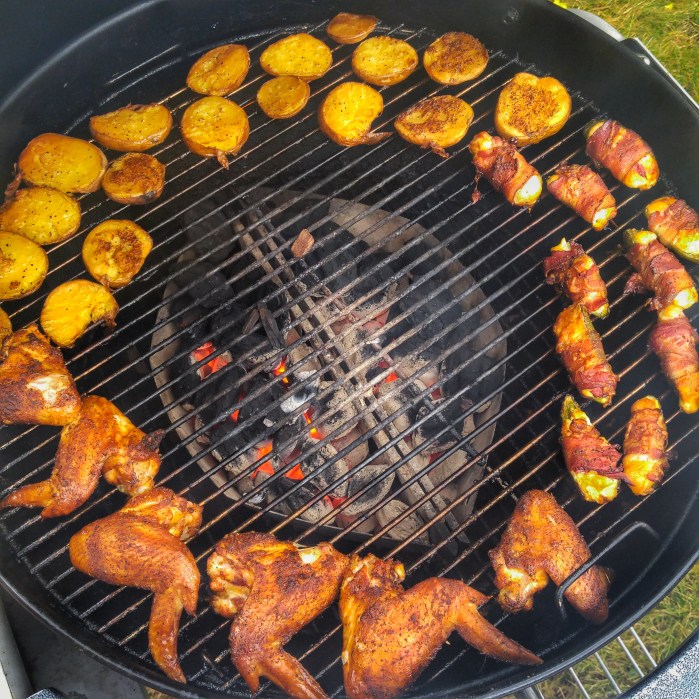
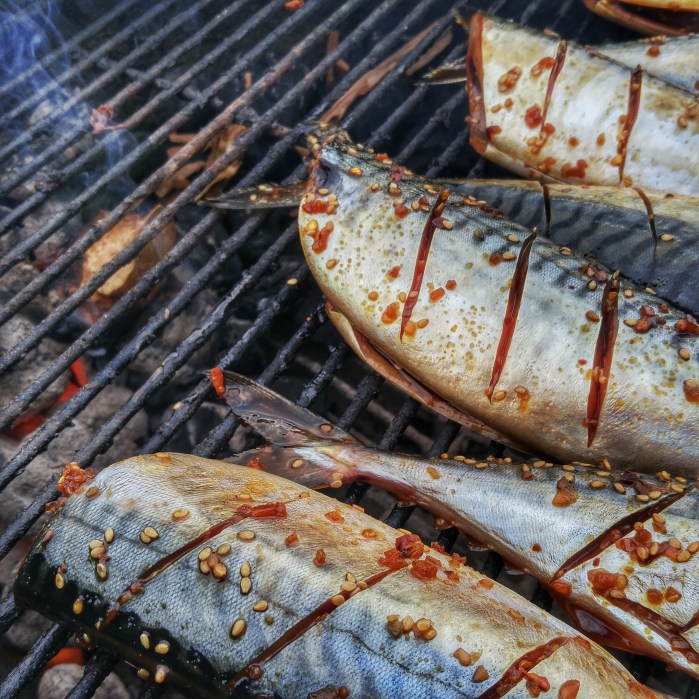
We’re starting to get some nice color at this point but we’ve got a ways to go.

20161124_122717-01.jpeg

12:27 We’ve got the temps right where we want them and she’s looking spectacular-

20161124_122456-01.jpeg20161124_122656-01.jpeg

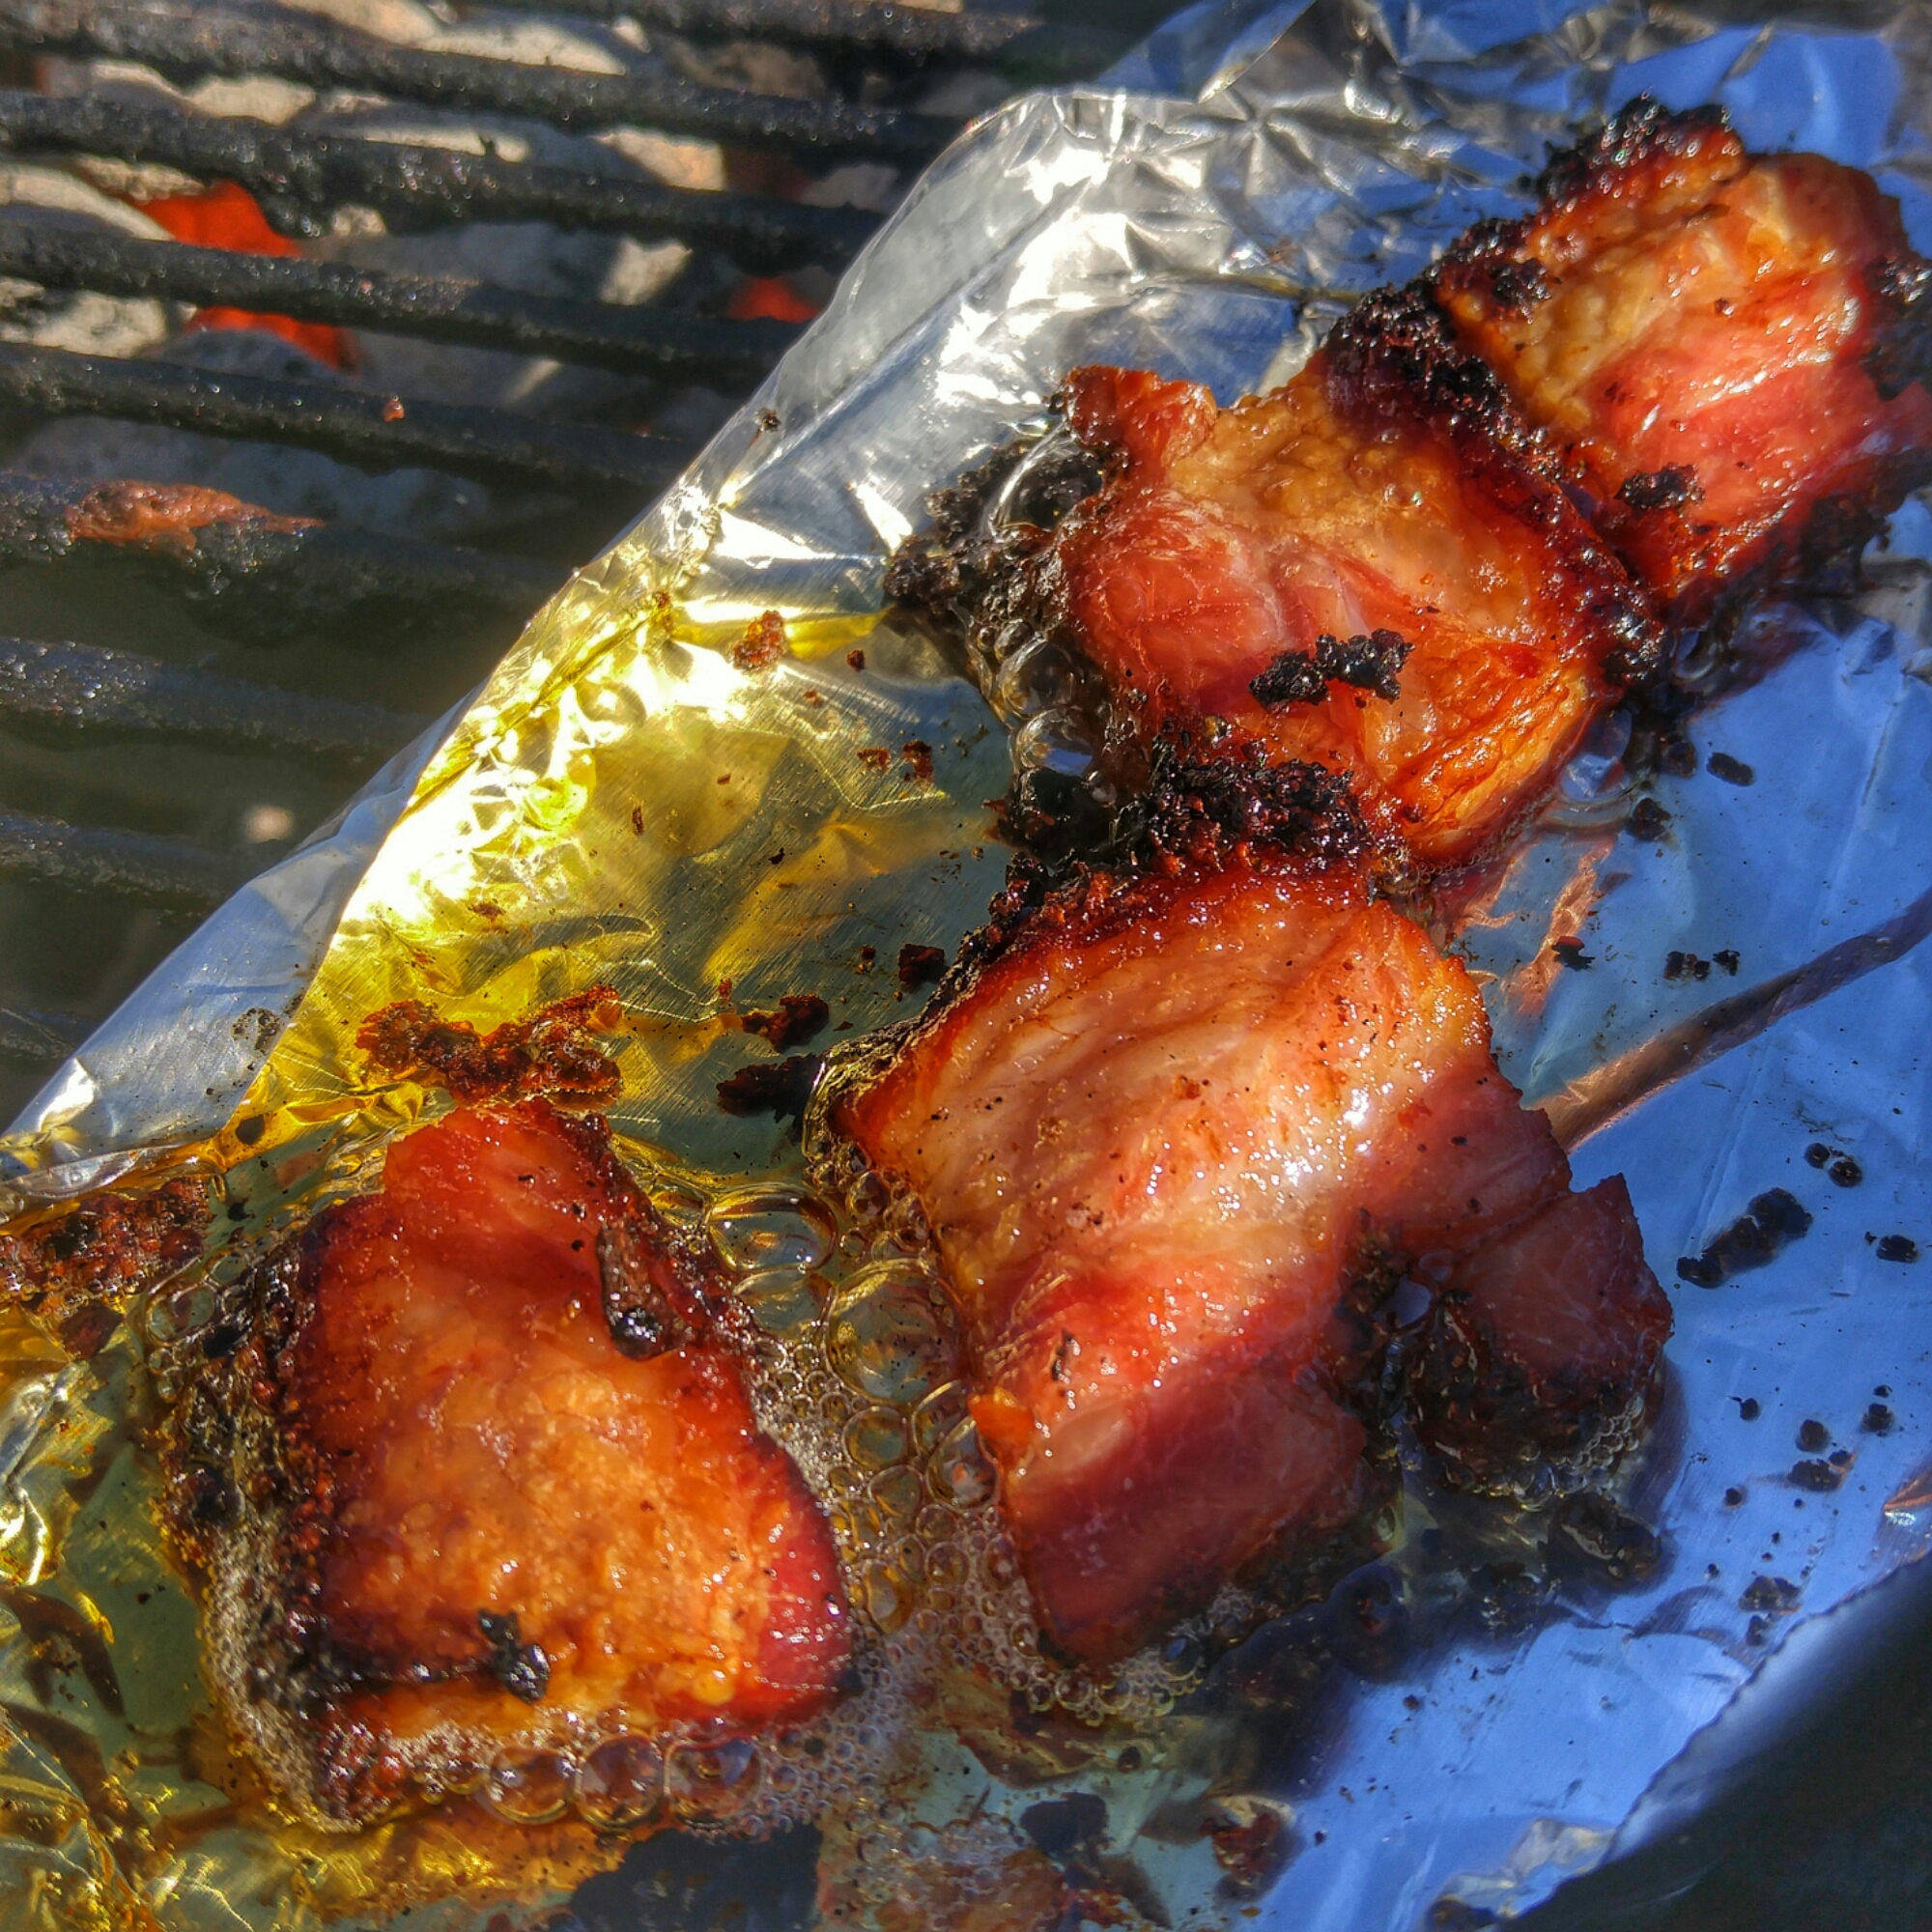
At this point we take out the temp probes and give each roast a slow roll directly over the coals to firm up that outer bark ring and then onto the platter under a very loose foil tent.

20161124_134204-01.jpeg

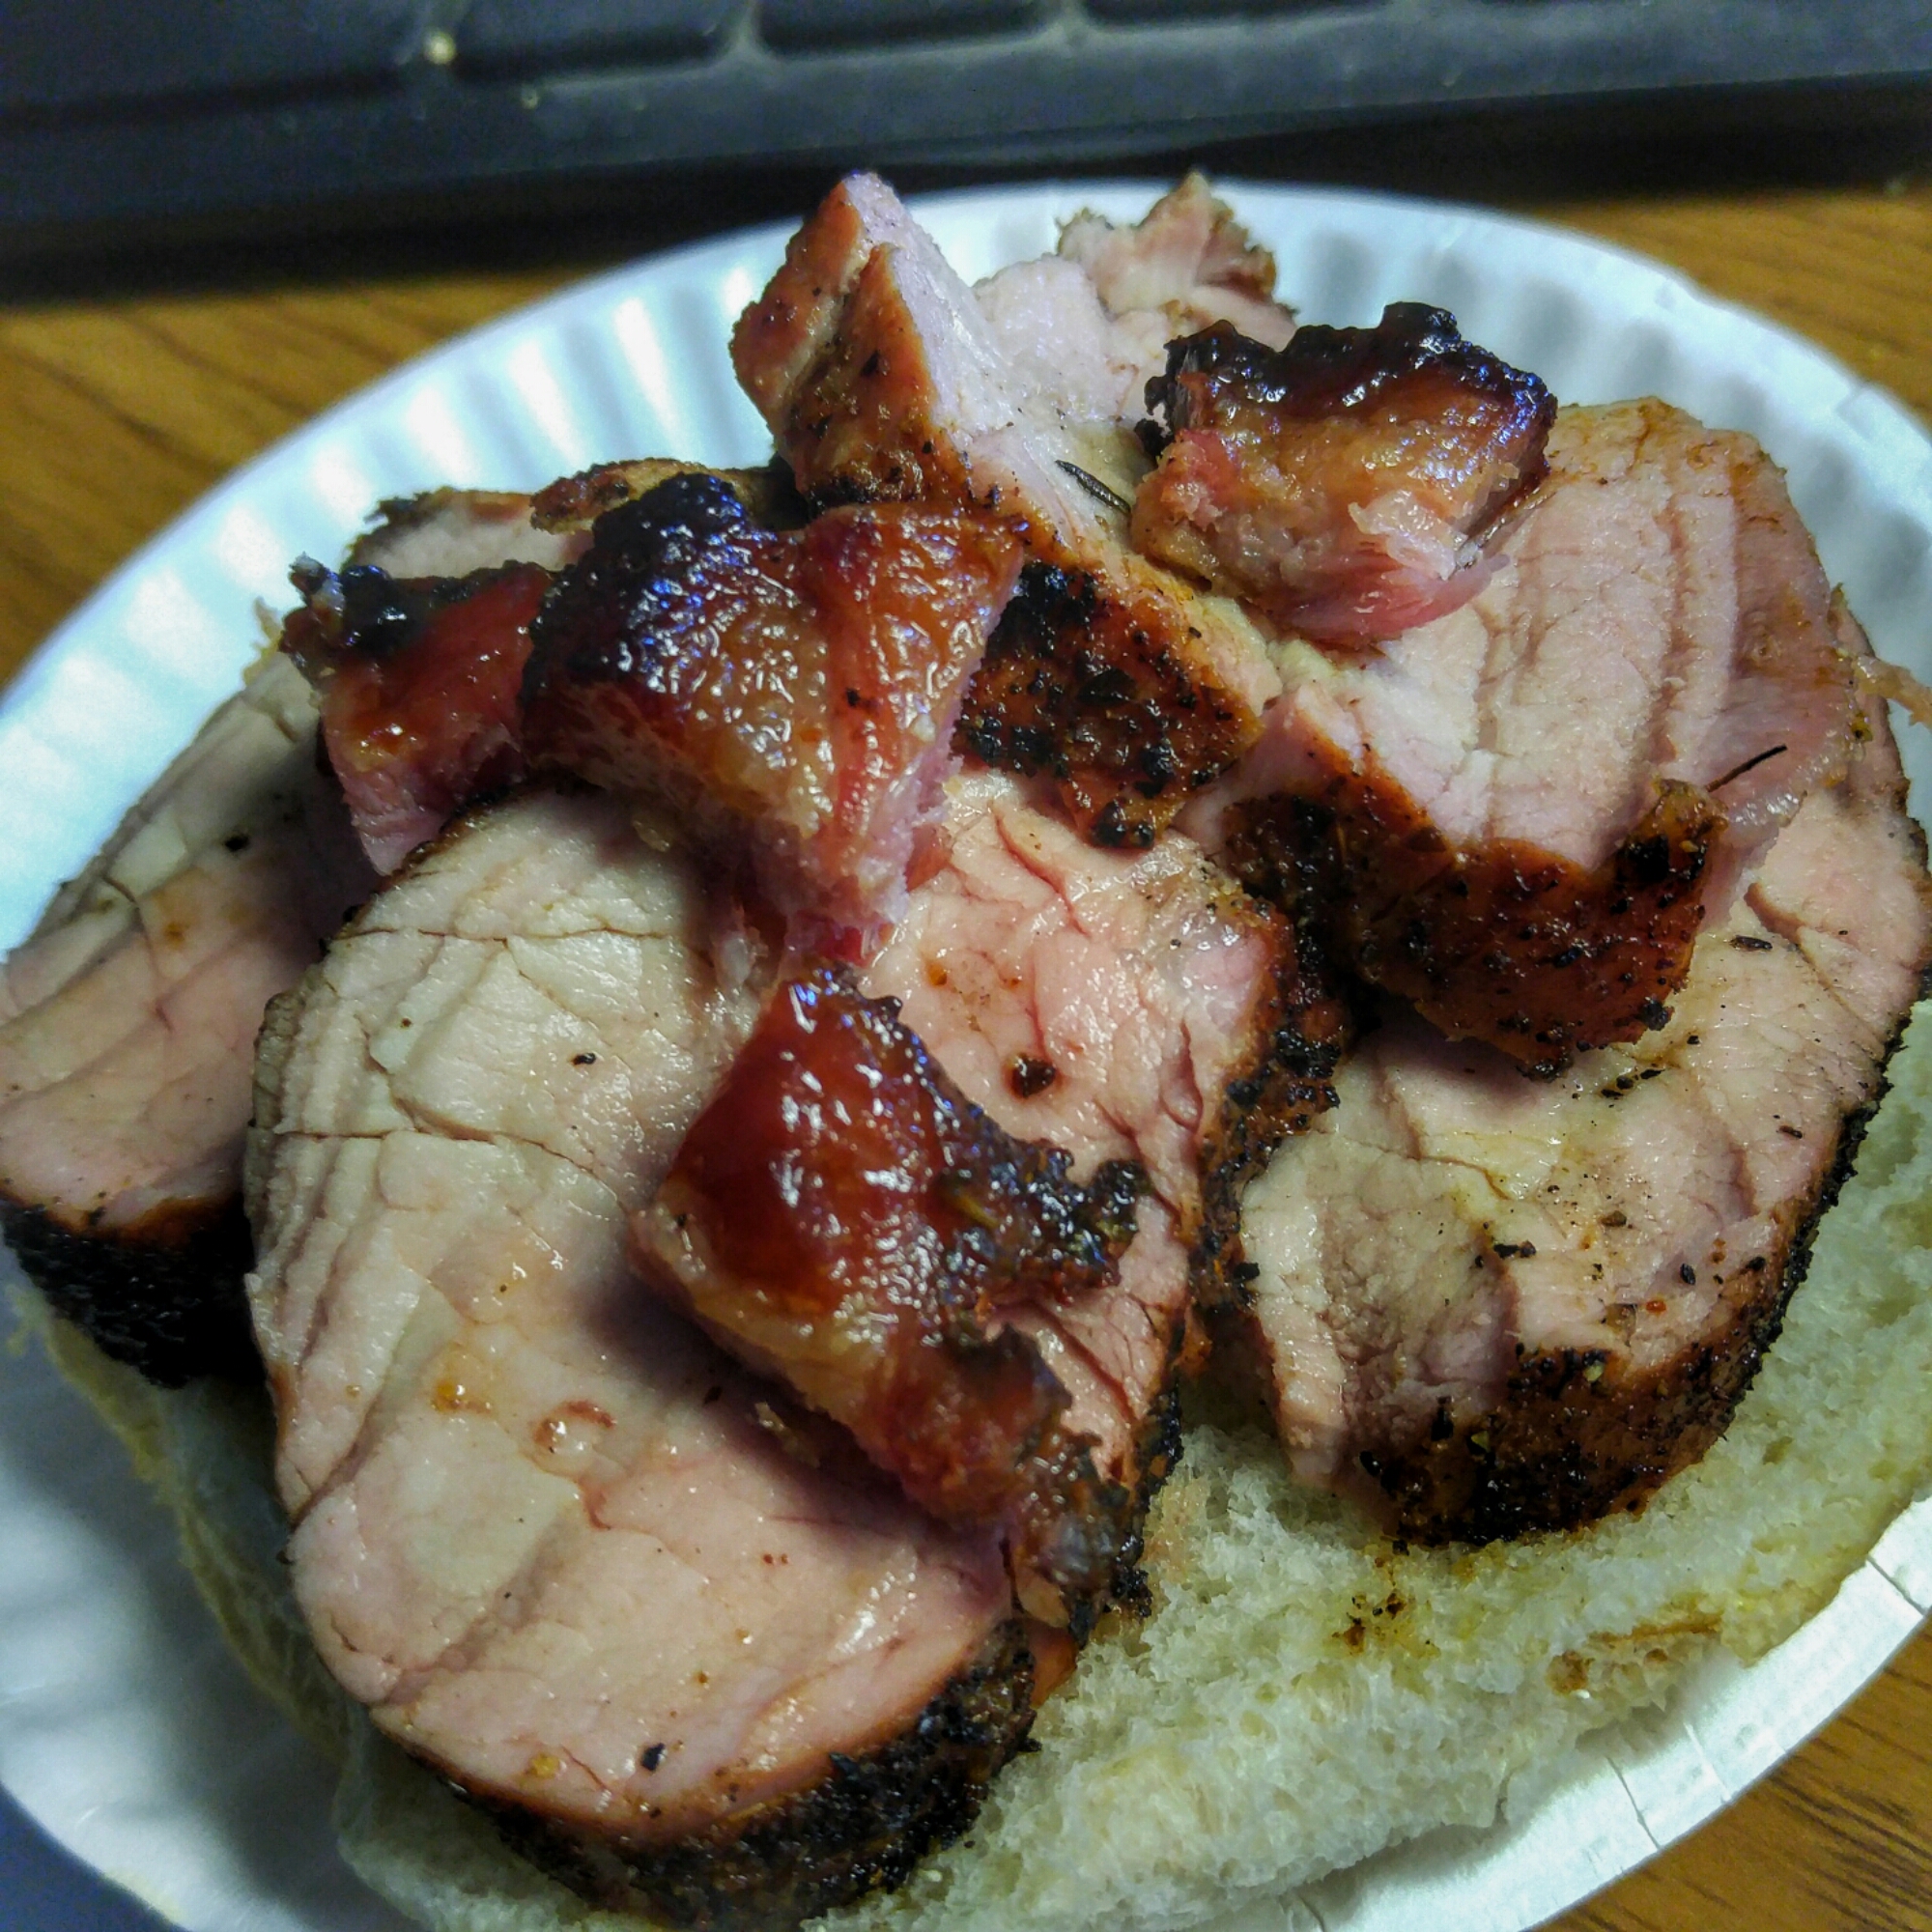
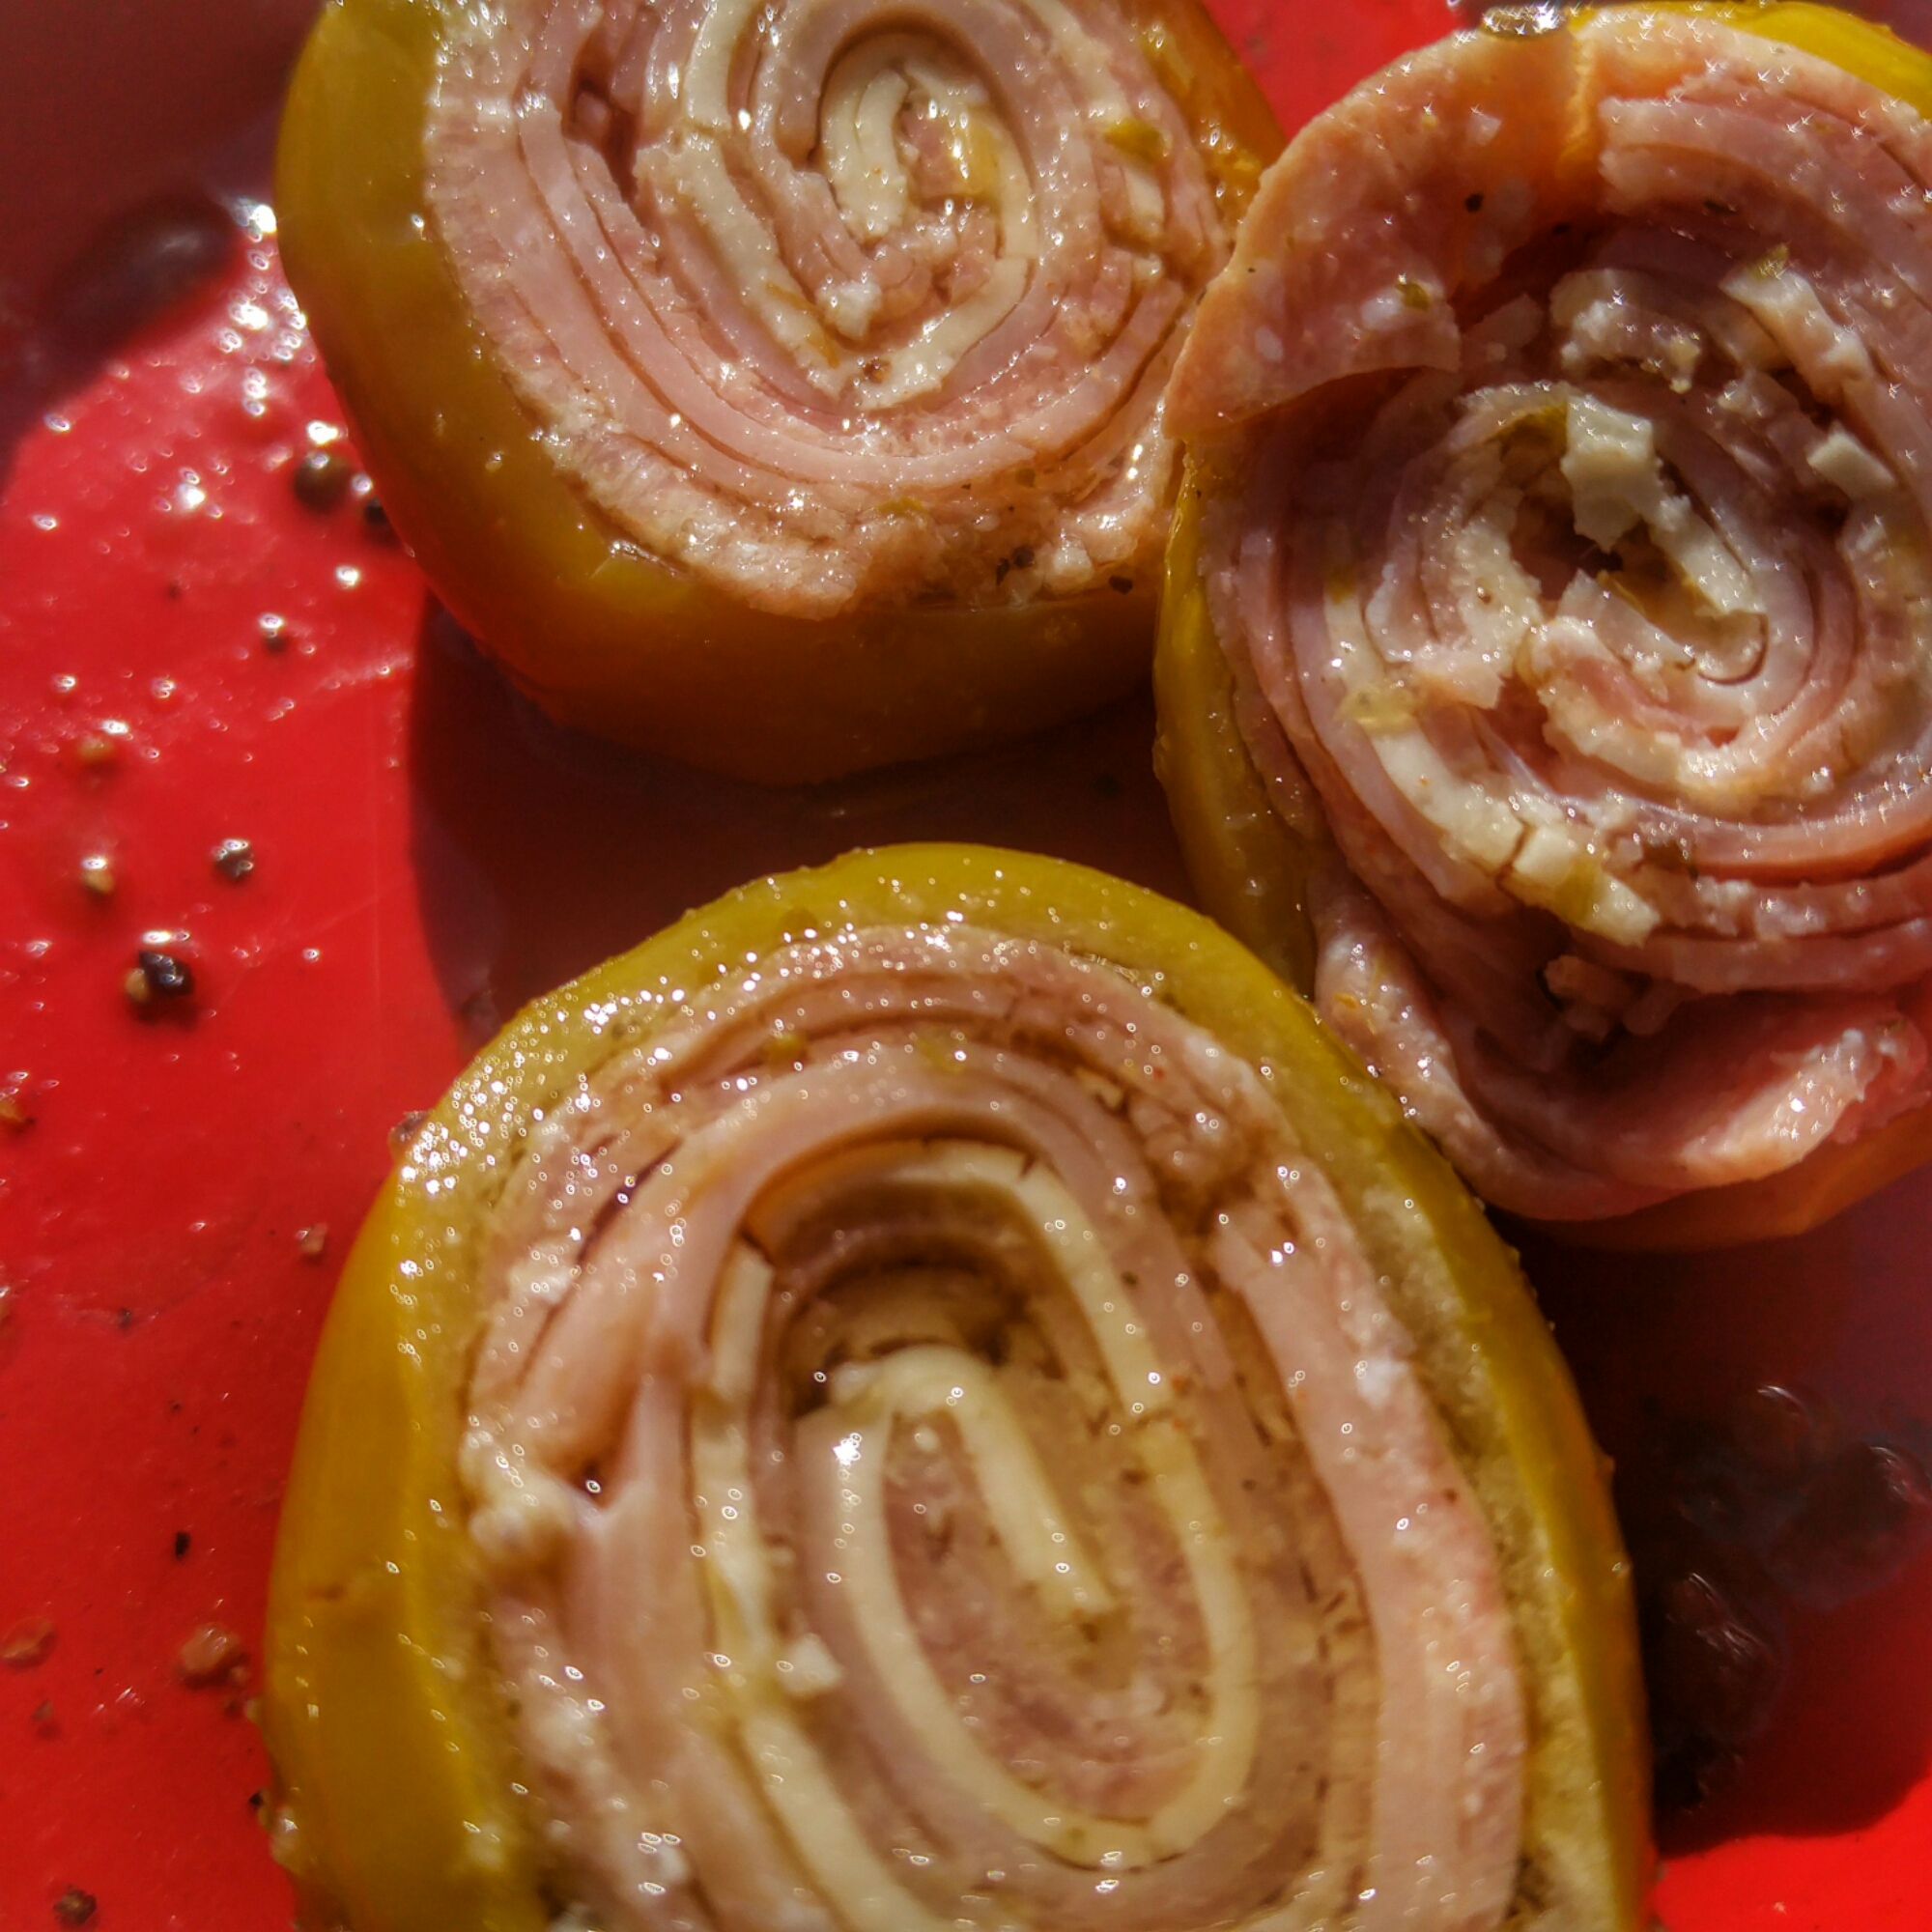
Let it rest for an hour and collected any of the juices that ran out for the gravy.  Just what we were looking for- edge to edge pink!  No gray outer ring.  A perfectly even cook.

20161124_150952-01.jpeg

This is a really easy cook.  Just follow the pictures above and you can do this easily too.


Venison Marinated in Spiedie Sauce with Onion Stuffed With Bacon and Bacon Fat Coated Smashed Potatos On The @WeberGrills Kettle

We’re going to tape a podcast this morning and I’ve had venison steaks marinating in Spiedie sauce for two days.  I figure since the deer meat is so lean we gotta add some fat in there somehow.  Good friends Eric Lorden and Craig Kimberley home smoked some bacon earlier in the week so what the hell, let’s mash this shit up and see how it come out.

I made a little foil tray and sliced up some bacon which I’ll use a couple different ways.

First core out the top of an onion, make some slits inside and stuff some bacon in the top.  Next slice up some more bacon and let it render some of that fat to put on the venison that Ian Fulford brought.

After cooking the onion bacon and smashed potatos using indirect high heat for about a half hour we take the lid off and cook the marinated venison steaks directly over the heat about 3 minutes per side leaving them a medium rare.

20161106_084423-01.jpeg20161106_085808-01.jpeg

Using the melted bacon fat I drizzle that over the venison after it cooked and took it off the grill to rest for about 5 minutes.  Closed the lid and then pulled everything off at the same time to eat.

20161106_085813-01.jpeg

I had never had a positive experience eating venison before this, but we all agreed it was absolutely outstanding.  A huge part of the success was due to letting it marinade for two full days in the vinegar based Spiedie sauce which really broke the venison meat down and added a ton of flavor.  That and the smokey flavor from the apple wood and charcoal- a total winner meal.


And then she said “Why do you need more than one @WeberGrills Kettle?”

The Latest… A DR Code Green 2nd Generation @WeberGrills Performer

Our buddy Anthony Caturano At Tonno took the second SS Performer.  Immediately I had a empty pit in my stomach, without a Performer to cook on at the dock. Truth be told I really enjoy the restoration process and needed another project so I searched out another Performer looking for some love.

So this beautiful gem fell into my lap look at the bottom of this post:)

It’s a second generation Weber Performer.  Each of the Generations of the Performers have things I like about them.

The classic lines on the first generation Stainless Steel ones, the only performers to use stainless steel. (Here’s the performer Anthony took)

wp-image-1292473495jpg

The Black Frame on the second generation.(This is the first Performer I ever acquired)

20160402_124155_hdr

The Wheels on the third Generation.

20160427_174232_hdr-01.jpeg

The Black Metal table on the fourth generation. (This is actually my 3rd gen with a 4th gen table.

20160519_185214_HDR-01

And here is the latest- The DR Code Green, should clean up nicely.  When the light comes I’ll test the gas assist to see if it’s working.  With or without the gas assist I love the functionality of the attached table and bin on the Performers.

The Before Pictures- DR Code Green Weber Performer

20161007_053846.jpg20161006_190435.jpg


Upper Deck Warming/Smoking/Grilling Accessory For 22 inch Kettles

Teaser for my review- (I haven’t even taken it completely out of the box but initial impressions from the quick peek are how thick and sturdy the build quality is)

29815211500_51d3047305_c

Found on Amazon Here-

Stainless Steel Warming Rack and Grill Grate- For Use with 22.5 Inch Weber Kettle- Charcoal Grilling Accessory

As I said before the build quality is thick like Weber’s Gourmet Grate System.

Here is how I started out.  A regular smoke set-up using the snake method.  The Country Style Pork Ribs offset of the coals with apple chunk and cherry wood chips.

20161004_101029-01.jpeg

Next to add the Upper Deck.  It fit right in place and there were no issues with clearance of the lid.

20161004_101206-01.jpeg20161004_101215-01.jpeg

The Upper deck provides a whole lot of extra space.  it is billed as a warmig rack but I think where it will shine is with that huge amount of extra space it affords you when smoking.

Next I dropped onto the Upper Deck a porcetta roast and set up the Maverick remote thermometer.

20161004_101334_hdr-01.jpeg20161004_101512_hdr-01.jpeg20161004_101610_hdr-01.jpeg

When the country style pork ribs had the color I wanted I slid a Weber disposable tin pan under with some Sweet Baby rays and coated the ribs, then covered with aluminum foil to let them braise for about 40 minutes. The tin pan fit perfectly under the Upper Deck unit allowing a continuation of indirect cooking while still having the porcetta roast unfazed on the “Upper Deck”

20161004_112523-01.jpeg20161004_112723_hdr-01.jpeg

My Sister Topped The Smoked Porcetta with Her Carrot Cake Marmalade, Yum!

Find the recipe for that on her website www.sistafeliciaskitchen.com

Carrot Cake Marmalade

smokedporcetta

Would not have been possible to cook both things at the same time on my kettle without the Upper Deck.  Obviously with the incredible build quality and huge cook space increase, this is an absolute no brainer purchase.


Football Grub: #atomicbuffaloturds #chickenwings #potatocrisps On the @WeberGrills Performer www.northeastbbq.com

Set Up A Full chimney of blazing coals in the charcoal baskets in the center of the Performer with a handful of cherry wood chips. Opened teh vents wide and let ‘er rip for about 35 minutes.
Wings dusted with Paul Prudhome Blackened rub.
Before-

20161002_150054-01.jpeg

During-

20161002_154213-01.jpeg

After-

20161002_154748-01.jpeg

Live Smoke: Mackerel On The @WeberGrills Kettle at www.northeastbbq.com

7:20AM  Cleaned the mackerel by head and gutting them and then making cuts every 3/4 of an inch down each side of the fish so the marinade will penetrate.

2016-09-27-07-02-52

20160927_070923.jpg20160927_072437.jpg

Next patted them dry with paper towels and placed them in my go-to fish marinade-

soy/ginger/sesame seed/red pepper flakes.

20160927_073151.jpg

I’ll let them sit in the marinade til 9:30 or so.  Check back around 10 for the next update!

9:45 AM

Changed plans and opted for the Kettle as it was such a small cook.  Set up the kettle for the snake method (arrange a fuse of coals around the perimeter so the coals act as a fuse with only so many coals going at once) looking for 225-250 degree grate temps.

Once it hit 200 I shut down the bottom vent to 3/4 closed and left the top vent wide open.

Placed the mackerel on offset of the coals.

20160927_095128-01.jpeg20160927_095133-01.jpeg20160927_095339_hdr-01.jpeg20160927_095345_hdr-01.jpeg20160927_095354-01.jpeg