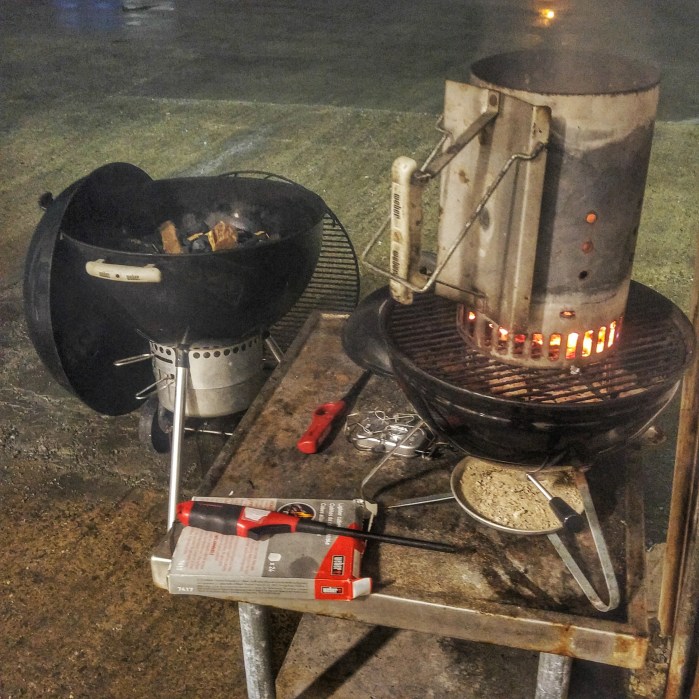
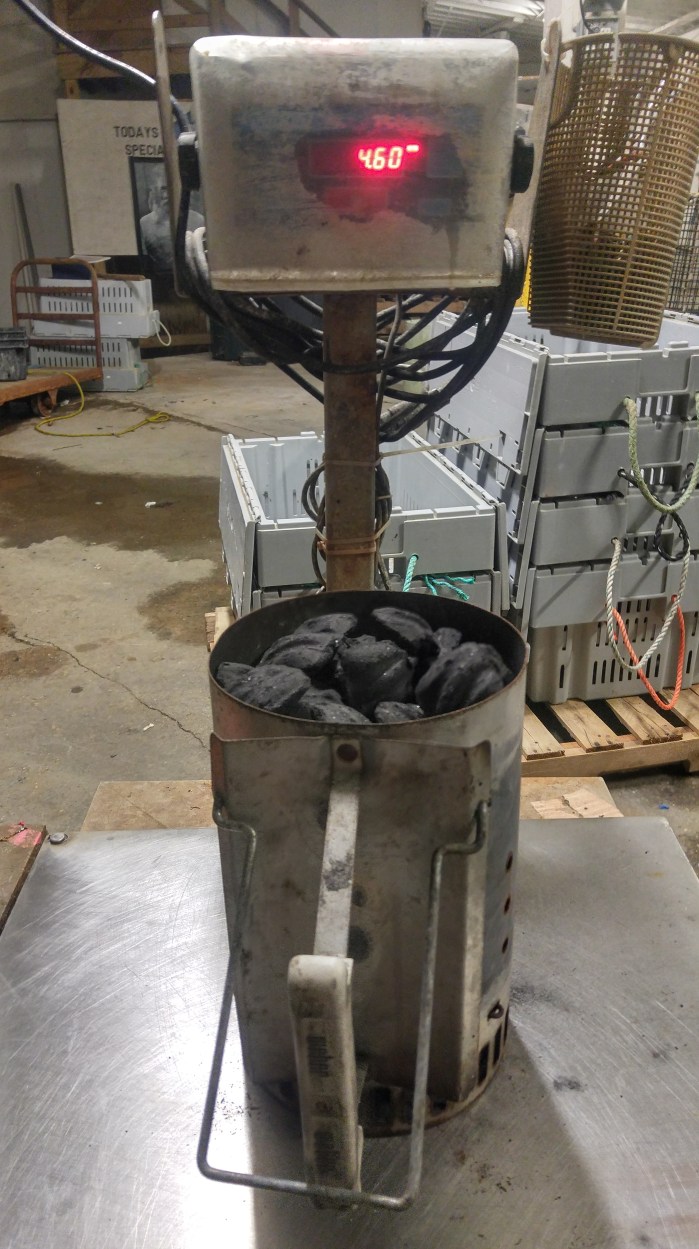
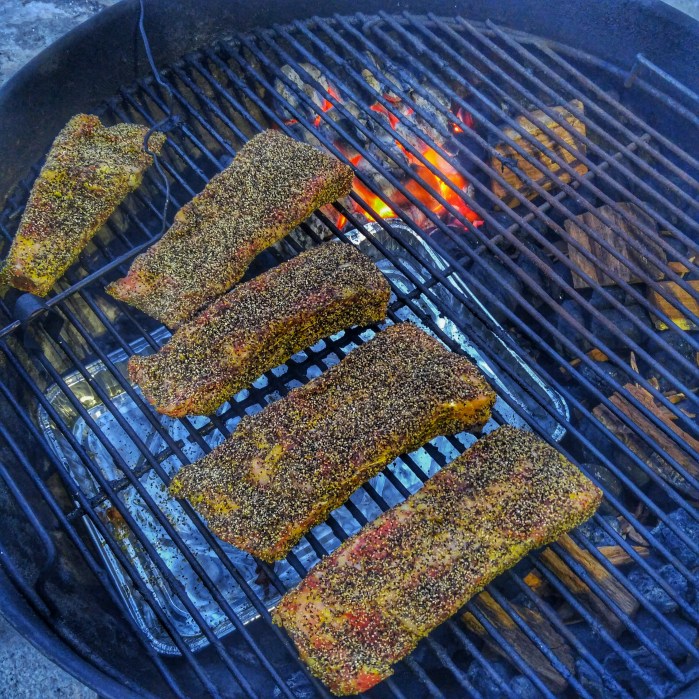
4:40AM Light The Chimney with about 12 Kingsford briquettes and set up the pit for snake method smoking using mesquite chunks and cherry wood chips.
Outside conditions 39 degrees with a light drizzle.
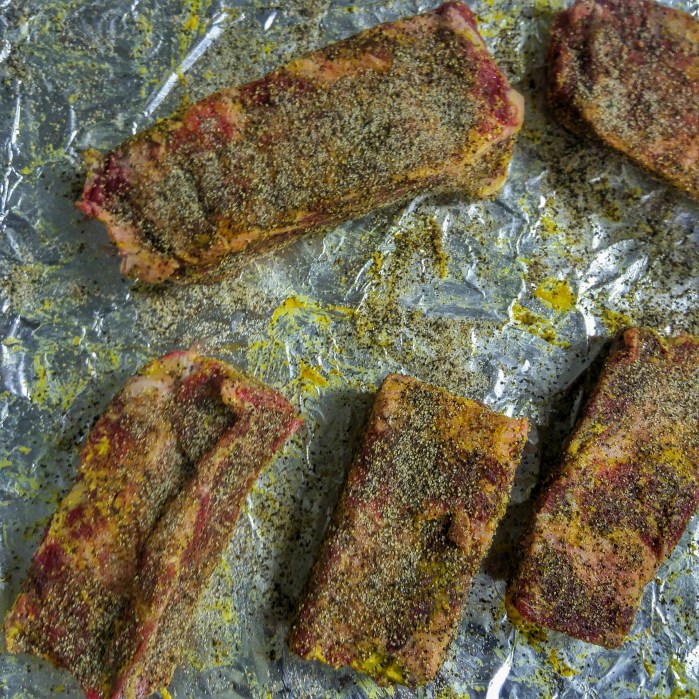
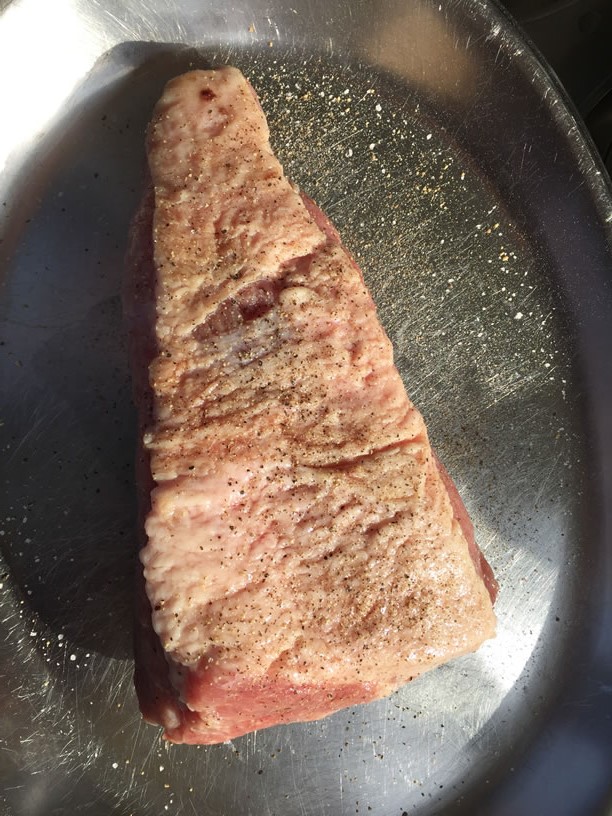
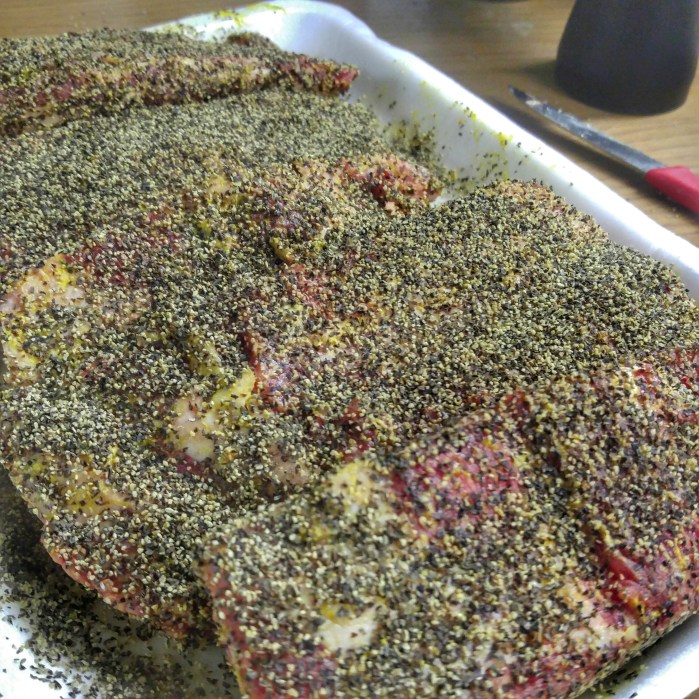
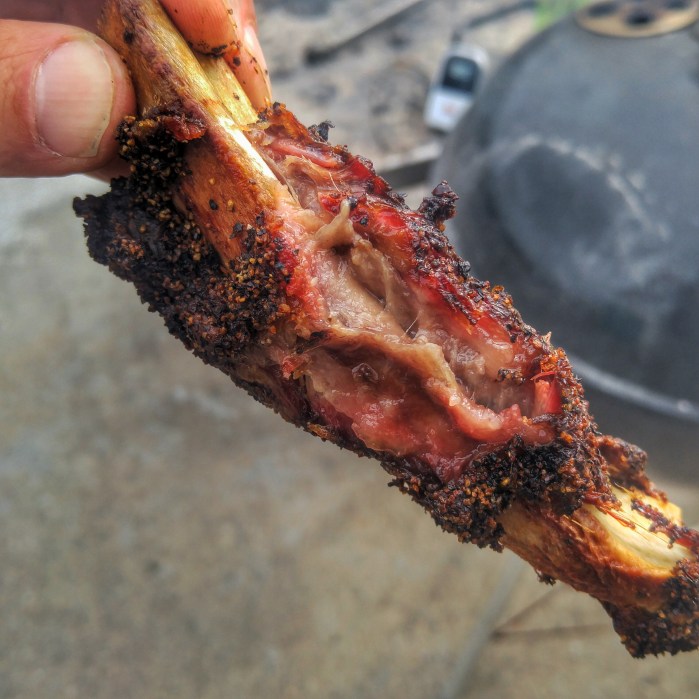
I’m trying a little something different as the beef ribs are so rich and I wanted to cut back on the salt so I put together a beef rub consisting of-
3 tbsp restaurant grind black pepper
1 tbsp onion powder
1 tbsp sugar
2 tsp granulated garlic
2 tsp ancho powder
1 tsp cayenne powder
At the dollar store I picked up this $1 sugar shaker to use to disperse the rub.
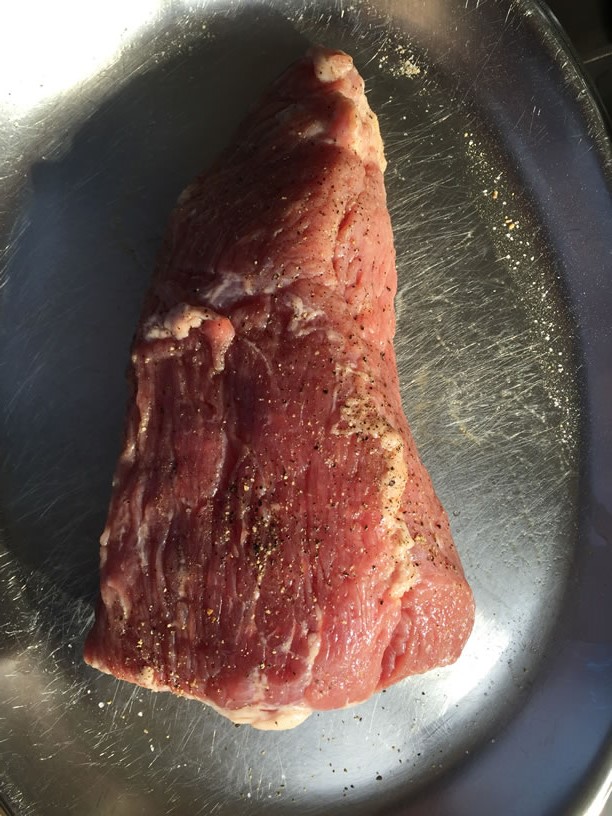
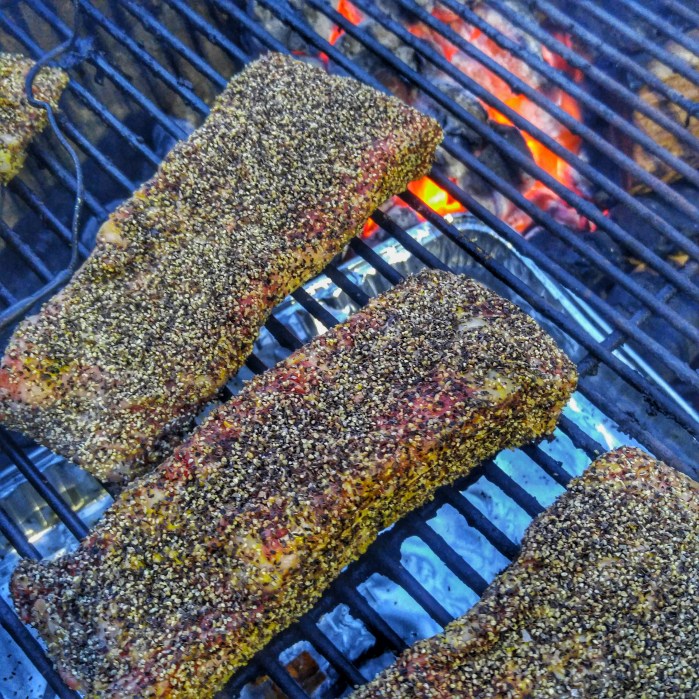
First a light slather of yellow mustard for the rub adhesive and then I applied ground Himalayan salt to the ribs as if I was seasoning a steak ( a lot less salt than the 50/50 pepper salt ratio I was using before). Once the salt was on I shook on the rub using the sugar shaker.
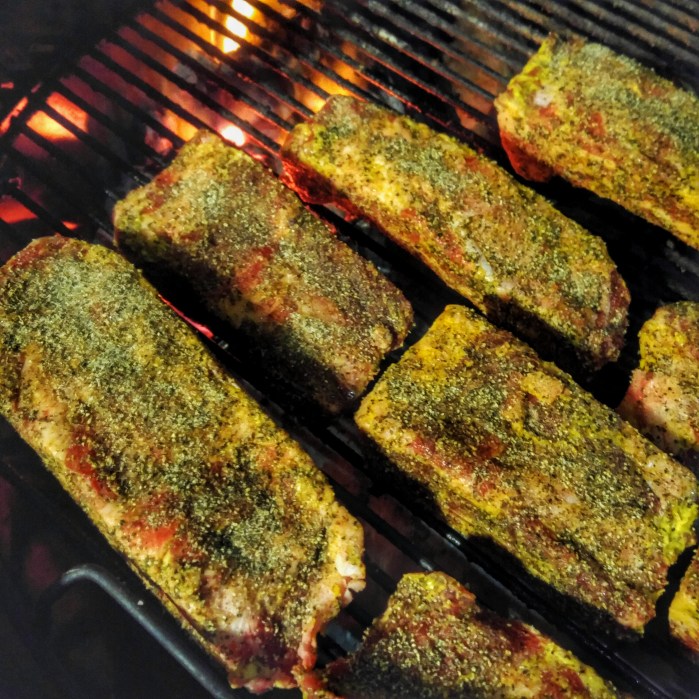
5:20AM Ribs Hit The Kettle-
6:57 Update: Temps have fluctuated from 250- 325. I’m not sweating the temps, they’ll be done when they’re done.
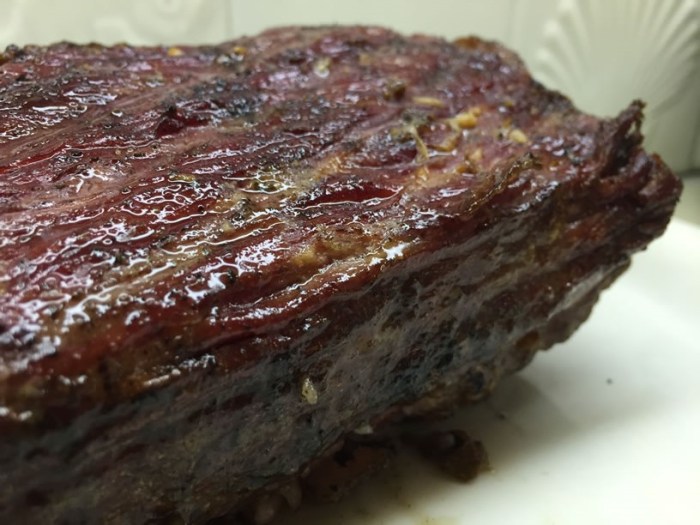
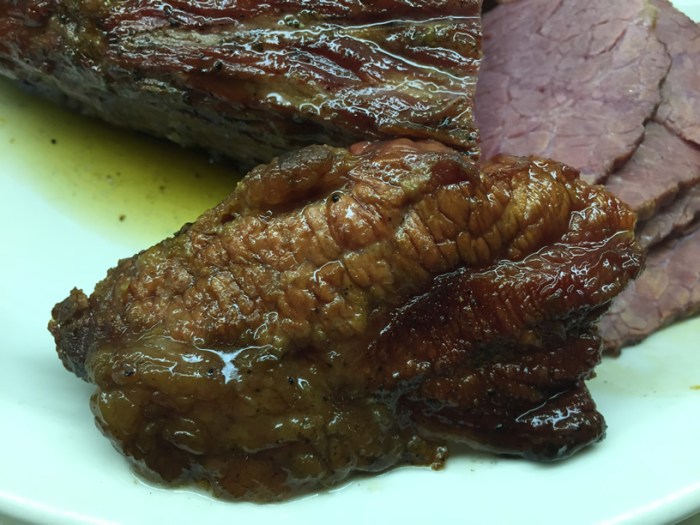
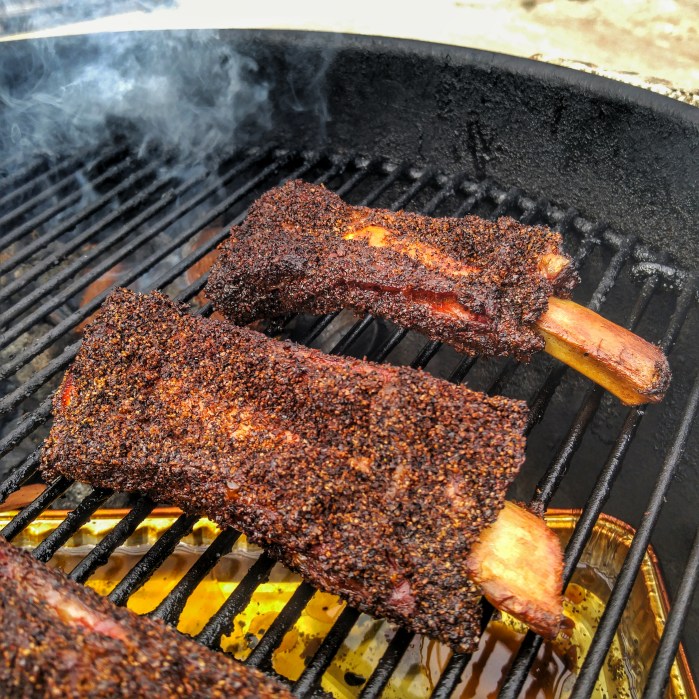
9:40AM. Probably the first time ever that I didn’t lift the lid once start to finish. The temps within the first hour varied from 250-325 but after exactly two adjustments she settled into a much tighter range of 270-289.
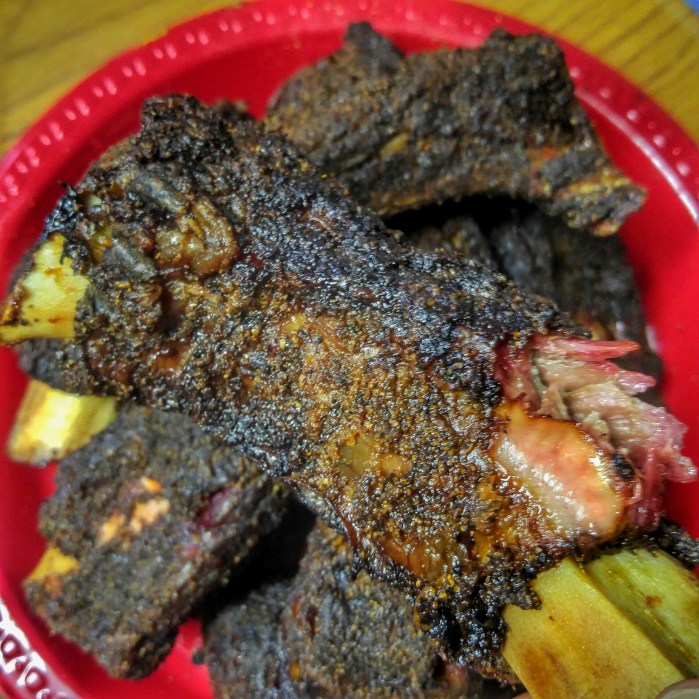
They were fantastic but probably could have benefited for spritzing at 20 minute intervals during the final hour. I also will absolutely use this rub again as they had a much better pepper/salt flavor.
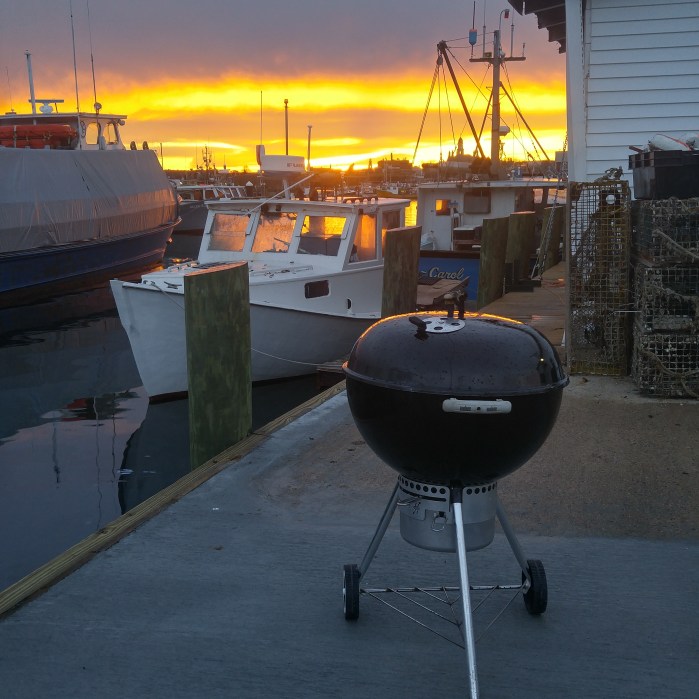
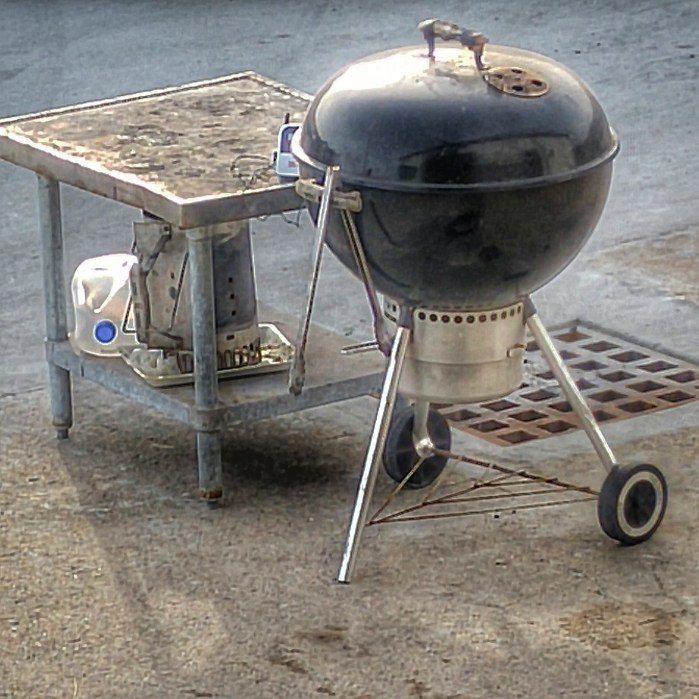
It should be noted that the Weber unit has been used at our lobster dock since last May and the Broil King Unit just arrived.
Firstly, the Broil King cost $26.99 at the time of purchase and here are the details as listed on Amazon-
Heavy duty all stainless steel design
High density resin handle
Lights up to two pounds of charcoal without starter fluid
The venturi effect will light the charcoal within five to ten minutes
The Weber Rapidfire Chimney Starter cost $14.99 and here are teh details as listed on Amazon-
Chimney starter system lights charcoal quickly and evenly
Made from aluminized steel with a stay-cool thermoplastic handle
Holds enough briquettes for a 22-1/2-inch kettle grill
Cone bottom ensures a fast start; eliminates need for lighter fluid
Measures 7-1/2 by 7-1/2 by 12 inches
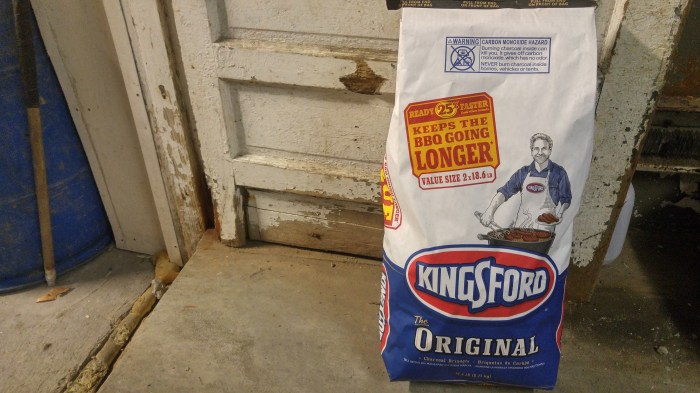
Opening and using a new bag of Kingsford briquettes for uniformity.
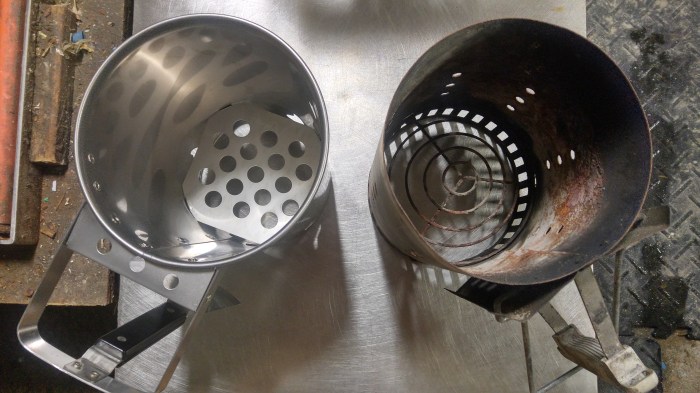
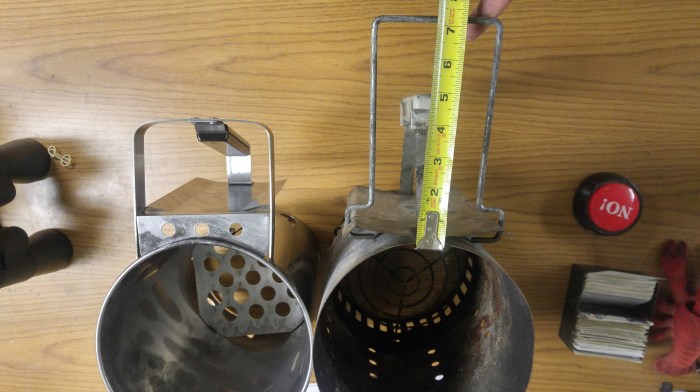
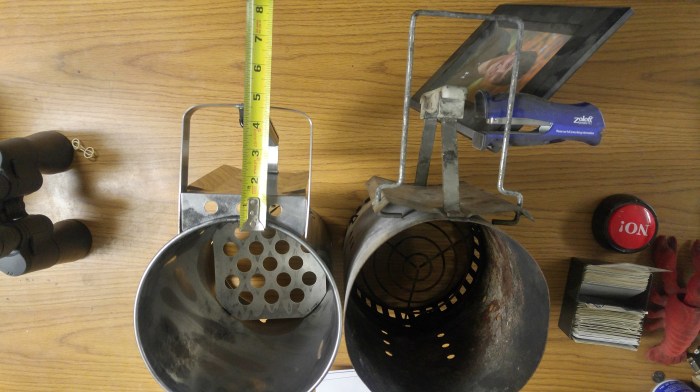
Physical characteristics- The Broil King is shorter, it also has a slight taper to widen just a bit at the top. The Weber seems like it would have more air flow with the wire rings. the Weber also has the hinged handle which when extended will keep your steadying hand further away from the hot coals. They both are well built and sturdy.
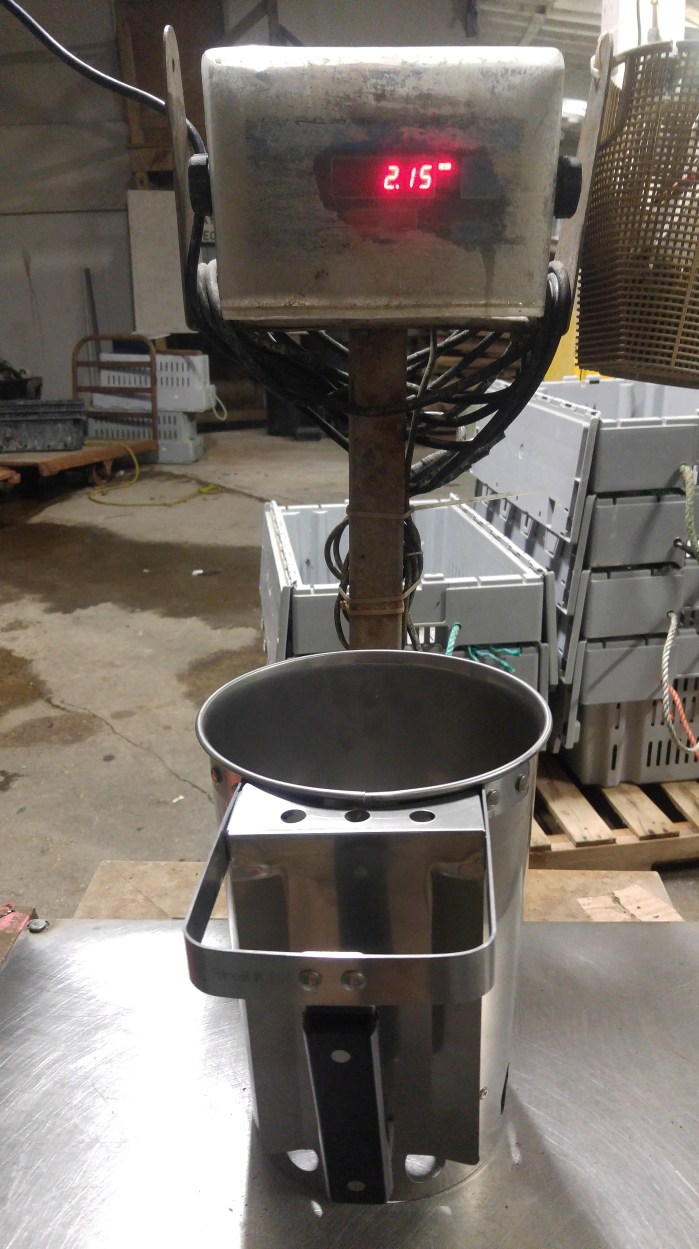
The Broil King weighs significantly less- 2.15 lbs vs 3.5 lbs for The Weber
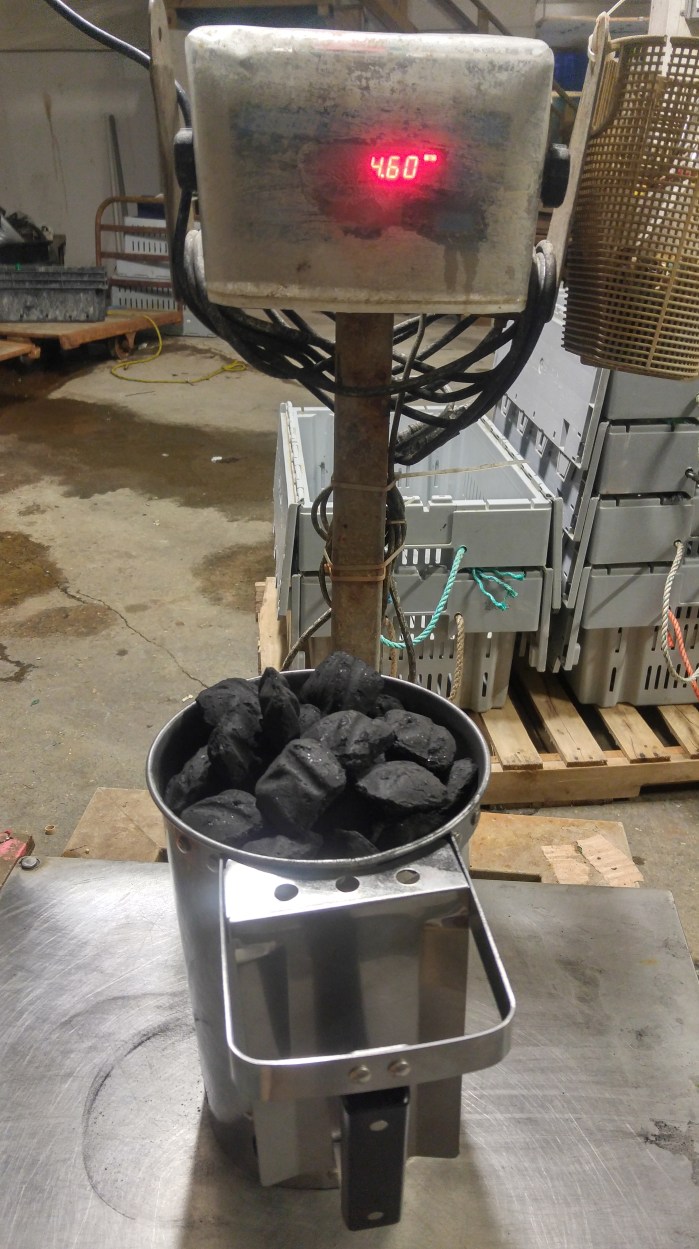
Filling each starter with exactly 4.6 lbs of charcoal the Weber can hold slightly more than the Broil King (not very significantly more but there is a little more space at the top, probably an additional 6 briquettes.
The extended hinged secondary handle on The Weber extends further than the Broil King- 7.25 inches vs 4.5 inches.
Conclusion:
The Weber 7416 Rapidfire Chimney Starter is a little over half the cost of the Broil King 63980 Charcoal Chimney Starter . It is heavier, it holds slightly more charcoal, it has more space for air to flow upward to start the charcoal and it has the secondary hinged handle which help to control the chimney when its full of hot coals.
Some things I like about the Broil King is that it is stainless. I’m not sure if it will hold up better than the Weber over time but at almost twice it’s cost I doubt you would get almost twice as long with it. Maybe you could though. I also like that the holes in the bottom which are shaped like flames are large enough that you could stick the end of a long lighter into completely whereas on the Weber you have to lift the chimney with one hand and light it from underneath.
For the money I’d purchase the Weber as you could almost afford two for the same price as the Broil King and I don’t see enough significant features that would make it worth almost double the price. In fact The Weber is a little heavier and can hold slightly more charcoal.
Update 3/20/16:
Tested The Broil King
Lit two crumpled pieces of newspaper and one Weber Starter Cube in the bottom of the unit at 6:06PM
6:20PM All the briquettes were glowing except for the top row. Ready for the cook.
It was easy enough to handle and the extra handle of the Weber is actually a non-factor one way or another for my use. Pouring the coals into the charcoal basket was easily controlled without the hinged extra handle on the Weber unit. The handle on the Broil King 63980 was cool to the touch and the heat deflector did its job well.
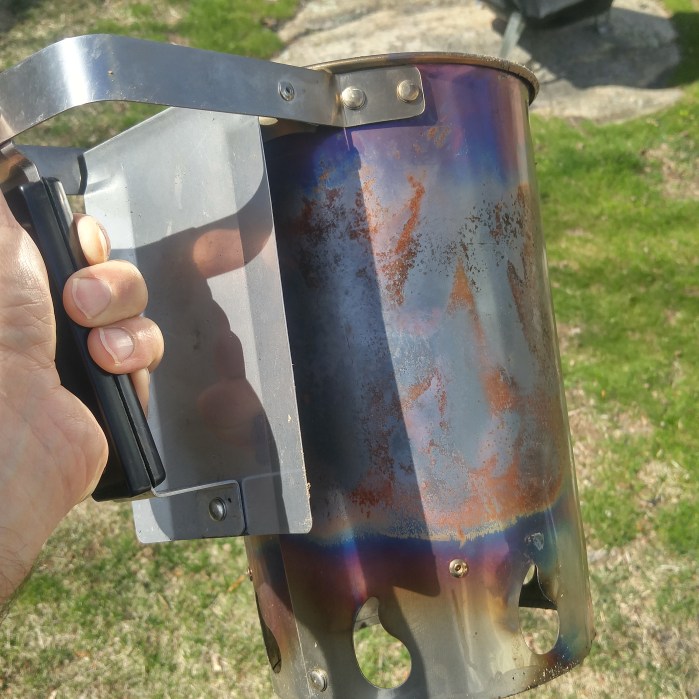
As you can see after the first use it is obviously discolored. This as we know does not effect performance but it’s worth noting that it will not be looking like the stainless out of the package unit that came shipped after it’s initial use.
After having used the Broil King unit I would say it performs well but because of the much higher cost I would buy the Weber 7416 Rapidfire Chimney Starter
4/2/16 Update:
After one week outside the Broil King Chimney that is supposedly made out of stainless steel has significant rust on it. Another problem I’m encountering is that with the slightest breeze it tips over because it is not very heavy and the weight of the handle topples it making it difficult to fill because you need to hold it with one hand while dumping the charcoal with the other arm.
I can’t under any circumstances recommend the Broil King Chimney, In fact I feel like it should be returned for the simple reason of rusting after only a week outdoors.
Between this 2008 Weber One Touch Gold and the Smokey Joe Silver I cooked at least 6 times a week all spring/summer/fall of 2015. They were both long overdue for a thorough cleaning and restoration. The good thing about Weber kettles is that their finish is so durable, even the worst crud build up and nastiest looking grills can be restored with a little elbow grease and a few inexpensive supplies.
Following the guides from The Weber Kettle Club I picked up a cheap razor scraper that came with 10 extra razor blades and some extra fine #0000 steel wool. A small flathead screwdriver helped get bits of gunk out of some tiny tough spots.
She went from the picture on the left to the picture on the right in a couple hours time with the right tools.
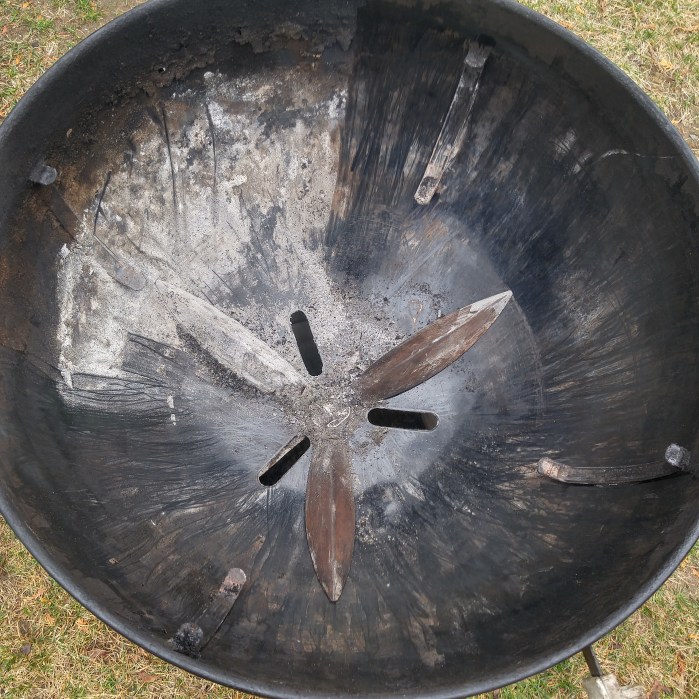
There were several problem spots that needed addressing. One it was dirty from a year of use, with lots of built up crud including spent charcoal ash combined with fat and sauce drippings. The legs of the kettle were cloudy and were just starting to show signs of getting pitted. The vents were covered with smoke residue and pretty gunked up. Lastly one of the wheels was missing a pushnut so every time I moved it outside I’d have to pick up the entire unit and put it down where I was going to cook for fear of a wheel falling off in the middle of a BBQ session.
Before pics-
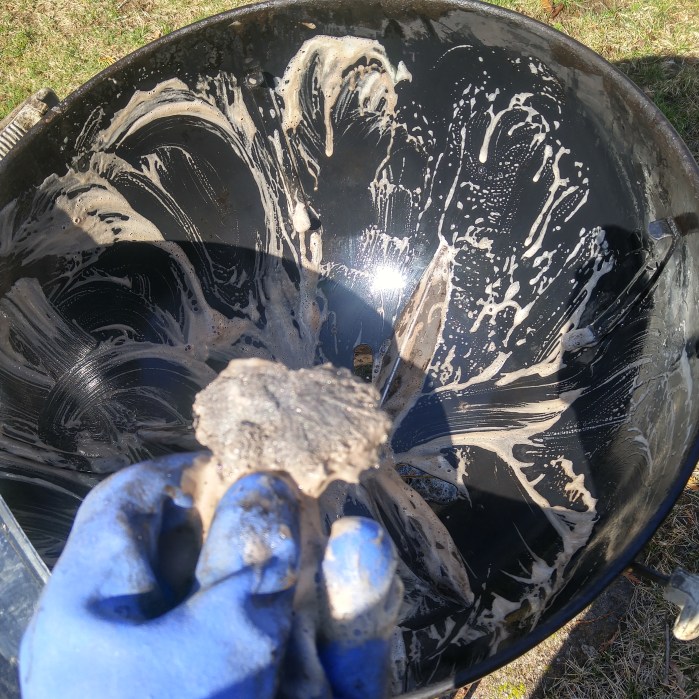
Now to get started. First scraping the entire inside of the bowl with the razor scraper to take off the large hunks of cooked on debris. It helped to change out the razor blade every third section that I had complete. You will be able to tell when it’s time to change the blade when it becomes more difficult to remove the crap. Working the bowl in quarters you’d be amazed at how much you can get down to that beautiful original porcelain finish.
Before-
After razor scraping 3/4
Once you get all the way around the bowl with the razor scraper, drizzle some dish soap like Joy around the bowl and take the steel wool to it. This is where it gets pretty exciting, realizing how sweet it’s gonna come out-
Using some elbow grease and steel wool gets the One touch cleaning system arms polished up nice too-
Do the same thing to the inside of the lid and then work the outside using the same steps.
After scraping half of the lid with the razor scraper and before hitting it with the steel wool-
Next the lid gets the soapy fine steel wool treatment-
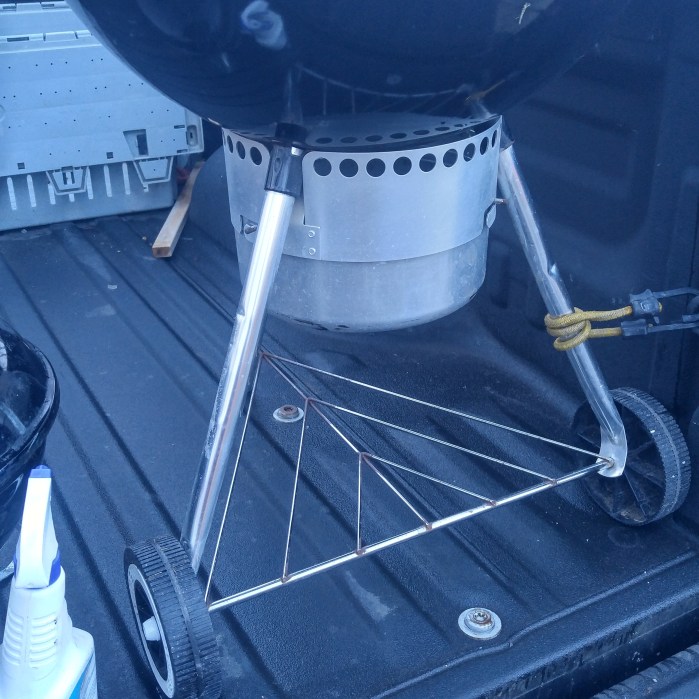
Next up the legs and the triangle. The legs were dull and just starting to show the signs of pitting. For the legs I simply used the soapy fine steel wool and they came out great. The triangle was pretty rusted though (not so conducive to the saltwater atmosphere at our lobster dock). I scraped the wires on the triangle with the razor scraper to remove as much of the heavy rust as possible and then it was just a matter of going over them with the soapy steel wool. This requires a little effort but the results are worth it. I probably spent 20 minutes on the triangle. There is still a little rust in the corners but a huge improvement over what I had to begin with.
Before-
After-
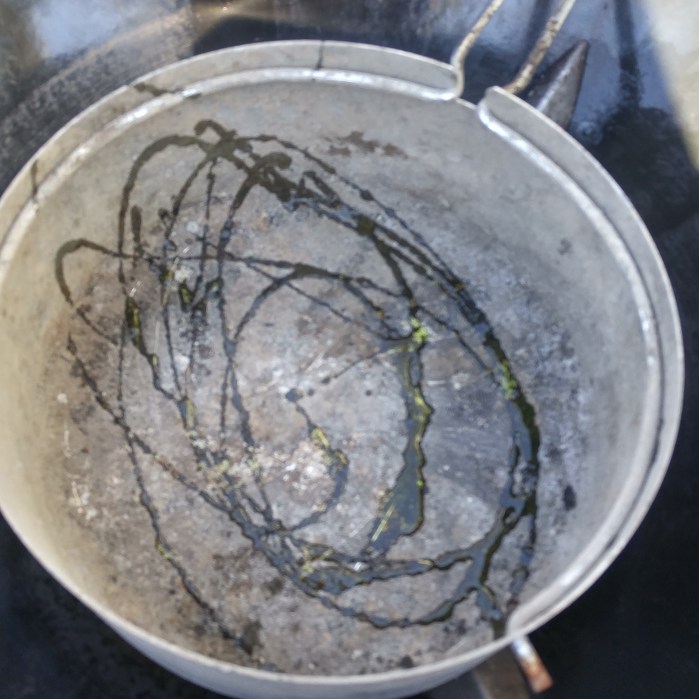
The ash pan had a good amount of solidified ash/gunk so I filled it half way with war water and gave it a good drizzle of dish soap and let it sit for a couple hours.
After a couple hours it loosened everything up and I scraped the inside of the ash catcher with the razor scraper and then hit it with (you guessed it- the soapy steel wool). Then hit the outside of the ash pan with the steel wool.
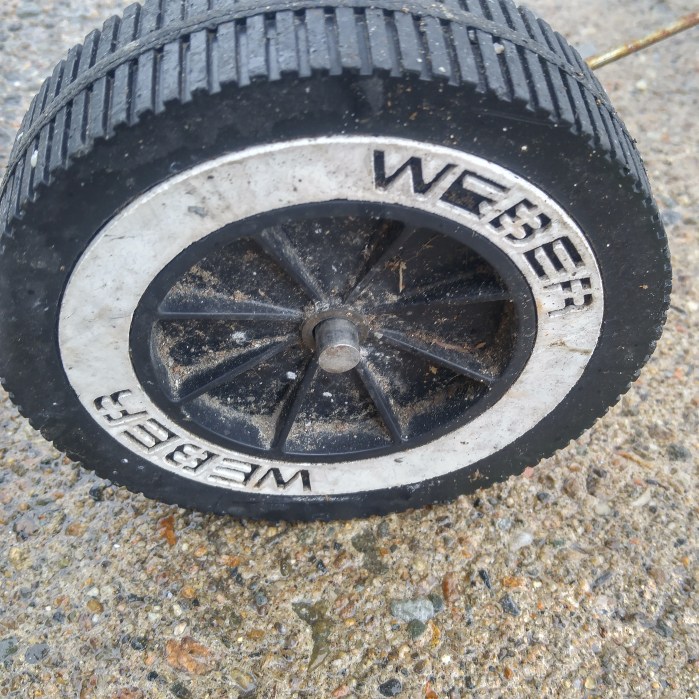
Next put a little soap on the wheels and clean them lightly with the steel wool.
Before the wheel with the missing pushnut-
After-
Cleaned and with new pushnut from True Value
I’ve looked them up online and seen the Weber three packs for sale for around $5 and $4-$5 shipping which seems ridiculous. I had been debating doing the restore and spending any money on it but after such a great season and falling in love with it I figure it’s worth the small investment considering how easy they can get to looking great. It’s strange how attached I’ve become to this grill that was given to me and not in particularly good shape (melted handle, missing hubcap, pitted legs). But after countless cooks and seeing the results other WCK members have doing restores and also considering the salty environment of our lobster dock I planned to see just how pretty I can get my dock grill with a little elbow grease.
Anyway for other “Restore” noobs like me that are searching for a replacement for a missing hubcap, know that white 3/8 Pushnuts are available at Ace hardware and I’m betting at most local hardware stores.
It cost me $1.49 for the replacement pushnut.
Hope it helps someone in the future. They aren’t standard color Weber black but I think they look great anyway.
Next up is a Mastertouch/Performer style top vent. I ordered three of them from www.grillparts.com The part is 63070 Charcoal Grill Lid/Bowl Damper Kit for $9.25 each. It isn’t completely necessary but I really like the way they look. A nice touch was the Weber Grills Koozie they tossed into my package for free. I plan to put one one my Lime Green Smokey Joe and Crimson Original Kettle Premium which are still in the boxes in the basement waiting for late spring. The Lime Green Smokey Joe will get the Lower Vent Knob Mod treatment as well.
Thanks to Weber kettle Club forum member @dwnthehatch for the advice that the entire vent doesn’t need to be replaced, the black plastic vent handle can be pried off carefully and popped onto your existing vent tab.
Lastly the kettle was missing it’s front leg cap. I found them in packs of 4 at our local hardware store. The brand is Shepherd and they cost $1.79 for a pack of either white of black. I opted for the black. They are officially called Plastic Leg Tips and you want the 1 inch version.
So that was it. Again I don’t have to remind you how mechanically challenged I am. If I can do all this stuff, believe me you can too and the results are well worth it!
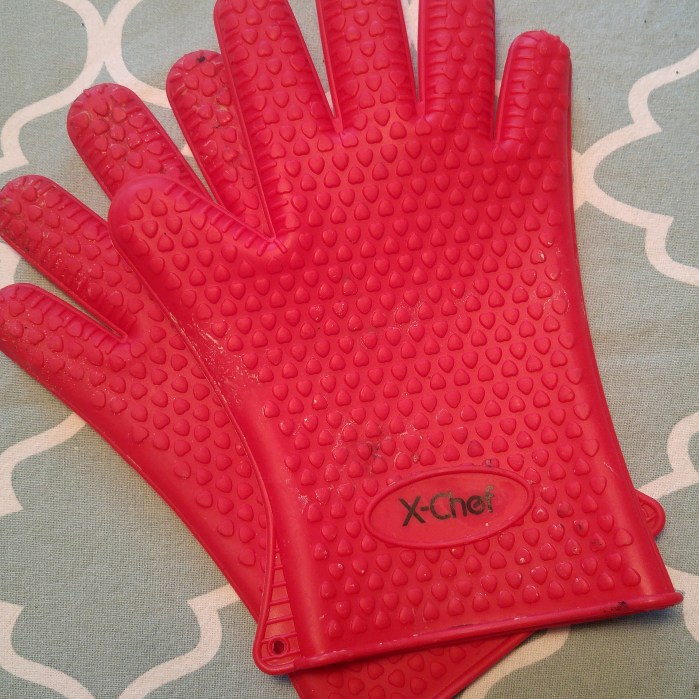
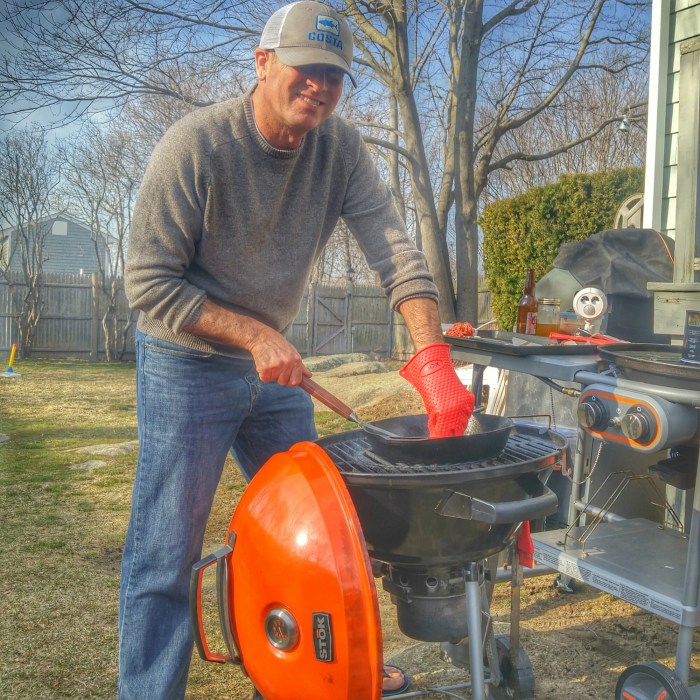
I was looking for a set of grill gloves to handle the Lodge Cast Iron Skillet. When opening up all the vents on the pit and getting that cast iron searing hot, the last thing you want to do is forget that it isn’t a stove top skillet that you can grab the handle. Often times you want to lift the skillet to redistribute the butter or cooking oil in the bottom of the skillet to coat the bottom. Or you may just want to move it off the direct heat and over the section of the grill that doesn’t have the coals under it.
After a little research I came across these X-Chef Silicon mitts for $9.99 There were similar mitts that looked exactly like these priced anywhere from $12.99-$54.00. I decided for $9.99 I’d give them a shot.
Yesterday when cooking the smash burgers with my daughters I needed to press down on the back side of the spatula to flatten the hamburger and get a good sear on the meat. I first placed the loosely formed round mound of hamburger down on the cast iron pan and then put a piece of parchment paper down and then used my hand to press the spatula down to flatten the meat into a patty. After about ten seconds I felt the heat on the tips of my fingers get very hot very quickly. So I slipped the X-Chef silicon gloves on and had no problem whatsoever. I also lifted the large super hot cast iron skillet up no problem without feeling any heat at all.
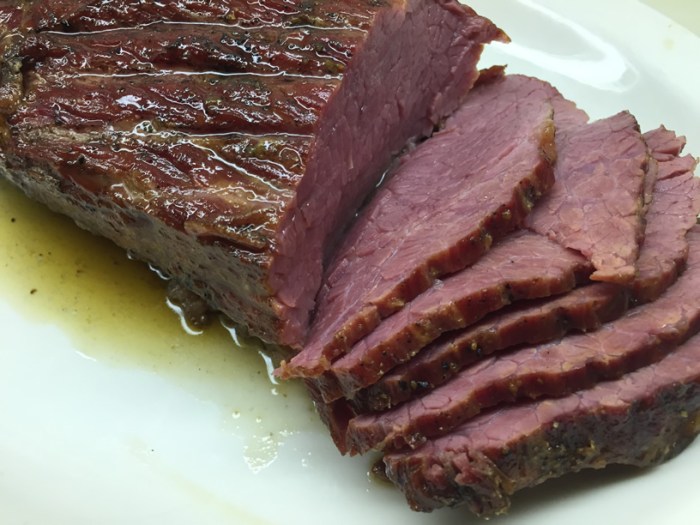
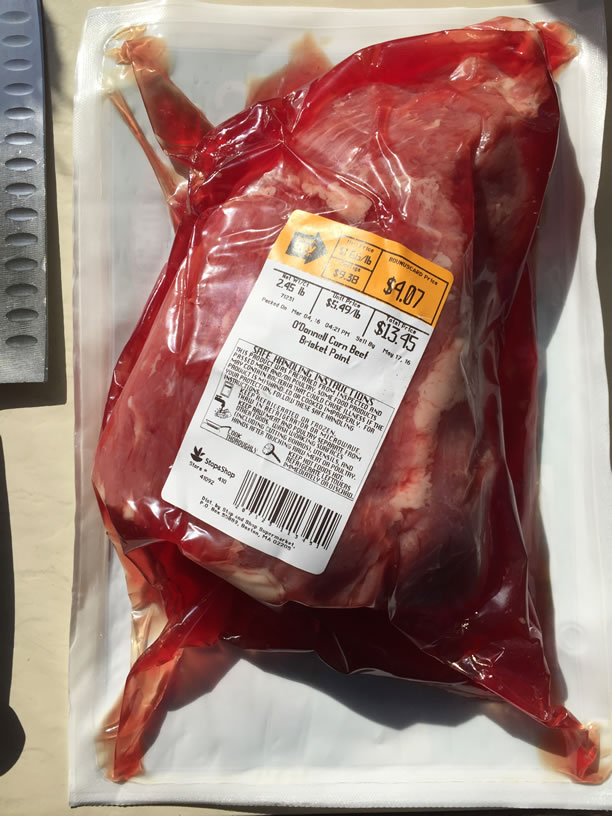
With Saint Patrick’s Day just around the corner, there are some great deals out there on brisket. $1.66/lb at Stop and Shop – point cut. It was packed in a completely saturated brine, and I should have soaked it in plain water to cut the saltiness. I didn’t figure this out until the first taste of the finished product.
Unpack. Rinse. Salt. Pepper. Let sit [covered] until it reaches room temp.
Low and slow is the way to go. Grill dome top temp was 300 – 350°, offset fire, bricks and hardwood charcoal mix, soaked mesquite chips, pan with water. I figure the dome top temp is 75-100° higher than offset area of grill.
Beef is pulled at ~165-170° internal temp.
Bark.
Yep.
Wrapped plastic over foil – try it. Rest for at least an hour.
Luckily I cooked something to eat because we were too hungry to wait out the rest period. Salt, pepper, low and real slow.
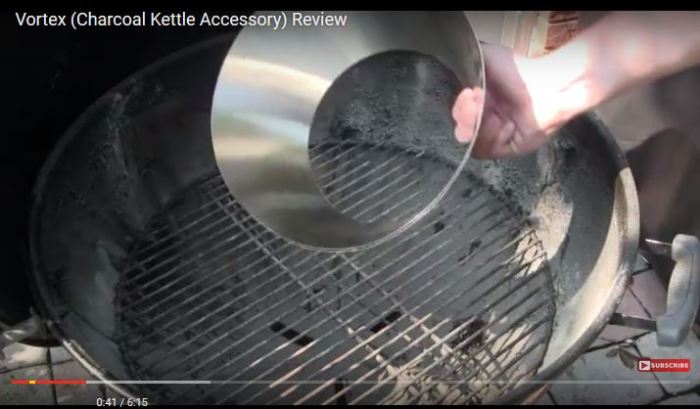
I’ve seen an accessory for kettle BBQ grills called The Vortex. It’s a cone- like structure that funnels the air up through the coals and creates an intense amount of heat for searing steaks. It costs around $40 and people that have purchased them rave about them.
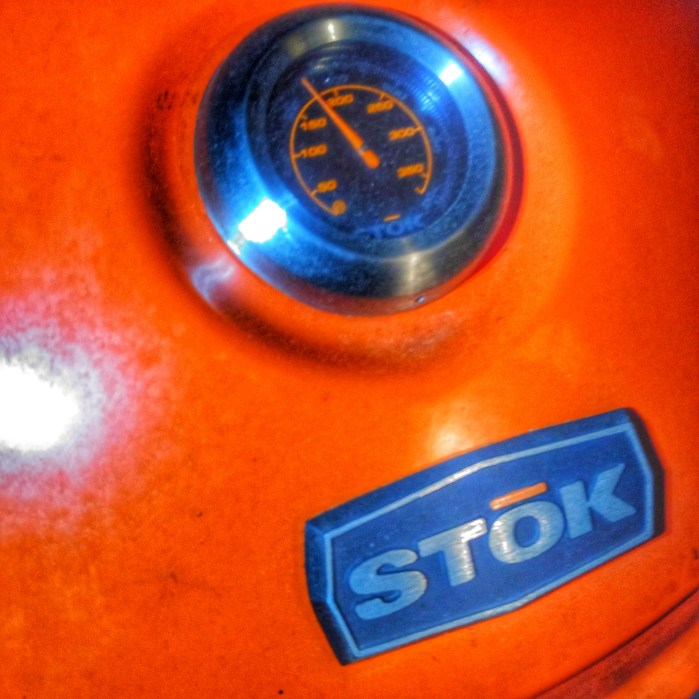
The thing is, the STOK Charcoal Drum comes with an insert that is supposed to be used as a chimney but it’s the same shape as The Vortex.
The video is quite good and gives some great tips on other things you can do with The Vortex (and thereby also with the charcoal basket insert that comes included with the STOK Charcoal Kettle) It should be noted that the Vortex is made from 20 gauge 304 grade stainless steel whereas the charcoal basket that comes free with the STOK Charcoal Drum is made of powder coated steel.
As you can see the two units are nearly identical.
I decided to flip the Charcoal insert that comes with the STOK Drum upside down and see if it would do the same thing as the Vortex.
Here’s how it went-
Flipped the STOK charcoal basket insert upside down, dropped in a crumpled piece of newspaper, lit it and filled it with Charcoal and waited for the temps to climb.
Tossed the ribeye on, three minutes, then flipped for three minutes on the other side. The upside down STOK Charcoal Basket created an intense amount of directed volcano-like heat, perfect for searing.
After three minutes on each side directly over the coals, put them on the outside of where the coals were and placed the cover on.
The results were perfect.
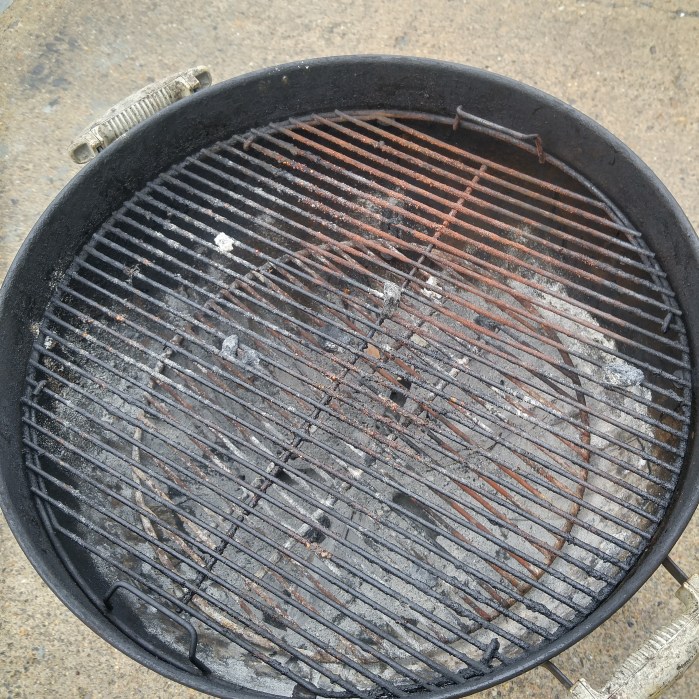
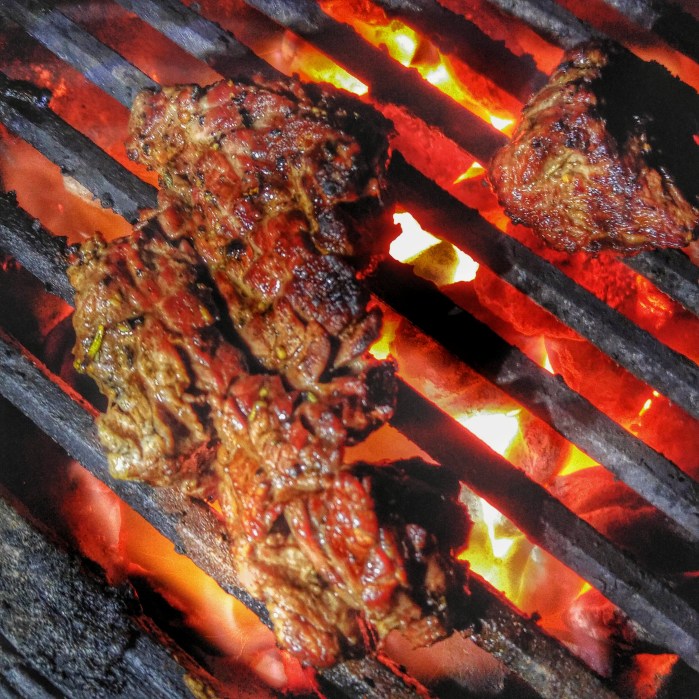
5:30AM Set up the kettle with a aluminum pan filled with water and briquettes set up snake style around the bowl for a low and slow sesh. Lit 12 briquettes inn the chimney and dumped them on the left end of the trail of briquettes which we’re looking to gradually catch and provide steady even heat between 275-300 degrees. using cherry chips and mesquite chunks.
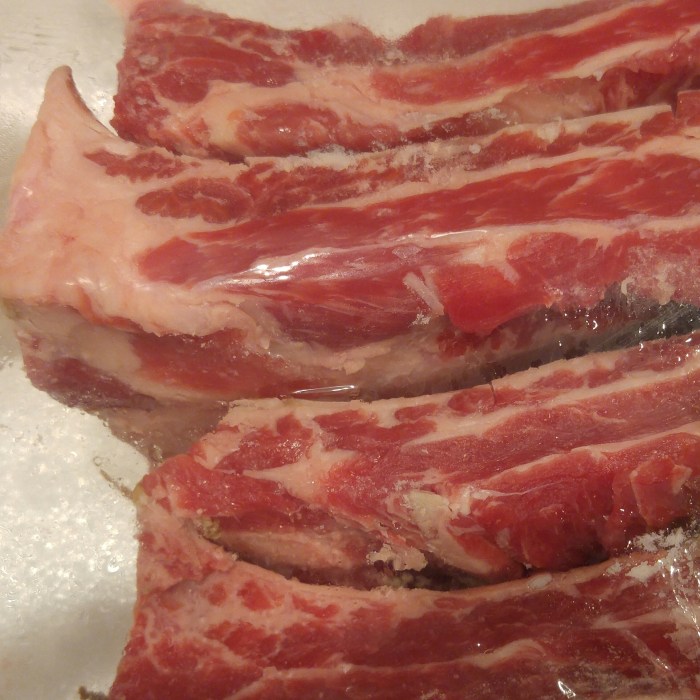
I’m not sure if it’s just our local Stop and Shop market that pre-cuts the racks of beef ribs or if it’s done elsewhere as well. I buy what’s on sale usually and they had 2.4 lbs on sale for $2.24 per lb so I couldn’t pass them up (you can’t see the sale tag in the first picture).
Slathered them up lightly with yellow mustard and applied a generous coating of coarse salt and black pepper (Texas Style rub).
The pit set up and getting up to temp. Water in the pan to keep a moist smoking environment-
8:39AM Cranking along Grate temp 284 degrees. Only adjusted the vents once since 6:24AM Got a ways to go. Haven’t opened the lid once. “If you’re looking-you ain’t cookin.”
9:54AM 3.5 hours in-
11:45AM- They’re all jiggly and the probe slides right in so it’s time to take ’em off-
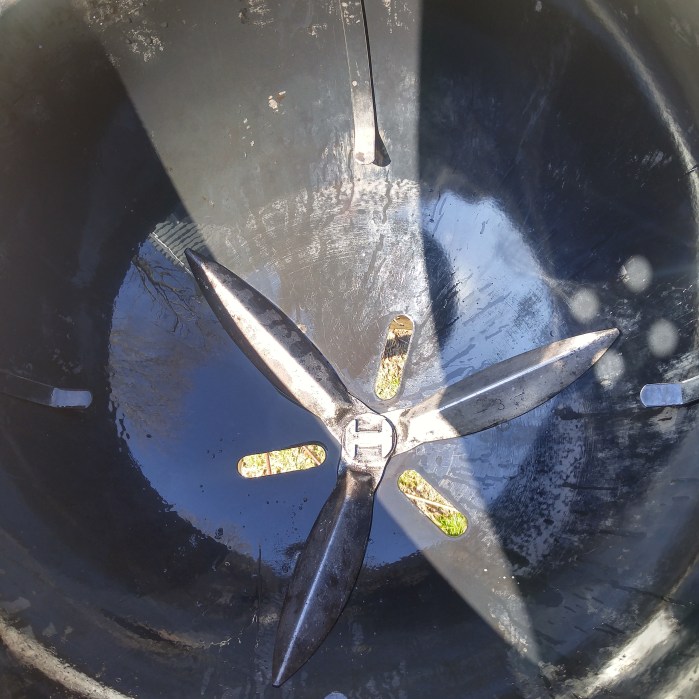
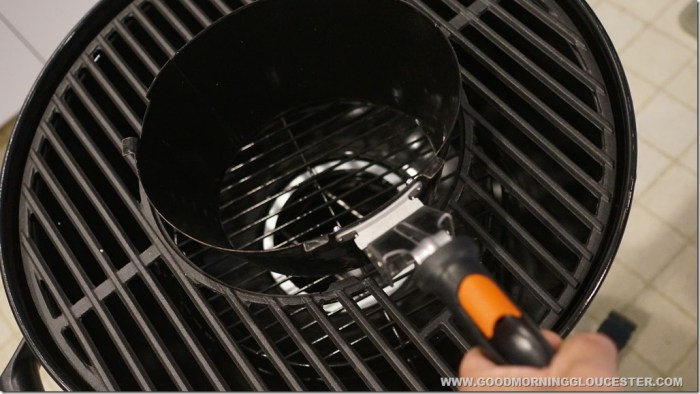
Fire up the pit and leave the charcoal insert in to create a vortex like heat concentrated right under our meat. BBQing with high heat vents wide open and direct.
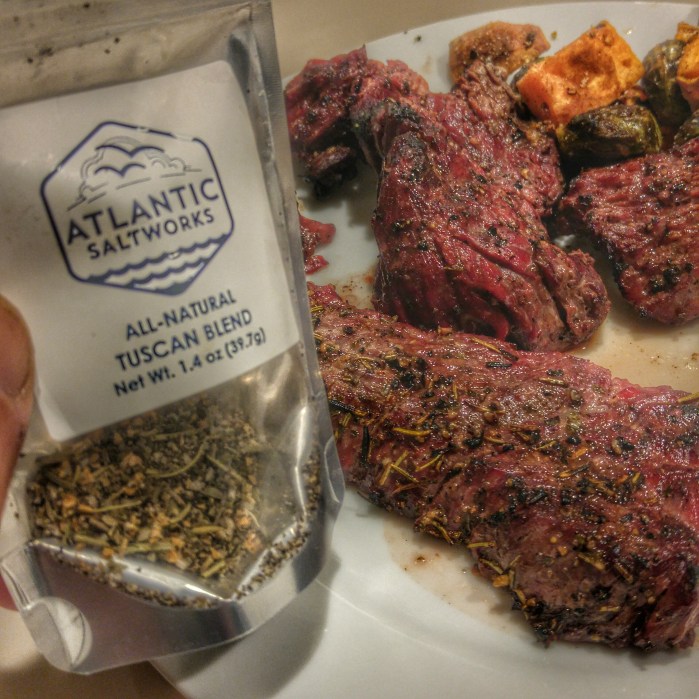
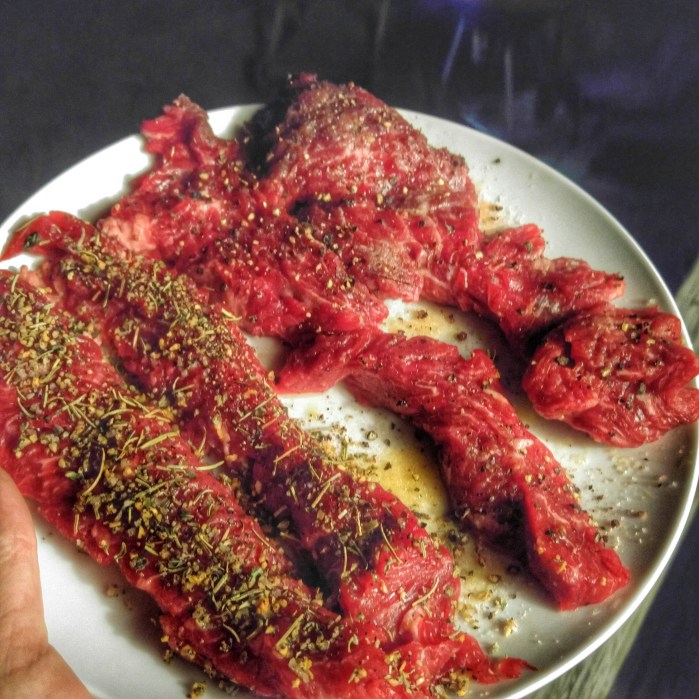
Took steak tips out 45 minutes in advance to bring to room temp and rubbed with evoo and then a liberal seasoning on all sides of Atlantic Saltworks Tuscan Blend.
Once the coals are orange fired up hot we place the steak directly over the coals on the STOK Charcoal Drum’s Cast Iron Grates.
Can we ali about the sear produced by the STOK concentrating the heat up through the Vortex like charcoal basket and the cast iron grates? Incredible!
Larry from http://www.thewolfepit.com has my favorite bbq video series check out his site at the link above for this recipe.
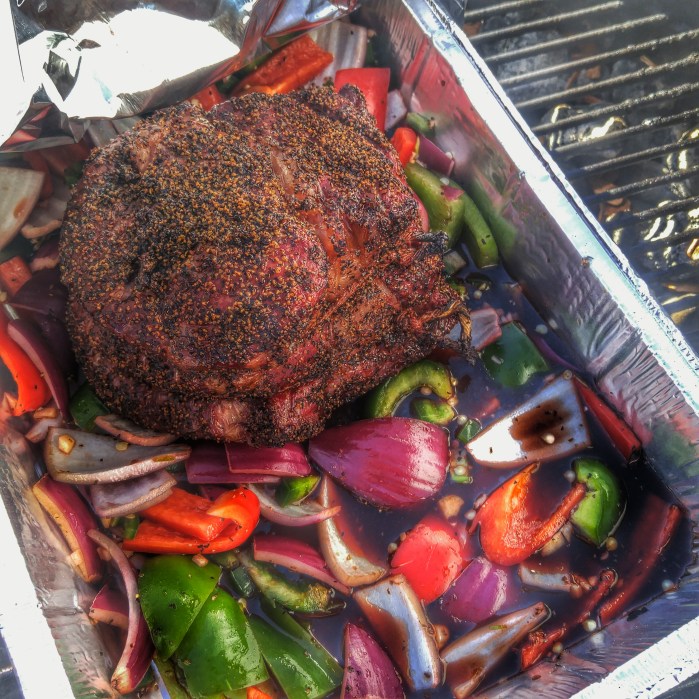
Set up the Kettle for the snake method using briquettes, cherry chips and mesquite chunks.
Got a third of a chimney going and dumped the asked over coals onto the left end of the briquette “fuse” looking to keep temps around 250 degrees for smoking the beef.
Applied Worcestershire sauce to the chuck roast and then coated with coarse salt and black pepper.
Once the pit hit 250 degrees tossed the beef on and inserted the probe.
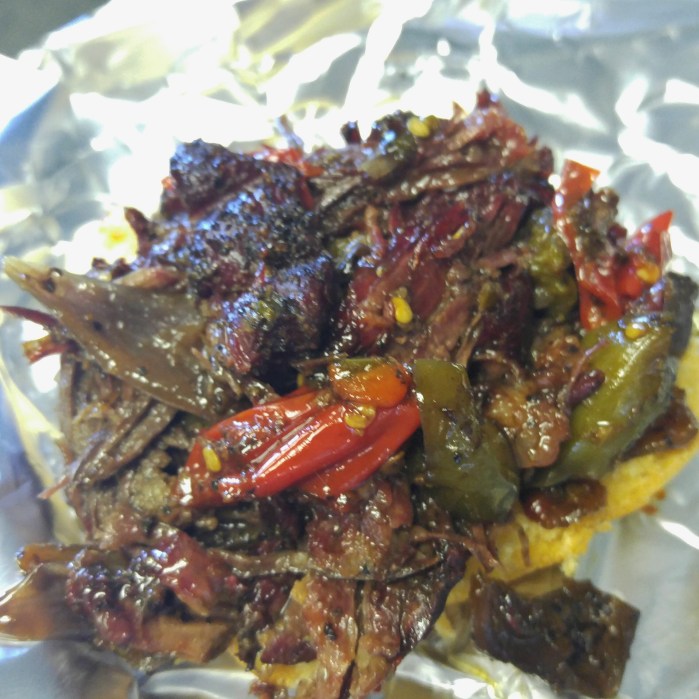
Closed the lid and started chopping the veggies. Chopped half a green pepper, a whole red pepper, two jalapeño peppers with the seeds, three Cloves of garlic minced and a half of a red onion in
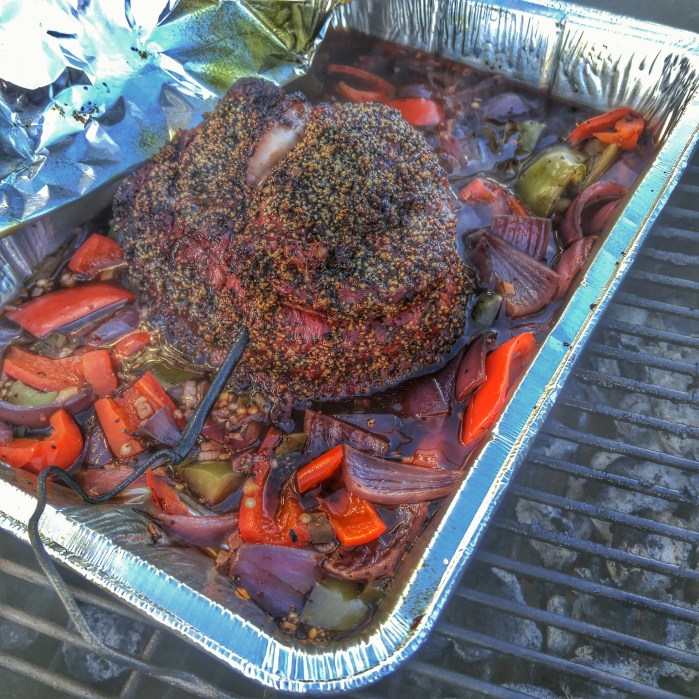
Once the beef hits 165 internal we pull it off the pit and add a half a bottle of cherry root beer and a couple of tablespoons of Worcestershire sauce to the pan with the veggies, plop the beef roast on top and seal it up in foil. Opened the bottom vent on the kettle and will let it braise til it falls apart.
After a couple of hours it hit 200 degrees internally but wasn’t pull-apart-effortlessly tender. So I covered it up until I could break it up easily.
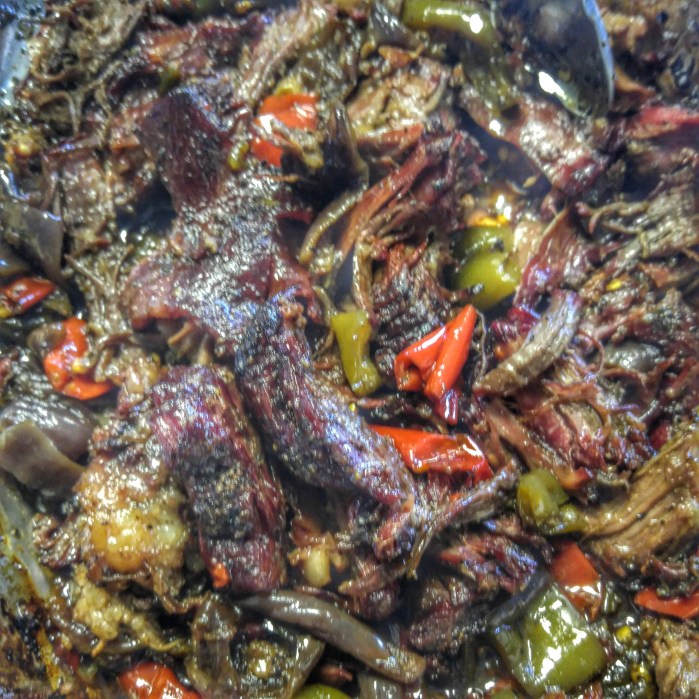
Once it broke apart easily it was shredded like you would shred pulled pork. Then left for about twenty minutes more uncovered to reduce the liquids even more.
When done, piled on top of onion rolls with a slice of pepper jack cheese and some chipotle mayo.
Delicious. The guys at the dock all raving about it. Serious heat. if the people you are cooking for won’t enjoy the heat, cut back on the jalapeno pepper.