@WeberGrills EI Code Restoration Update 7/2/16

The ash catcher assembly had a bit of a droop in the back so one of my fishermen had some shark fishing stainless steel 175lb leader wire so we snugged it up tight.

20160701_131006_hdr-01.jpeg20160701_130749_hdr-01.jpeg

I may invest in a dremel tool with a buffer attachment and hit the ash catcher with some polish. Anyone have a recommendation for a certain type brand? Sears had some sets for sale.

She’s pretty secure now.

@WeberGrills EI Code Performer Restoration Project Update 7/1/16

What a nice surprise when I got to the dock this morning.
4:30AM and Joey Ciolino dropped off the frame,  put together.

He used brackets and I think these are called sheet metal screws to firm it up and then he spray painted over them with black.  I had to really look to even notice because it blended in.  To A Weber Grillfella it would be obvious if you were focusing your attention at the base of the grill but I don’t think 99% of the population would think it was anything but standard.  Its really solid with the threaded rod and the brackets.

20160701_061827_hdr-01.jpeg

Next to get cleaning, a combination of scotchbrite pads, steel wool, water, dishwashing detergent and elbow grease.
Lots of surface dirt and stains.  Most came out.

Before-
20160701_062108_hdr-01.jpeg
20160620_142819_hdr.jpg20160620_142701_hdr.jpg

I think I’ll pick up a bristled brush to scrub the grey plastic handles.  The little grooves are tough to get into to clean.

After-

20160701_072128_hdr-01.jpeg20160701_072305_hdr-01.jpeg

20160701_072008_hdr-01.jpeg

@WeberGrills Green EI Code Performer Restore Update 6/26

20160620_142819_hdr.jpg

Setting up to be able to work upright

2016-06-26 04.56.29

The plan-

wp-1466965121620.jpg

First need to remove the rusted off bolts that secured the Performer’s horizontal cross brace square tubes.  Sprayed them with WD-40, put a vice grip on the rusted bolt and another on the nut and with a little pressure they snapped right off, all four of them.

2016-06-26 04.56.39

A photo to remember exactly where the Gas assist tank holder goes before I disassemble it.

2016-06-26 04.58.37

For anyone that wold rather replace the bolts with more original starnuts and a bolt, the one that came on the Performer originally is 2 inches.

2016-06-26 04.59.00

As I decided to run a threaded rod all the way through the square cross-brace tube and the holes where the bolts I removed was located and then cap the rod off with an acorn nut.  Here was the hardware from Ace Hometown Hardware store, Gloucester MA.

4 acorn nuts, 8 nuts to secure the washers inside the square tube and 4 washers which were the diameter of the inside of the tube to hold it in place.

2016-06-26 05.18.102016-06-26 05.18.372016-06-26 05.22.19

So I get to the last nut, 8th out of 8, 7 went on flawlessly and were all adjusted to right where I wanted them on the threaded rod.  Wouldn’t you know that last nut wouldn’t go on.  So I put the vice grips to it and it wasn’t til I got about an inch on that I realized that I stripped the thread and there would be no way the acorn nut would screw on.  So back to the hardware store for a new rod and a three extra nuts (for insurance).  the rod was only $2.39 at the Building Center Gloucester MA. I needed two nuts to finish securing the bottom of the frame.  I could only get two of them on and I wasn’t about to strip another rod so I’ll have to wait til i get out of work to get a nut that fits.  The nuts must be mixed with different threads.  Driving me nuts.

2016-06-26 11.35.15

So here it is, installed.  I used one of the original washers from the Performer just before the acorn nut.  On the other side I had to cut off about an inch from the rod but now the frame is much more stable.  Hopefully I get out of work in time to grab another nut to finish off this part of the project.   Next up having my buddy Joe Ciolino tack weld the top part of the frame to the vertical supports on the bottom of the frame.

2016-06-26 12.42.332016-06-26 12.58.38

So here she sits, uncleaned but with reattached horizontal cross tubes on the bottom of the frame (minus that one damn nut).

2016-06-26 14.50.19

Here she is- The EI Code Green SS @WeberGrills Performer With Gas Assist

Everything works, I’m pretty sure all I need to do is tack the legs to the frame and it’s missing one of the casters. The bowl is in great shape. The charcoal bin is in great shape, the ash sweeps work well.

image

image

image

image

image

image

image

image

image

Live Smoke: Boneless Petite Sirloin Roast On The @WeberGrills Kettle

20160606_091450_hdr-01.jpeg

Rubbed Down With EVOO, Coarse Salt, Restaurant Grind Black Pepper and Montreal Seasoning.

20160606_091635_hdr-01.jpeg20160606_092140_hdr-01.jpeg

Set Up The Kettle Using The Snake Method with Briquettes, Mesquite Chunks and Cherry Chips.

20160606_093821_hdr-01.jpeg

Loin Hits The Kettle At 9:57AM.  Monitoring the Temps With the Maverick 732 Remote Temperature Probe.  Looking For 120 degrees internal before we pull it off.

20160606_095701_hdr-01.jpeg

Pit temps wanted to settle in at 275 or so.  At 11:10PM internal temps were 122.  Pulled it.
image

image

After letting it rest for a half hour we carved into it slicing it thinly for sandwiches on onion rolls with Boar’s Head Chipotle Horseradish Sauce


Chicken Thigh Experiment and Sauce Review: @sbrbbq Sweet Chili Wing Sauce

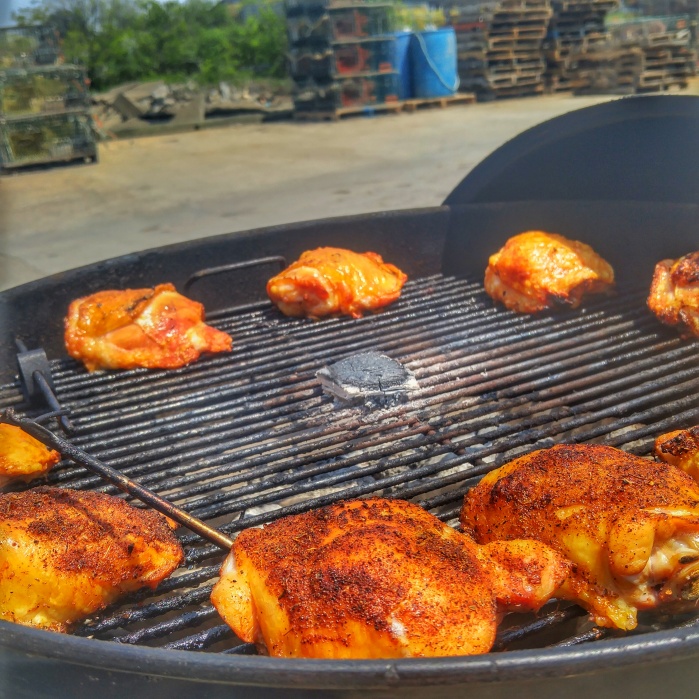
I set up the @WeberGrills kettle with the two charcoal baskets placed directly in the center of the bowl and loaded it up with 2/3 a chimney of red hot charcoal.

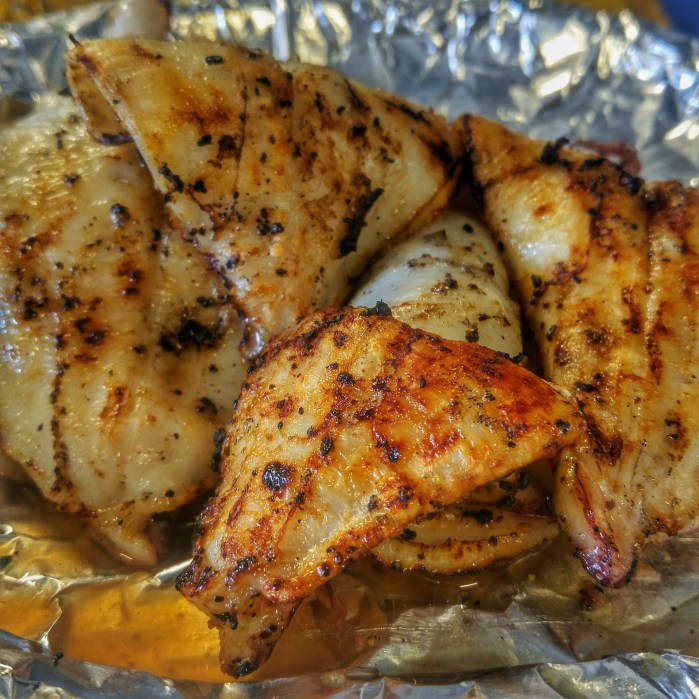
For the preparation of the chicken thighs I patted them down with a paper towel to remove any moisture or water (this helps to crisp the skin) . Then lightly brushed them with evoo.

After coating with the evoo six of the thighs got  Paul Prudhomme dry rub and four got a sprinkling of coarse salt.

The exercise was to figure out how to get the best juicy inside/crispy skin chicken.

The chicken was arranged in the outside perimeter of the bowl indirect of the charcoal baskets which were placed in the middle.  One chunk of mesquite wood was placed in the center over the coals for smoke.  Top and bottom vents left wide open throughout the cook.

20160527_114354_hdr-01.jpeg

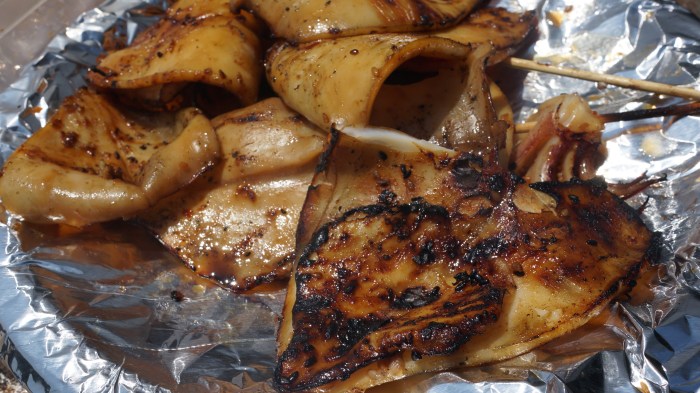
I used the Maverick 732 to monitor internal temps and once they hit 165 degrees I mopped 4 of the Prudhomme rubbed thighs and 4 of the salt rubbed with Sweet Baby Rays Sweet Chili Wing Sauce and Glaze. Two of the Prudhomme rubbed thighs were left unmpopped throughout the cook.

20160527_122228_hdr-01.jpeg20160527_122234_hdr-01.jpeg20160527_122638_hdr-01.jpeg

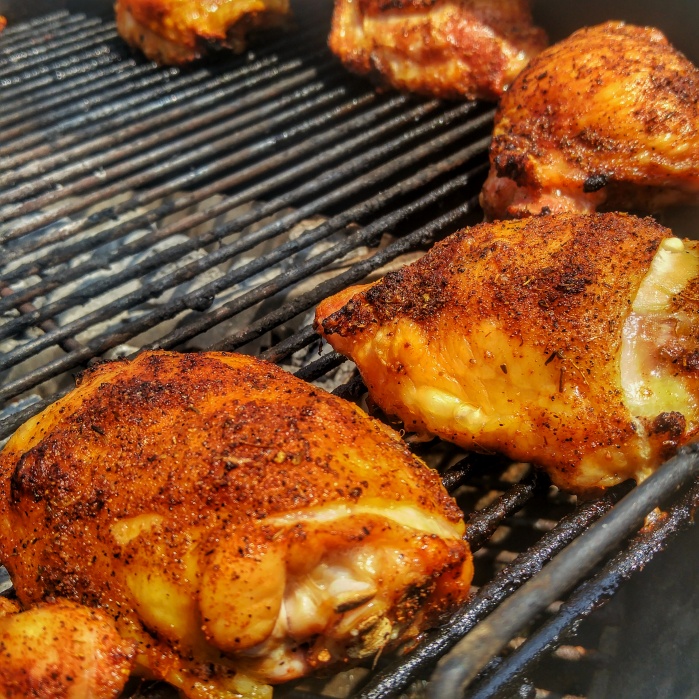
After mopping the wings, the cover was placed back on and left on for about five minutes to set the glaze.  Internal temp 175 and pull the chicken off.
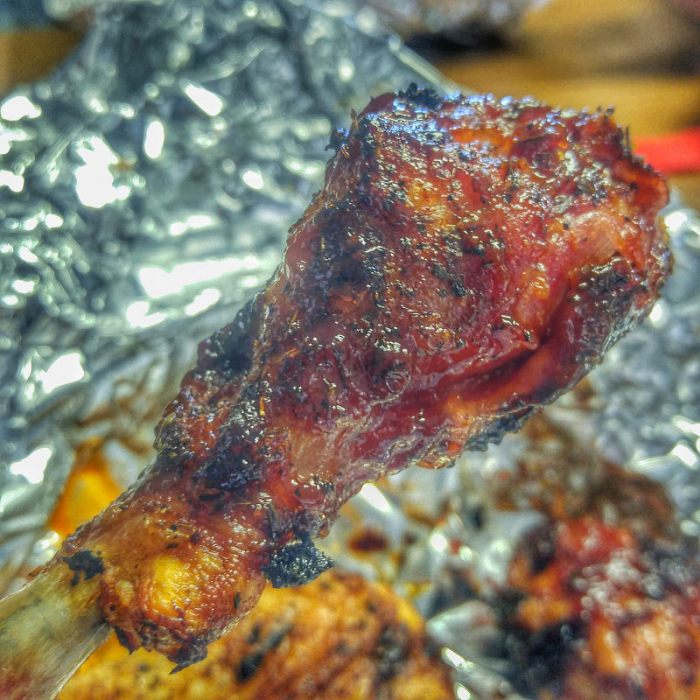
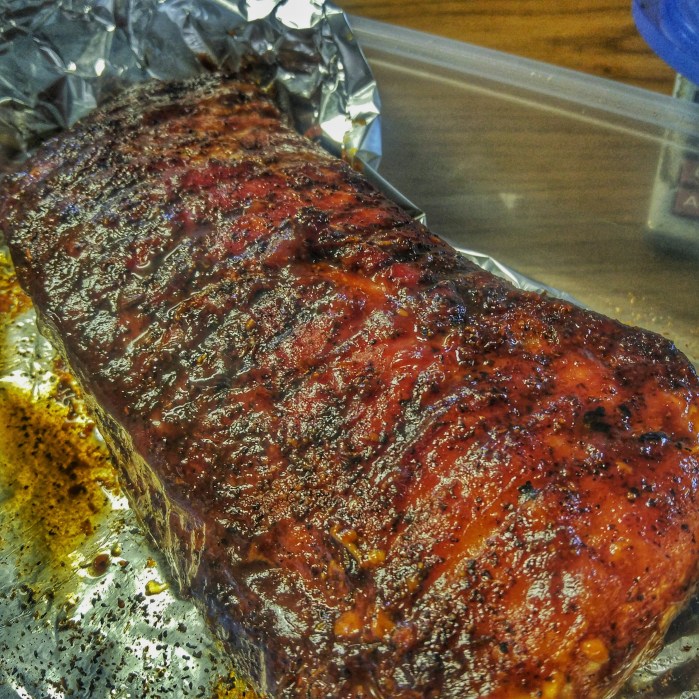
20160527_122938_hdr-01.jpeg

The results-

20160527_123030_hdr-01.jpeg20160527_123037_hdr-01.jpeg

So the findings on the Sweet Baby Rays are a ten out of ten.  The flavors are perfect.  So damn good.

As for the results with mopping during the cook-

They were very very good but the ones that were left unmopped were  more crispy skinned when eating.

So for the future I will prepare them this way:

Pat dry>light coat of EVOO>rub with Prudhomme Rub>cook indirectly with charcoal placed in center charcoal baskets and chicken outside perimeter>pull the chicken at 175 degrees internal temp>serve with sauce on the side.

Oh, and by the way it’s lobsterman “Johnny Action” Approved!

20160527_142147_hdr-01.jpeg


GRILLING CALAMARI ON THE @WEBERGRILLS KETTLE WITH @JOEY_C

Grilling Calamari (Squid) on a Weber Kettle With Two Different Marinades

The calamari grilled with the butter/evoo/minced garlic/salt/pepper marinade was very good.  The calamari grilled with the soy/ginger/sesame/red pepper flakes was absolutely ridiculous and I’m not sure I’ll ever be able to enjoy calamari any other way after this.  It was OUTSTANDING!!!!

Key is to get the grill red hot and then get a little char on the calamari basting them once or twice quickly over high heat while they are on the pit.  A little flare up is not a bad thing as the char will give it great flavor.  Note: “char” not burnt.


DSC07349DSC07351DSC07355DSC07358

Thinly Sliced #Pork Loin Sandwiches Made On The @WeberGrills Kettle

20160523_101411_hdr-01.jpeg

Rubbed The Pork Loin with Paul Prudhomme blackened seasoning and coarse black pepper.  Set up the kettle using the snake method with briquettes, apple chunks and cherry chips.

20160523_102422_hdr-01.jpeg

When she hit 130 internal I basted her with some Sweet Baby Rays BBQ sauce.

20160523_114951_hdr-01.jpeg

145 internal and she got pulled off and rested for 10 minutes before thinly slicing it for sandwiches.

20160523_121610_hdr-01.jpeg20160523_122243_hdr-01.jpeg

Topped with cole slaw and Franks hot sauce.  So tender, juicy and flavorful!

20160523_123103_hdr-01.jpeg