They are heavy duty. They are well constructed. They blow the standard weber Charcoal Grates Out of The Water.
Are they necessary? No
Are they an awesome upgrade and tremendous gift for a big time Weber kettle Aficionado? Absolutely
Gorgeous and Beefy.
From the website:
Start your kettle easier and keep it burning longer with the EZ Light Bottom Charcoal Grate! Replace your beat up old version and get this new upgraded and easy to use charcoal grate.
Heavy Duty Stainless Steel Rod Construction – Long lasting and hard wearing. No rusting!
Designed to let your grill breathe right. No more clogs and easier temperature adjustments
Built in fire starter channels. Place your starter cubes in the channels and then cover with charcoal. It couldn’t be easier!
Designed to fit the Weber Kettle as a CHARCOAL GRATE, this is not designed as a cooking surface. This grate is 17 inches in diameter and is the same size as the OEM charcoal grate
Replace that rusted our charcoal grate or baskets and give yourself an upgrade.
List Price: $28.00
Price: $11.49 Free Shipping for Prime Members
You Save: $16.51 (59%)
Alex Zogas, Craig Kimberley and my other die hard Weber Kettle aficionados all swear by them. They’re about twice as thick as anything else and really do well to protect your grill. Read the reviews here
THE CLASSIC ACCESSORIES DIFFERENCE: CA Veranda covers have interior bound seams for strength, high-density stitching for durability, padded handles for comfort, matching webbing for a great look and California Prop 65 compliance for health and safety
Guaranteed to fit kettle grills 26.5″ in diameter x 38″ high
Fits Weber Original Kettle 18″ and 22″, Original Kettle Premium 22″ and 26″, Weber Gold Series 18.5″ and 22.5″ and Silver Series 18.5″ and 22.5″ models
Three-year limited warranty
Gardelle Fabric System features an elegant water-resistant fabric top with a protective waterproof backing and a protective dark splash guard skirt
You’ll be sure to find the right covers to fit your needs with over 140 shapes and styles in the Veranda Collection from Classic Accessories
Elastic hem cord with a toggle allows adjustment for a tight and custom fit
Review:
PhotoGraphics
It is rare in today’s world of cheap offshore products to find something that is made better than expected and still sells for an affordable price. Actually, that is only partially true … even some so-called “luxury” brand products are now being made offshore and are made to the cheapest standards, yet they still sell for a luxury price.
At the Amazon price of under twenty dollars I had low expectations for this grill cover. There were ones selling for much more and others with the famous brand name on them selling for about the same price. I was more interested in short-term protection for my shiny new kettle grill than I was in saving money … after all if it was a piece of junk I could buy another when necessary. I read the reviews of the famous brand and so many reviewers were making statements like “you would be just as well off using a plastic garbage bag”, but the photos and description of this cover from Classic Accessories somehow just looked better than average.
And it is. As soon as I unpacked it from the box I could tell it is better. It feels heavy-duty and immediately looks better than anything I’ve seen in the stores (and some of them sell for more than twice the price). The cover is made of a heavy canvas-like cloth material backed with an equally heavy-grade rubberized weatherproofing. All of the seams are sewn evenly and look very strong. I placed the cover over my new Charbroil grill, which is a 22.5” model but because of its shape is larger than some other grills, and the fit is perfect … it looks like it is custom made. The length is exactly as illustrated by the manufacturer on this page, almost touching the top of the wheels.
The cover has two heavy-duty handles to help remove it, sewn-in waterproof air vents and strong click-lock leg wraps, plus a tough locking drawstring. I live in a very brutal climate area, especially in summer, and I have come to learn what can survive the weather and what won’t. I predict I will still be using this cover 5 years, maybe 10 years down the road.
And the cover’s color scheme is attractive. No longer am I hiding my grill in a far corner but I’m leaving it right in view in the corner of the patio where the desert sand color helps it blend in with the ambient surroundings.
The seller’s description is one of the better ones I have seen at Amazon, complete with a handy measuring aid. Everything is exactly as represented and the cover easily earns 5-stars for its high quality and great value for the price.
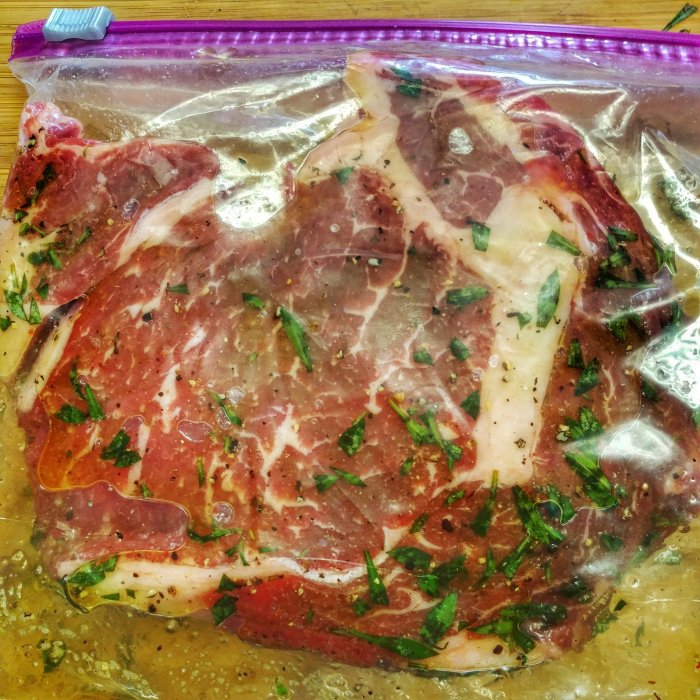
First I placed a thick cut ribeye in a plastic bag with salt, pepper, garlic salt, finely chopped rosemary and EVOO and let it sit for a couple of hours in the fridge coated in love.
Next set up the kettle for reverse searing by filling a charcoal chimney half full and once the coals are ashed over dumping them into the charcoal baskets which are pushed over to the left side of the charcoal grate.
Closed the bottom vent about half way and once it got up to around 250F I placed the ribeye on the opposite side of the kettle so it was not under the coals and placed the Thermoworks probe into the middle of the steak.
I was in a hurry so I let the kettle grate temp to go at 350 degrees. Normally for a reverse sear I’d choke the vents down so I’d have grate temps around 250-275 but not a big deal either way.
Once the Thermoworks Smoke remote sensor read 100F for the internal temp of the ribeye I pulled it off and loosely tented it in foil, opened the lid and bottom vent all the way and let the steak rest off the grill for around 5 minutes while the coals in the charcoal basket get fired up really hot with the introduction of all that oxygen funneling through the charcoal baskets.
Once those coals were really going placed the steak directly over the charcoal baskets and seared each side for about 1.5 minutes. Taking internal temps with the Javelin Pro instant read thermometer. Once it hit 120 internal I took it off and placed it back in the tented foil to rest for 5 more minutes while I melted a couple of tablespoons of butter to pour over.
It was delicious.
I’ve had a Maverick 732 dual probe thermometer for years and it’s worked fine. Only problem are the preset alarm ranges are a pain in the ass to reprogram and it constantly goes off driving everyone in the house or at work nuts. The Thermoworks Smoke is a next level remote thermometer. The build quality is far superior. The display is far superior. The ease of setting or turning the alarms on or off are superior. For just a few dollars more you’ll wish you sprung for the Smoke over the Maverick if you’re serious about your Barbeque.
My lovely wife Kate got me a Slow N Sear for my 22 inch kettles and I’m finally getting around to reviewing and using it.
To purchase and read other first hand reviews- click here
Here’s the video-
The first thing you notice about it when you take it out of the box is the build quality. It’s made out of heavy duty stainless steel and won’t be rotting away any time soon.
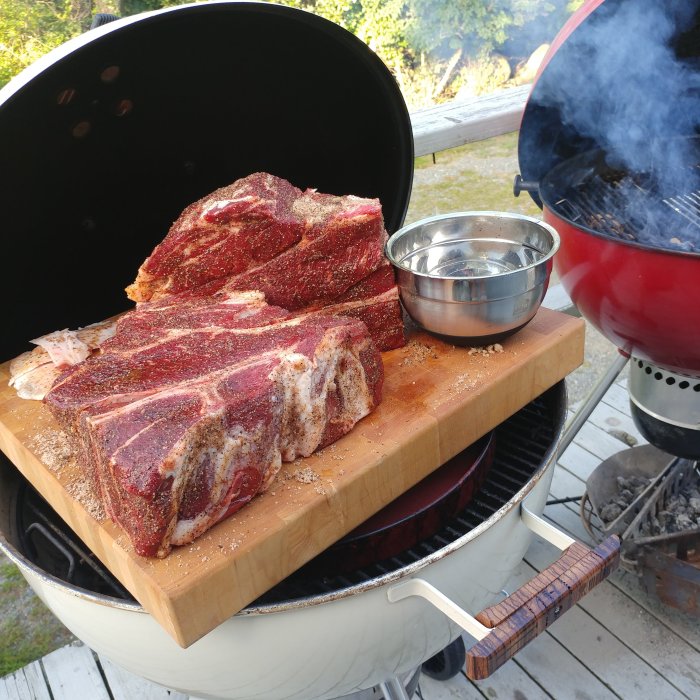
The main reason for getting the Slow N Sear for my purposes is for cooking large hunks of meat that take up a lot of grill space. For this cook it was two large seven bone chuck roasts that if I was using the snake method, after about five hours the snake would wrap around and end up directly under the meat, causing fat to drip and meat to burn- no bueno.
The Slow N Sear keeps the charcoal contained to one side. It also protects the porcelain coating on your nicer grills from having lots of coals banked up along the side with it’s heavy stainless construction. It also keeps a nice moist cooking environment with it’s removable water pan (in the 2.0 version). The water pan can also be removed giving you more room for coals and longer cook times without refueling.
For this cook I tried to follow the manufacturer instructions closely. I lit a Weber starter cube in one corner and arranged about 7 coals around it. When placing the coals around the lit starter cube be careful to not snuff out the starter cube. I didn’t snuff it out but I could see how it could happen if you weren’t careful.
After the coals were going sufficiently I filled the rest of the Slow N Sear 2.0 with briquettes leaving a little space for some peach wood (thanks Joe Ball) and cherry wood chips.
Next I boiled a quart of water and carefully poured it into the water pan. it sizzled (just like the manufacturer said it would) so I’d recommend you pour it using a oven mitt in case of splatter.
After that closed the lid and let the kettle come up to 175 degrees before adjusting the vents. I closed the top vent 1/2 way and the bottom vent about half way and later adjusted the top vent to closed about 3/4 of the way.
I started at 7:40AM and she was hovering around 225 when I put the two six pound chucks on the opposite side of the grill with foil and foil pans lining the opposite side of the charcoal grate to catch the liquid gold drippings which we’d later reincorporate into the pulled beef.
At 10AM she was rocking along at about 250-260 and at 12:30 the temps dropped a little to the 210 range. I still had spent coals and some that weren’t lit yet in the end of the Slow N Sear opposite the end where we initially started the coals with the starter cube. The charcoal grate temps dropped to 210 and then 200 right around the time the chucks were entering the stall at 160 degrees F internal. scratching my head I figured out why. It was dropping because the spent ash needed to be knocked down. It was restricting air flow. This is shown in a video by Baby Back Maniac in a YouTube who shows that you clear your spent ash when you refuel.
So I added about a third of a chimney of unlit briquettes to the Slow N Sear after knocking down the spent ash and we were back on track.
At 2:30 the chucks were at 173 degrees F internal and I wrapped them in double foil and placed them back on the kettle and opened the top vent all the way and the bottom vent about half way letting the kettle climb up to around 270-280.
Once the chucks reached 205 I pulled them off, put them on a cutting board, poured the drippings from the foil pan and juices from inside the foil wrap into a bowl and mixed it with the beef as I shredded it. The chucks rendered down perfectly and were all jiggly and moist and incredibly flavorful. The guests devoured the pulled beef on rolls made by my friend Susan Lipsett and mango slaw from my Sister Felicia and Sweet Baby Rays Vidalia Onion BBQ Sauce.
The Slow N Sear is an excellent piece of equipment. It is well built, well designed and helps maintain temps for long cooks with large cuts of meat weather it be ribs or brisket of big slabs of chuck.
I recommend it if you cook a lot of large cuts of meat like full packer briskets or multiple pork butts.
To purchase and read other first hand reviews- click here
Not included in the review was a Lodge cast iron skillet which has many of the same properties as the Emeril cast iron griddle except it is round and has higher sides which eliminates the likelihood of grease fires in the case of grease overflowing the edges.
I used a flat griddle with a small lip around the edges to do some smash burgers and bacon. Believe me if you’ve ever had a grease fire due to the grease overflowing onto the coals , it’s no fun. They can get pretty unruly. The high sides and deep grease collecting trays are welcome features.
You don’t need a ton of coals to get any of these griddles good and hot.
The Emeril rectangular one fits like a glove within the edges of the rectangular Weber Go-Anywhere.
The Cook’s essentials was by far the easiest to handle and clean and was a joy to use on the 22 inch Weber Kettle. I suspect it won’t last a lifetime like a cast iron skillet that is well maintained but it also requires far less maintenance and won’t rust. For $16.46 I like it a lot.
The Little griddle required a decent amount of elbow grease to scrub clean with an sos pad. I suppose you could let it season up and not be so crazy about getting every bit of burnt on stuff off.
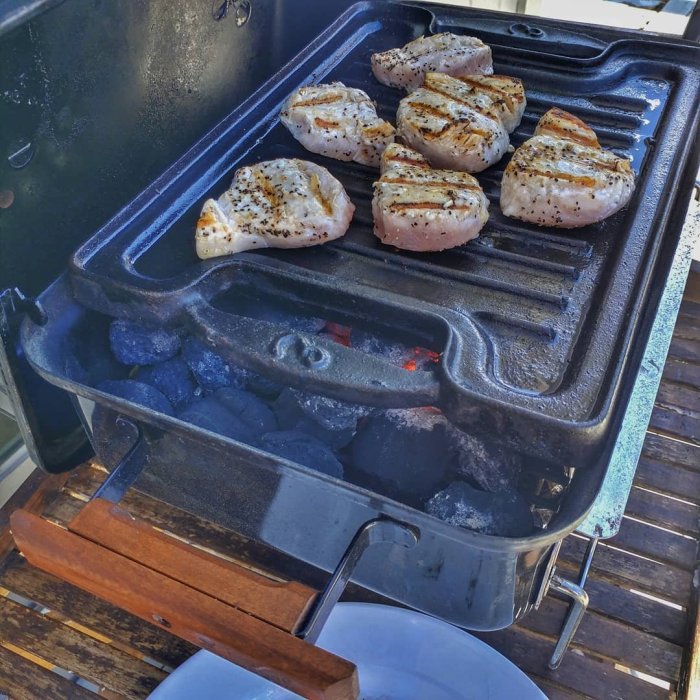
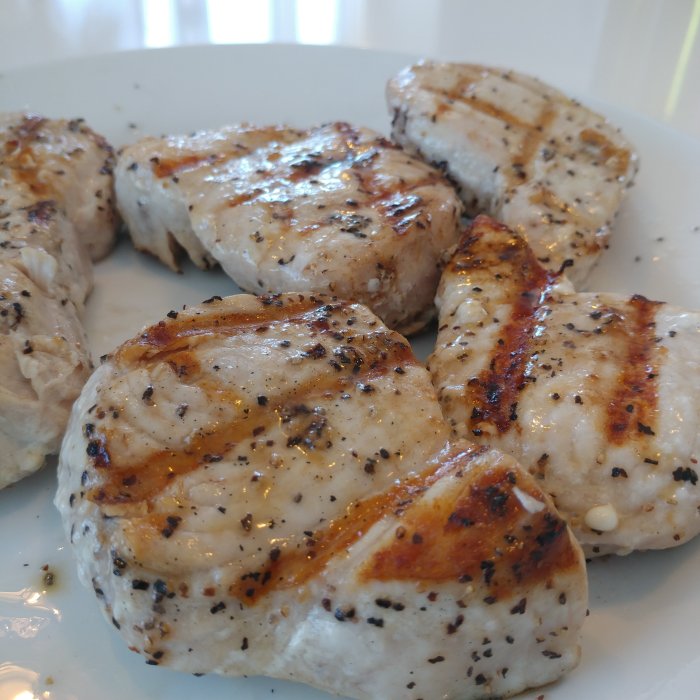
When I pulled this Cast Iron Griddle out of the shed to cook swordfish on the Charcoal Weber Go-Anywhere I figured that I’d probably have to drape it over the sides of the grill. Here’s a link to buy it on Amazon It’s $35 and that’s a steal for how versatile it makes your grill!
When I checked, it fit perfectly in the groove where the cooking grate would go without any need to modify it. It’s like a stock accessory. Not only that but has enough space open on the sides to allow air flow to the coals to get that cast iron piping hot for searing.
THIS MAY BE THE BEST PORTABLE CHARCOAL GRILLING SETUP EVER!!!
As you can see it fits perfectly inside the grooves where the cooking grate would sit. It doesn’t impede the lid from closing , the lid still latches on the edge of the back of the grill. I swear when they designed this griddle they had to be thinking of the Weber Go-Anywhere!
You can get these items at Foster’s Grill Store or if you’re not from around Gloucester MA, these links on Amazon-
The main reason people that don’t cook with charcoal is because they think it’s too time consuming. It really isn’t when you use a chimney starter-
Weber Stephen Company 7429 Rapid Fire Chimney Starter, Silver
Lighter cubes are cheap and make it so you won’t have a bunch of spent newspaper flying around the bottom of your grill collecting grease and sticking to your food. They get your coals going inside the chimney starter in minutes, effortlessly.
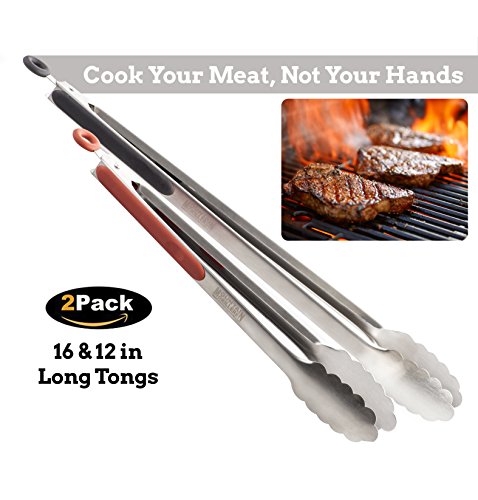
There are fancier ones. I’ve tried them. This one just works. If you are BBQing, you need to know two things primarily. The ambient temperature at the grill grate level and the internal temperature of your meat. When you can confidently know these things, you can confidently BBQ. There are so many cuts of meat that if you use internal temp’s as a guideline you’re going to succeed, and if you’re off by ten degrees you can ruin an expensive piece of meat. it’s up to you, would you rather know you nailed it or would you rather gamble. As far as smoking meat, I generally smoke at grate temps between 225-275. when you have the remote wireless meat thermometer you can monitor those temps from the couch or the kitchen.
My buddy Craig has these and while there are a ton of different kinds of tongs out there I like the little bit of silicon up on the handle, it gives just a little bit more grip when you’re manning the grill for extended periods of time. and the price is right.
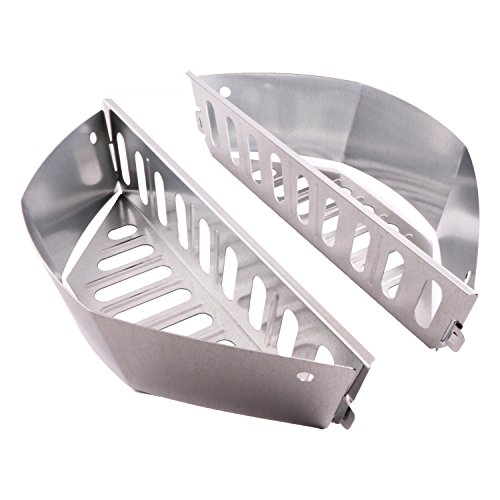
Charcoal Baskets- Cheapies and Buy One set For The Rest Of Your Life-
Charcoal baskets serve several purposes. One they protect the bottom of your grill from crazing and porcelain pops. Two, they are an excellent way to control your charcoal placement for direct and indirect cooking.
The cheapies (which are perfectly fine and you’ll probably get at least 4 seasons of heavy cooking out of them)-
The heavy duty buy them once and have them for the rest of your life charcoal baskets. I have these and if you’re a serious charcoal griller, buy them they’re stainless and about three times thicker. I reviewed them here
On all the grill forums people rave about a product called the vortex. It creates a high heat situation which makes excellent chicken wings. I find that with two charcoal baskets pushed together you can get equally as good results.
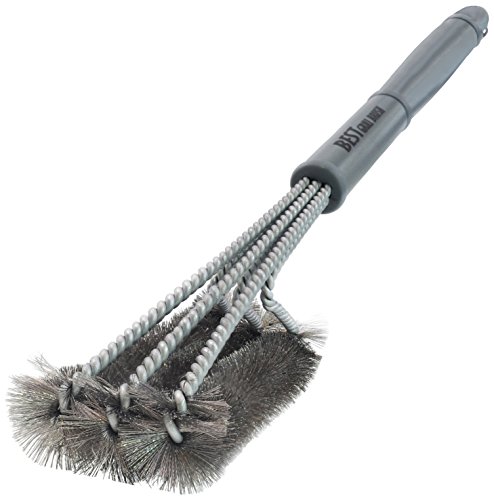
Grill Brush- Do I need to do a lot of explaining here other than to say that this model has three sets of bristles to go up and down the grates and get in between the grooves.
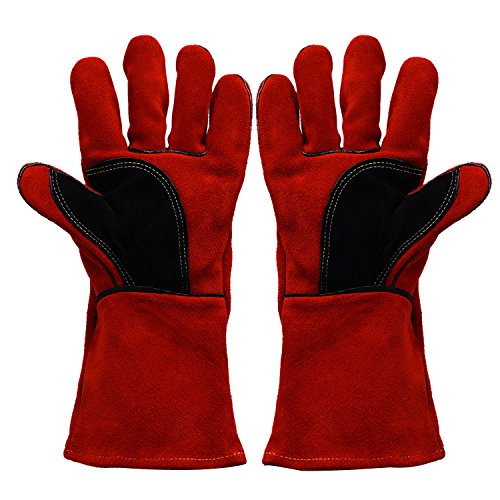
I’ve tried the silicon gloves and they get all sweaty nasty inside. These welder’s gloves are great and economical to lift your hot grates out when there’s hot coals underneath-
Keeps the charcoal dry and easy to pour out of. I have a couple of these. One I keep charcoal in and another to keep bags of wood chips and lighter cubes and match sticks.
To dispose of spent ashes without worrying about lit coals igniting the woods around you or when you’re traveling and cooking out to properly dispose of spent ashes.
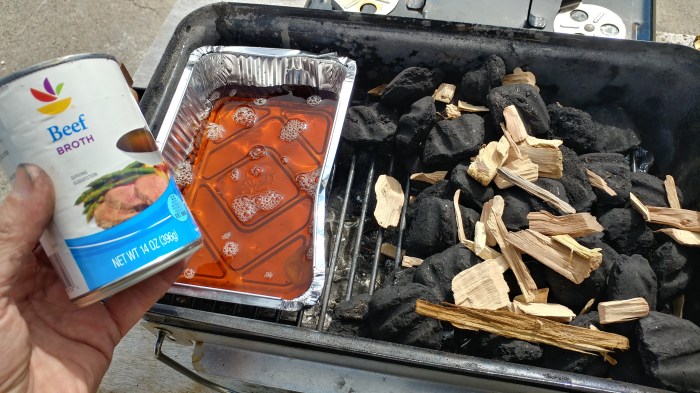
Set up the Weber Go-Anywhere for indirect smoking with a drip pan on one side under the deflector plate slot and 7 or so lit coals in the opposite corner with a bunch of unlit coals.
Purchase the BBQube deflector plate here It makes the small Weber Go-Anywhere into a perfectly capable charcoal sipping machine. This whole cook might have used 25-30 briquettes and there were plenty left over to go longer!
A simple rub of black pepper, salt, garlic powder.
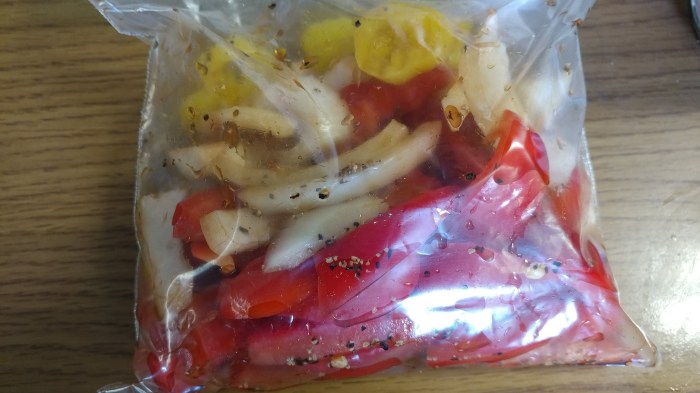
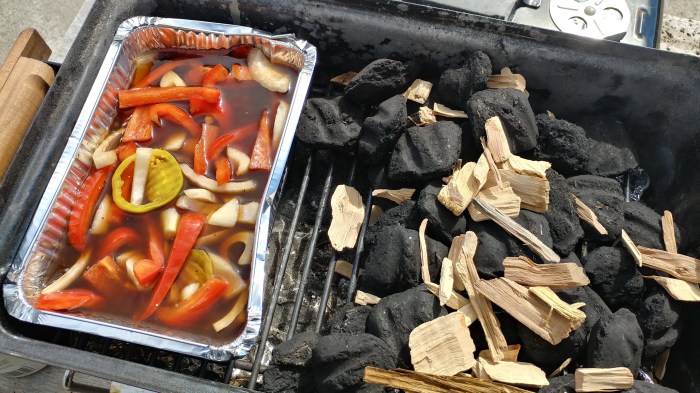
Place a cup of beef broth, sliced up red bell pepper, sliced up half onion, and pepperoni rings in the drip pan
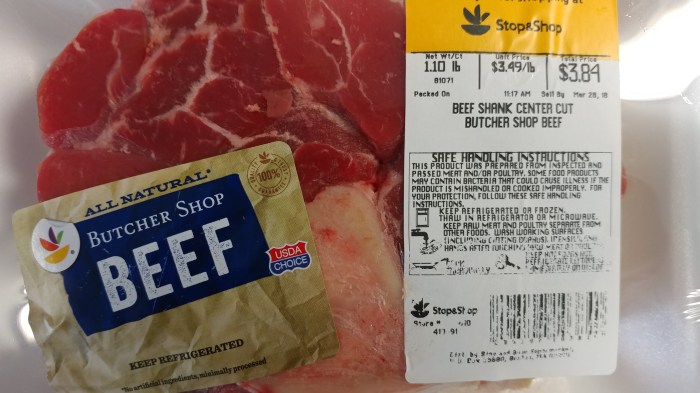
Goal is smoking the beef shanks for about an hour and a half between 250-275 to get color and smoke.
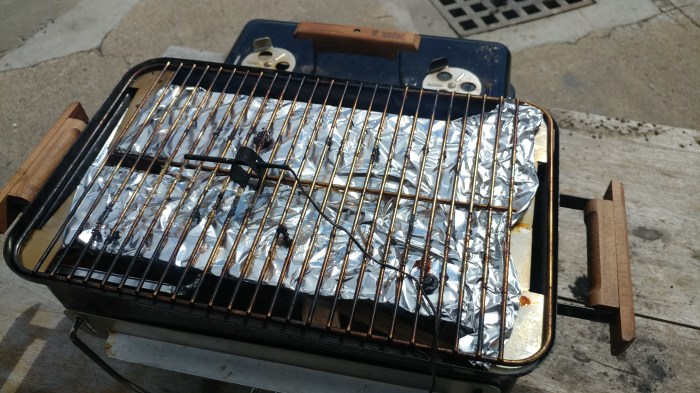
Wrapped the deflector plate in foil for easy clean up.
Placed beef shanks over the side of the grill that has the slot for the drip pan and the remote temp probe in the middle of the grill.
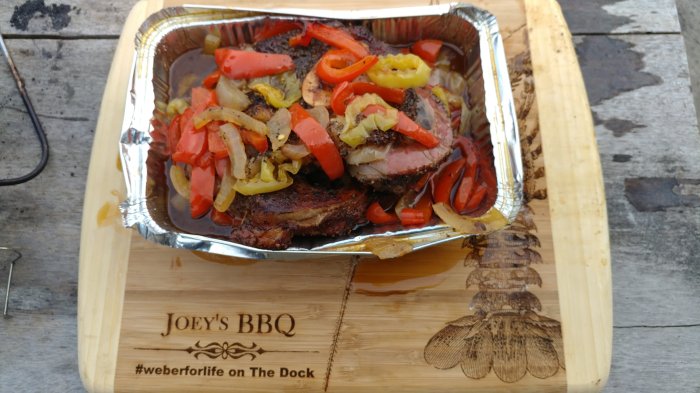
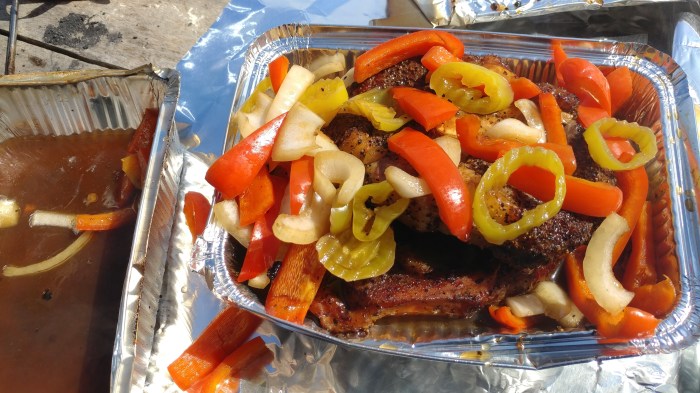
After an hour and a half at 250 the shanks had the color I wanted and were probing internal temps of 150 degrees F. Pulled out the drip pan and placed the beef shanks with the beef stock and veggies in it and wrapped in foil to braise for another hour and a half.
After an hour and a half braising all of the hard connective tissues and sinewy renders down into delicious tender fat for flavor and the bone marrow renders into the beef stock as well creating an intense beefy deliciousness.