I received a Slow N Sear 2.0 for Christmas last year. When first using it I filled it up and placed a bunch of lit coals on one end and left it alone.
It held temps like a champ for a long while. It is really built well. It protects the porcelain on your kettle from high heat crazing. It really is a nice piece of equipment.
However about two thirds of the way through my brisket temps were dropping. I kept adding coals but was having a hell of a time keeping the temps up.
This was not a design flaw of the Slow N Sear 2.0. It was because the spent ashes were built up at the bottom of the Slow N Sear prohibiting air flow. Once I figured this out, all I needed to do was to knock the ash down and clear it out so the air would feed the coals and I could regain the temps I was shooting for. Totally on me.
Down the dock I generally use the same set of tongs for everything. Cooking and ash management. This is only because I’m cooking for myself and a couple of the animals I work with.
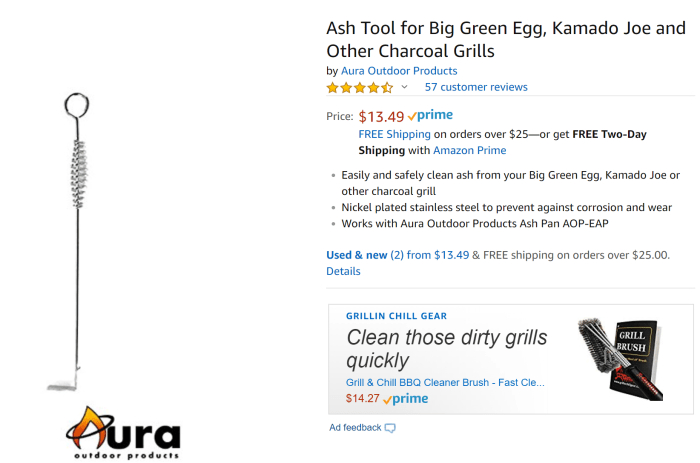
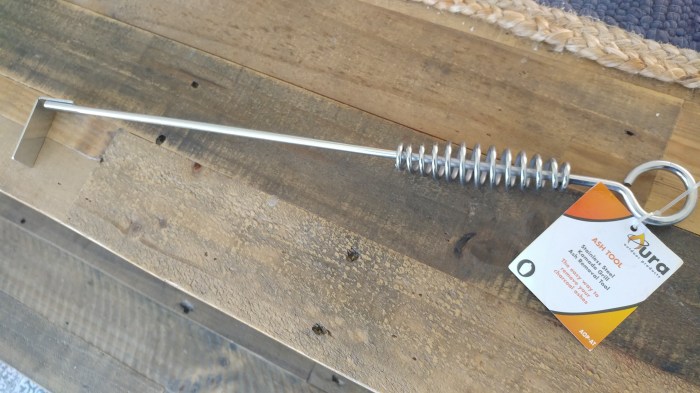
The Aura Ash tool is a great accessory, especially it’s build quality and price.
It’s $13.49 with prime free shipping on Amazon and at that price it’s a total no-brainer.
It has a large hoop on one end that fits perfectly on a Mastertouch handle. It’s frankly overbuilt stainless construction and does exactly what it’s advertised as doing. maintaining your ashes so you don’t have to use your cooking tongs to do it.
It can stay outdoors all the time so you don’t have to go searching for it.
I have this one at home and I’m going to order another for the dock right now.
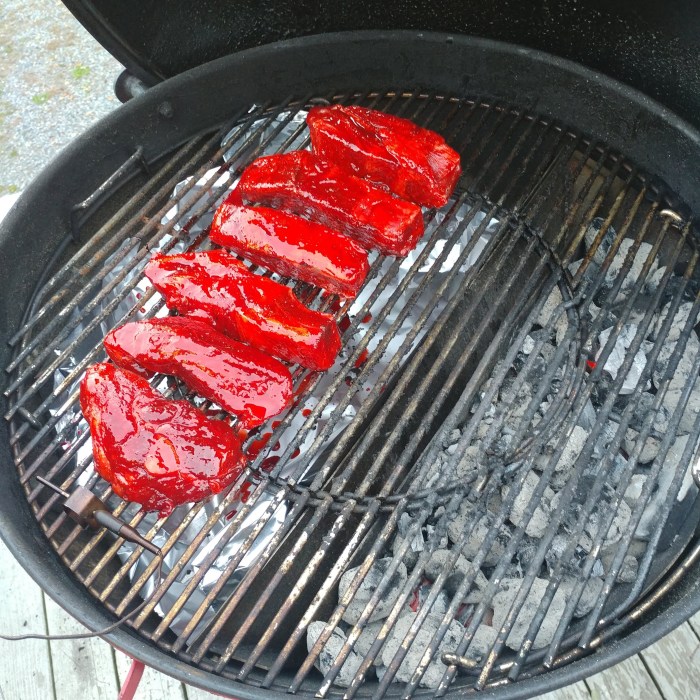
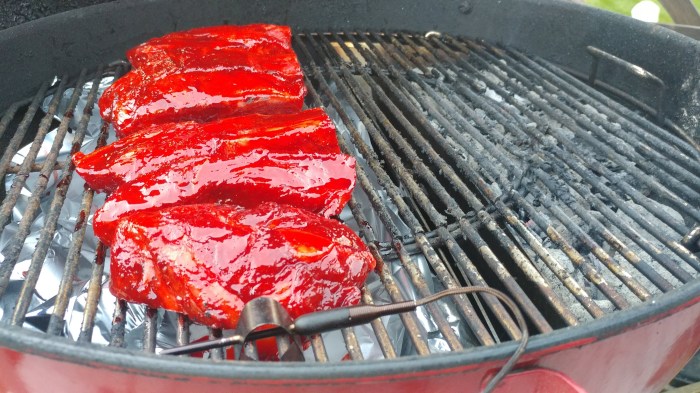
First step marinate the country ribs in Chinese Rib Sauce for at least an hour preferably overnight. I got this Butcher Block Sauces Original Chinese Rib Sauce at Market Basket.
Set up your kettle for indirect heat. I used a slow n sear on the right and be sure to line the other side of the charcoal grate with foil as this sauce is STICKY!
Using a chimney of lit coals, choke down the top vent half way and bottom vent half way and adjust accordingly to achieve around 275 degrees. Once the kettle is up to temp place the marinated country ribs opposite the coals at 275 degree pit temp for an hour. Add fruit wood (peach, apple, cherry) if you got it for smoke.
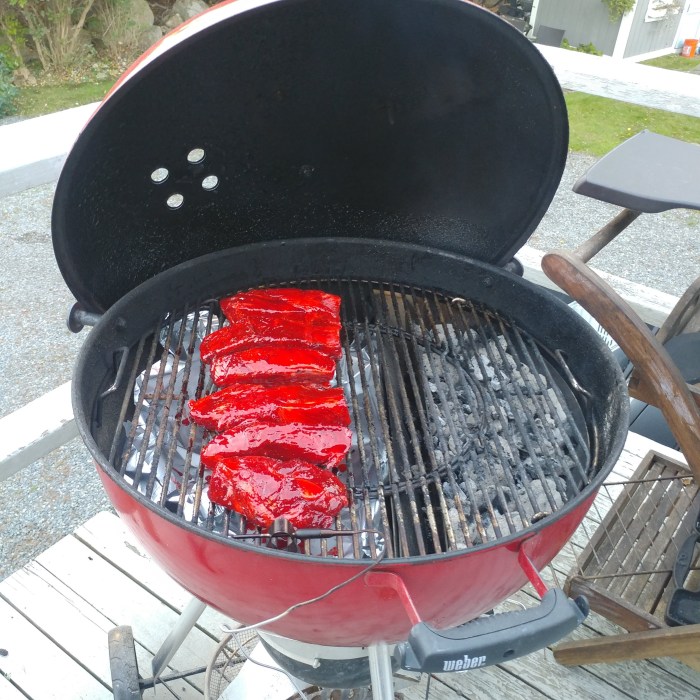
Leave the lid closed for an hour . About 45 minutes into the cook add a half a beer into a foil pan. I only had a couple of small foil pans so I used about a quarter of a beer in each one and then about 8 oz of the Rib sauce into each pan and whisk it together so the rib sauce is less gooey. If you have one large on it will work just as well. This will be your braising liquid.
After one hour in the smoke pull the country style ribs one by one off the grate and dredge them in the braising liquid coating both sides and then put them in the foil pan with the juices you dredged them in. Once you have them all in the foil pans cover them with foil and place them back on the grill for another hour, opposite side of the coals.
After the second hour take the ribs out of the foil pans and place them directly over the coals and mop them with the remaining Chinese rib sauce. A couple of minutes on each side til the edges just start to burn. you don’t mind a little caramelization, it’s what makes it delicious. Pay attention though, there’s a ton of sugar in that sauce and if you let it go too long it will be black. So just keep an eye on it.
You take a cheap cut of meat and turn it into something outrageously delicious.
You won’t to be able to stop eating these, so yummy.
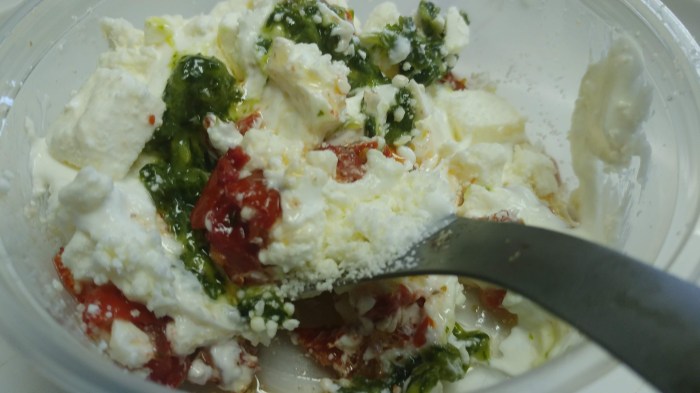
Mix sour cream, parmesan cheese, basil paste, feta and sun dried tomatos for the stuffing.
Roll 1/4 inch thick EVOO coated chicken breast (pound flat between two pieces of wax paper) around the stuffing, secure with toothpicks then coat with Italian bread crumbs.
I used a deflector plate. Under which I put a half a Weber chimney of lit coals on the opposite side of the grill where the chicken would go. Vents all wide open.
Cook for 25 minutes until chicken is golden brown.
What I learned in this cook was that no matter what, you have to be patient and wait for the brisket to be probe tender.
This Brisket reached 204 degrees internal but wasn’t probe tender, enetered a stall, temps retreated even with steady 250 degree pit temps all the way from 204 back down to 189. It wasn’t probe tender until it came back up to 195F.
List Price: $28.00
Price: $11.49 Free Shipping for Prime Members
You Save: $16.51 (59%)
Alex Zogas, Craig Kimberley and my other die hard Weber Kettle aficionados all swear by them. They’re about twice as thick as anything else and really do well to protect your grill. Read the reviews here
THE CLASSIC ACCESSORIES DIFFERENCE: CA Veranda covers have interior bound seams for strength, high-density stitching for durability, padded handles for comfort, matching webbing for a great look and California Prop 65 compliance for health and safety
Guaranteed to fit kettle grills 26.5″ in diameter x 38″ high
Fits Weber Original Kettle 18″ and 22″, Original Kettle Premium 22″ and 26″, Weber Gold Series 18.5″ and 22.5″ and Silver Series 18.5″ and 22.5″ models
Three-year limited warranty
Gardelle Fabric System features an elegant water-resistant fabric top with a protective waterproof backing and a protective dark splash guard skirt
You’ll be sure to find the right covers to fit your needs with over 140 shapes and styles in the Veranda Collection from Classic Accessories
Elastic hem cord with a toggle allows adjustment for a tight and custom fit
Review:
PhotoGraphics
It is rare in today’s world of cheap offshore products to find something that is made better than expected and still sells for an affordable price. Actually, that is only partially true … even some so-called “luxury” brand products are now being made offshore and are made to the cheapest standards, yet they still sell for a luxury price.
At the Amazon price of under twenty dollars I had low expectations for this grill cover. There were ones selling for much more and others with the famous brand name on them selling for about the same price. I was more interested in short-term protection for my shiny new kettle grill than I was in saving money … after all if it was a piece of junk I could buy another when necessary. I read the reviews of the famous brand and so many reviewers were making statements like “you would be just as well off using a plastic garbage bag”, but the photos and description of this cover from Classic Accessories somehow just looked better than average.
And it is. As soon as I unpacked it from the box I could tell it is better. It feels heavy-duty and immediately looks better than anything I’ve seen in the stores (and some of them sell for more than twice the price). The cover is made of a heavy canvas-like cloth material backed with an equally heavy-grade rubberized weatherproofing. All of the seams are sewn evenly and look very strong. I placed the cover over my new Charbroil grill, which is a 22.5” model but because of its shape is larger than some other grills, and the fit is perfect … it looks like it is custom made. The length is exactly as illustrated by the manufacturer on this page, almost touching the top of the wheels.
The cover has two heavy-duty handles to help remove it, sewn-in waterproof air vents and strong click-lock leg wraps, plus a tough locking drawstring. I live in a very brutal climate area, especially in summer, and I have come to learn what can survive the weather and what won’t. I predict I will still be using this cover 5 years, maybe 10 years down the road.
And the cover’s color scheme is attractive. No longer am I hiding my grill in a far corner but I’m leaving it right in view in the corner of the patio where the desert sand color helps it blend in with the ambient surroundings.
The seller’s description is one of the better ones I have seen at Amazon, complete with a handy measuring aid. Everything is exactly as represented and the cover easily earns 5-stars for its high quality and great value for the price.
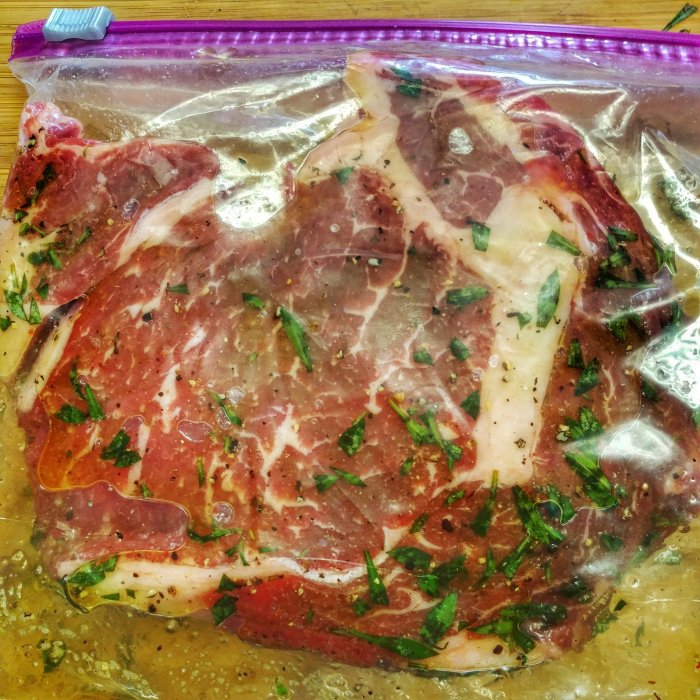
First I placed a thick cut ribeye in a plastic bag with salt, pepper, garlic salt, finely chopped rosemary and EVOO and let it sit for a couple of hours in the fridge coated in love.
Next set up the kettle for reverse searing by filling a charcoal chimney half full and once the coals are ashed over dumping them into the charcoal baskets which are pushed over to the left side of the charcoal grate.
Closed the bottom vent about half way and once it got up to around 250F I placed the ribeye on the opposite side of the kettle so it was not under the coals and placed the Thermoworks probe into the middle of the steak.
I was in a hurry so I let the kettle grate temp to go at 350 degrees. Normally for a reverse sear I’d choke the vents down so I’d have grate temps around 250-275 but not a big deal either way.
Once the Thermoworks Smoke remote sensor read 100F for the internal temp of the ribeye I pulled it off and loosely tented it in foil, opened the lid and bottom vent all the way and let the steak rest off the grill for around 5 minutes while the coals in the charcoal basket get fired up really hot with the introduction of all that oxygen funneling through the charcoal baskets.
Once those coals were really going placed the steak directly over the charcoal baskets and seared each side for about 1.5 minutes. Taking internal temps with the Javelin Pro instant read thermometer. Once it hit 120 internal I took it off and placed it back in the tented foil to rest for 5 more minutes while I melted a couple of tablespoons of butter to pour over.
It was delicious.
I’ve had a Maverick 732 dual probe thermometer for years and it’s worked fine. Only problem are the preset alarm ranges are a pain in the ass to reprogram and it constantly goes off driving everyone in the house or at work nuts. The Thermoworks Smoke is a next level remote thermometer. The build quality is far superior. The display is far superior. The ease of setting or turning the alarms on or off are superior. For just a few dollars more you’ll wish you sprung for the Smoke over the Maverick if you’re serious about your Barbeque.
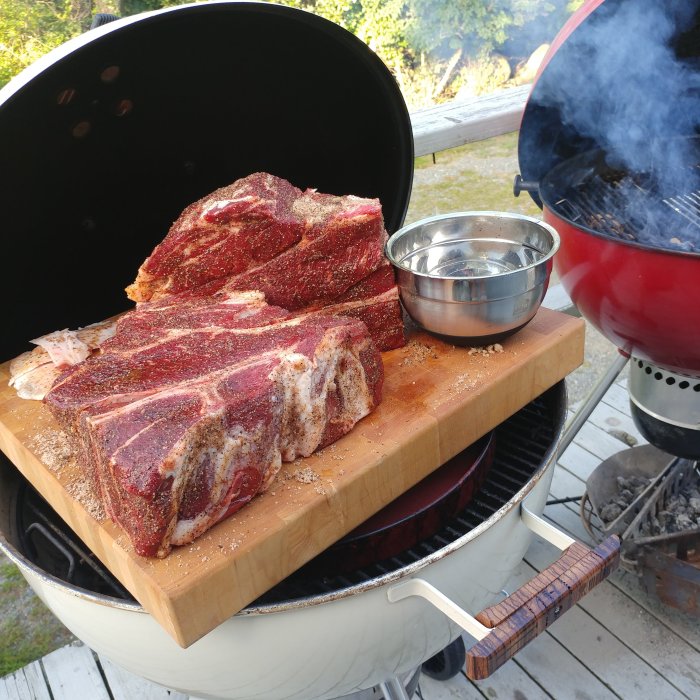
My lovely wife Kate got me a Slow N Sear for my 22 inch kettles and I’m finally getting around to reviewing and using it.
To purchase and read other first hand reviews- click here
Here’s the video-
The first thing you notice about it when you take it out of the box is the build quality. It’s made out of heavy duty stainless steel and won’t be rotting away any time soon.
The main reason for getting the Slow N Sear for my purposes is for cooking large hunks of meat that take up a lot of grill space. For this cook it was two large seven bone chuck roasts that if I was using the snake method, after about five hours the snake would wrap around and end up directly under the meat, causing fat to drip and meat to burn- no bueno.
The Slow N Sear keeps the charcoal contained to one side. It also protects the porcelain coating on your nicer grills from having lots of coals banked up along the side with it’s heavy stainless construction. It also keeps a nice moist cooking environment with it’s removable water pan (in the 2.0 version). The water pan can also be removed giving you more room for coals and longer cook times without refueling.
For this cook I tried to follow the manufacturer instructions closely. I lit a Weber starter cube in one corner and arranged about 7 coals around it. When placing the coals around the lit starter cube be careful to not snuff out the starter cube. I didn’t snuff it out but I could see how it could happen if you weren’t careful.
After the coals were going sufficiently I filled the rest of the Slow N Sear 2.0 with briquettes leaving a little space for some peach wood (thanks Joe Ball) and cherry wood chips.
Next I boiled a quart of water and carefully poured it into the water pan. it sizzled (just like the manufacturer said it would) so I’d recommend you pour it using a oven mitt in case of splatter.
After that closed the lid and let the kettle come up to 175 degrees before adjusting the vents. I closed the top vent 1/2 way and the bottom vent about half way and later adjusted the top vent to closed about 3/4 of the way.
I started at 7:40AM and she was hovering around 225 when I put the two six pound chucks on the opposite side of the grill with foil and foil pans lining the opposite side of the charcoal grate to catch the liquid gold drippings which we’d later reincorporate into the pulled beef.
At 10AM she was rocking along at about 250-260 and at 12:30 the temps dropped a little to the 210 range. I still had spent coals and some that weren’t lit yet in the end of the Slow N Sear opposite the end where we initially started the coals with the starter cube. The charcoal grate temps dropped to 210 and then 200 right around the time the chucks were entering the stall at 160 degrees F internal. scratching my head I figured out why. It was dropping because the spent ash needed to be knocked down. It was restricting air flow. This is shown in a video by Baby Back Maniac in a YouTube who shows that you clear your spent ash when you refuel.
So I added about a third of a chimney of unlit briquettes to the Slow N Sear after knocking down the spent ash and we were back on track.
At 2:30 the chucks were at 173 degrees F internal and I wrapped them in double foil and placed them back on the kettle and opened the top vent all the way and the bottom vent about half way letting the kettle climb up to around 270-280.
Once the chucks reached 205 I pulled them off, put them on a cutting board, poured the drippings from the foil pan and juices from inside the foil wrap into a bowl and mixed it with the beef as I shredded it. The chucks rendered down perfectly and were all jiggly and moist and incredibly flavorful. The guests devoured the pulled beef on rolls made by my friend Susan Lipsett and mango slaw from my Sister Felicia and Sweet Baby Rays Vidalia Onion BBQ Sauce.
The Slow N Sear is an excellent piece of equipment. It is well built, well designed and helps maintain temps for long cooks with large cuts of meat weather it be ribs or brisket of big slabs of chuck.
I recommend it if you cook a lot of large cuts of meat like full packer briskets or multiple pork butts.
To purchase and read other first hand reviews- click here
By subscribing to the Thermoworks list you get special offers that are not offered on their main page.
My good friend Joe Ball alerted me to a big sale on a commercial grade remote thermometer- the Thermoworks Smoke.
I’d always used a Maverick 732 which is a decent consumer grade remote thermometer that retails for around $60.
The Thermoworks Smoke is professional grade. The build quality is conservatively speaking about three times greater and it can be had for $79.99 including shipping.
I can’t stress enough how good of a unit this is. if you have a grill master in your life, trust me buy this and put it away for a birthday or Christmas and they will love you for it.
“Smoke is our newest alarm thermometer, and we have accumulated a small number of Smoke units here that, for various reasons, we will not sell as new units. Open Box Includes:
sales demos
customer returns
cosmetic seconds
slightly damaged packaging
refurbished units
While not the same as new, all units are like-new and include the full warranty. They include Smoke, Smoke Receiver, Pro-Series High Temp Cooking Probe, Pro-Series High Temp Air Probe with Grate Clip, and operating instructions. In most cases, you won’t be able to differentiate these from new stock.
This is a private sale for our email subscribers, but you are welcome to forward the link to friends and family.”
This is how I set up my charcoal Weber Go-Anywhere for high heat indirect cooking. Here we cook a full package of chicken wings offset the coals using tin foil and a foil tray to catch the drippings.
Link for the foil trays that fit perfectly inside the Go Anywhere at this link