First cook on the Brick Red @WeberGrills Performer Flank #Steak

20160519_185214_HDR-0120160519_185240_HDR-0120160519_185247_HDR-01

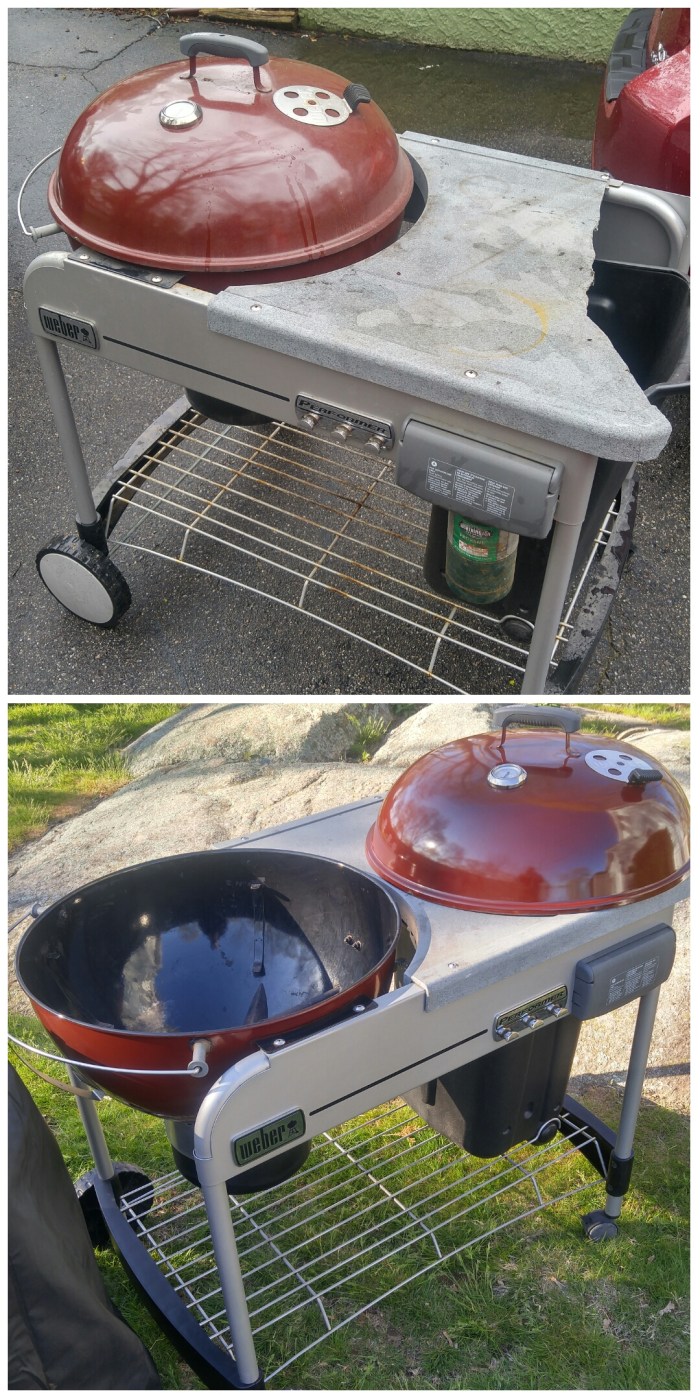
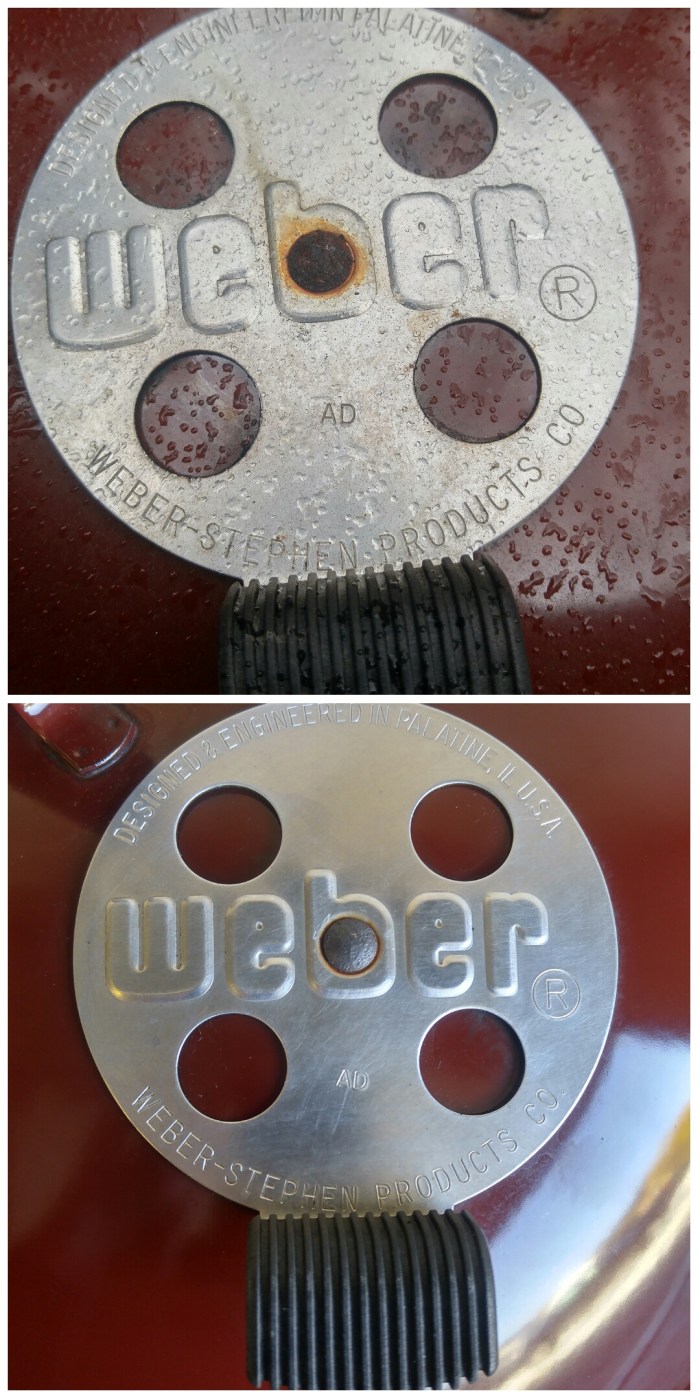
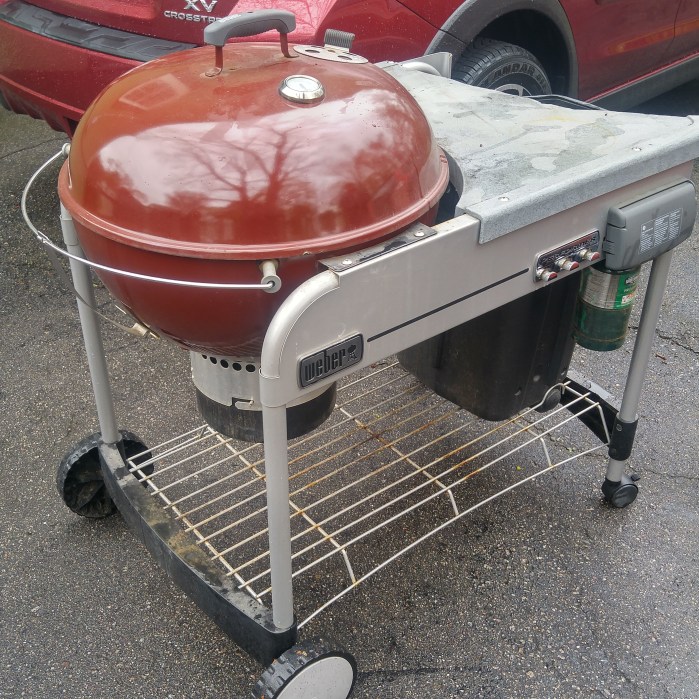
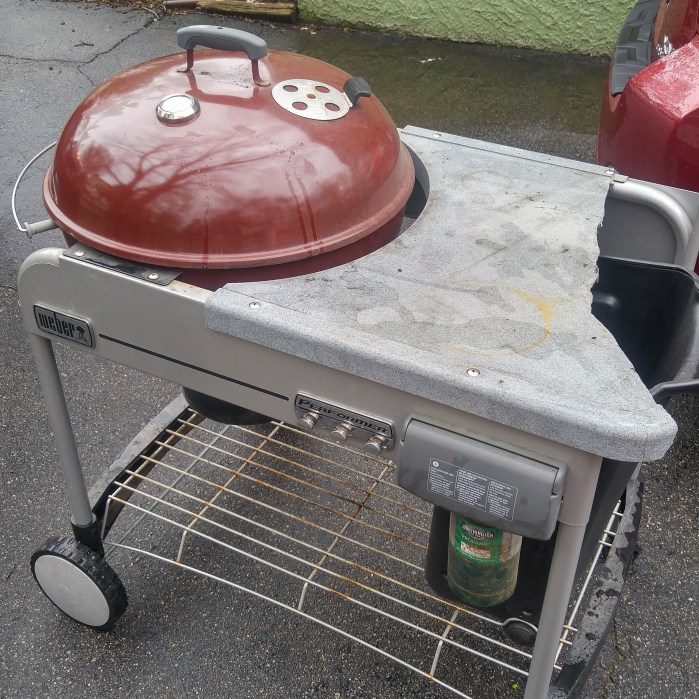
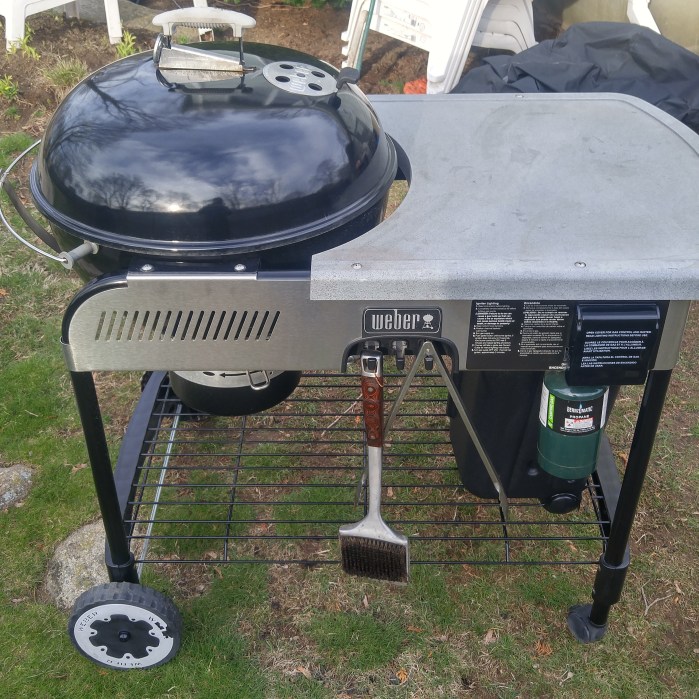
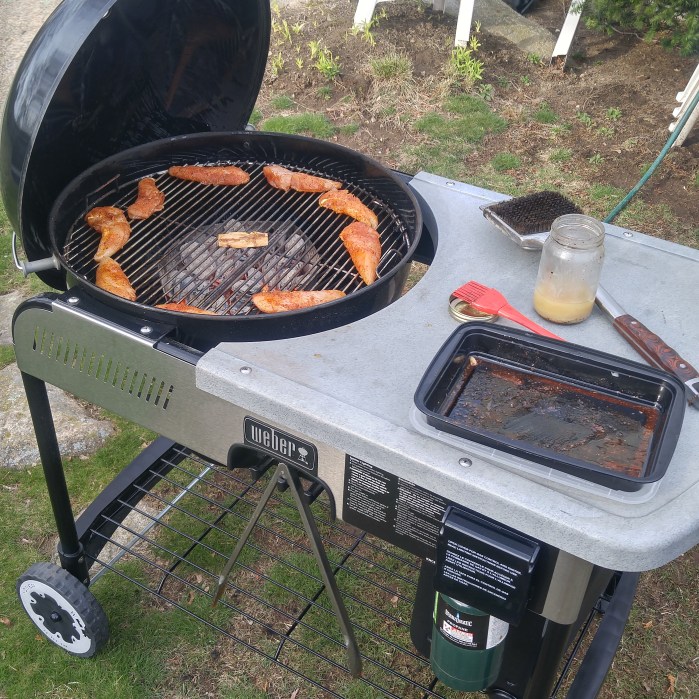
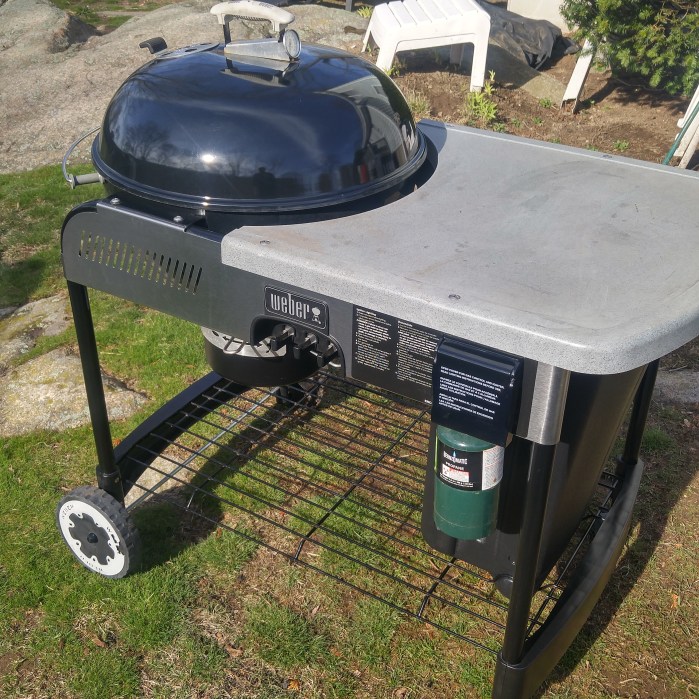
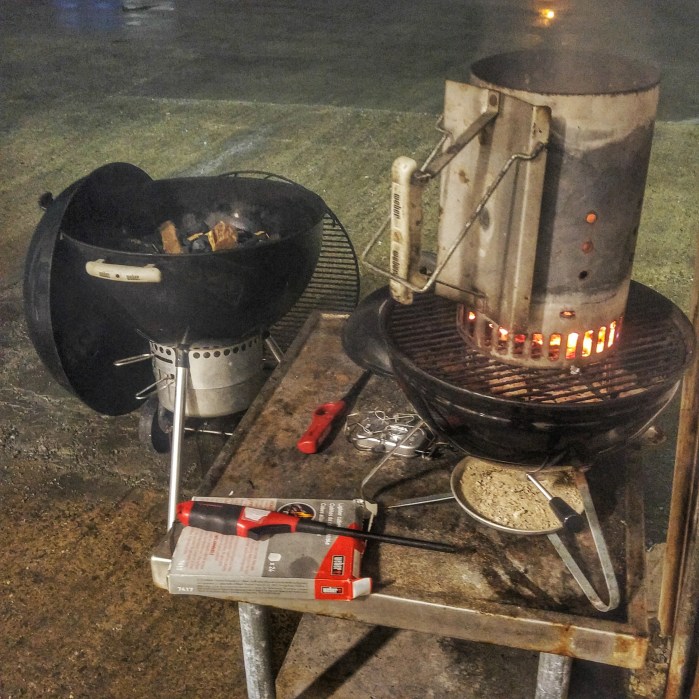
Sold the first Performer I’d ever purchased yesterday on CraigsList and fired up The Red Brick one for the first time.

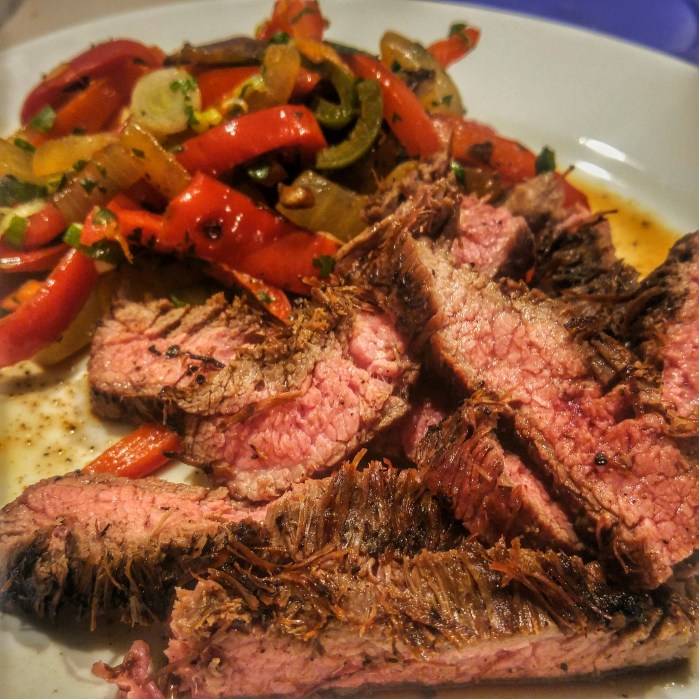
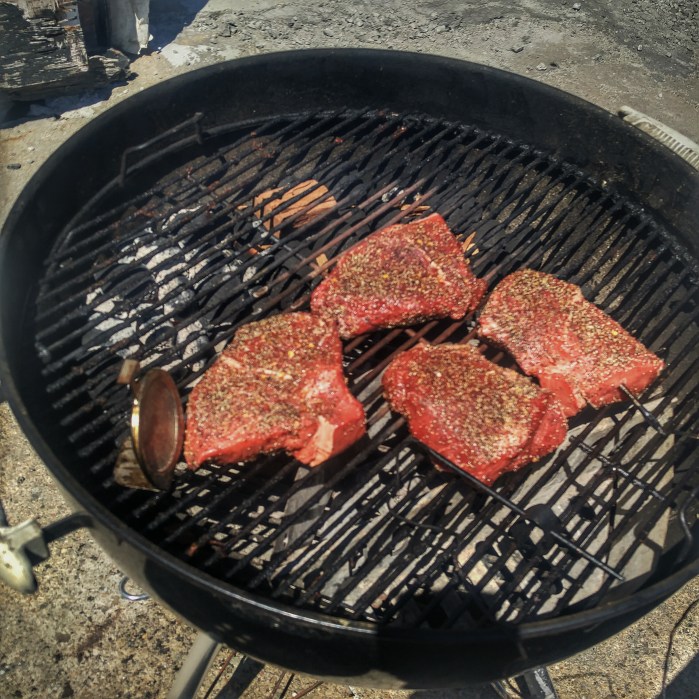
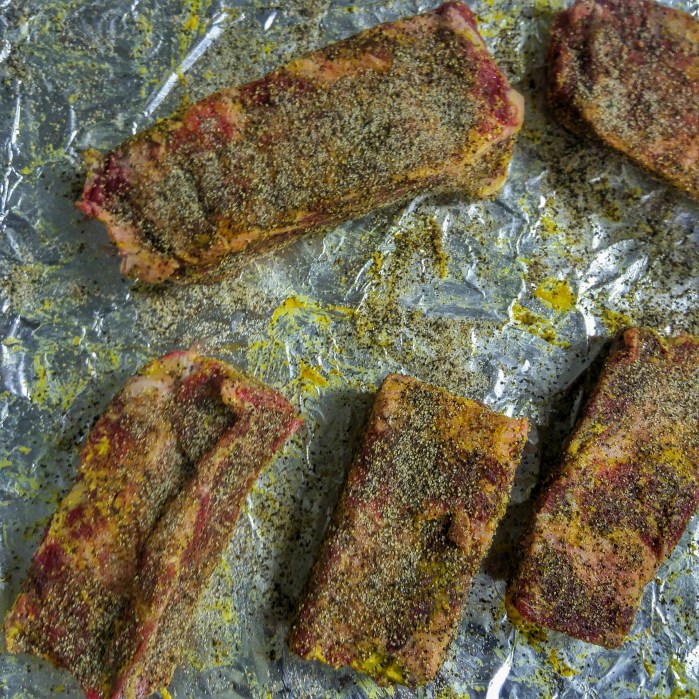
It was a pretty simple cook: Flank Steak.
The Lovely Kate marinated the Flank Steak at noon time and it went on at 7:15PM
It tasted great but I probably wouldn’t have purchased it.
“Flank steak” is hot in the culinary world right now so markets price them fairly high considering the tough cut that it is.  My line of thinking is that if you can get good Ribeyes on sale for $5.99 why in the world would you pay the same thing for a lesser cut of meat?   When I go to the meat department I generally go with an open mind and look for value and then plan my cook around whats on sale.  A lot of people get a certain recipe in their head ahead of time and no matter what the cost is, they are going to buy the protein that that recipe calls for no matter what it costs per lb.  It’s the same as someone having the option to buy Rib Roast for the same price as brisket and opting for brisket.  I’ll never understand that.
In any case it turned out delicious.  She made a citrus/ avocado/cilantro/red onion topping  that was out of this world and I really enjoyed it.  She’s an amazing cook.

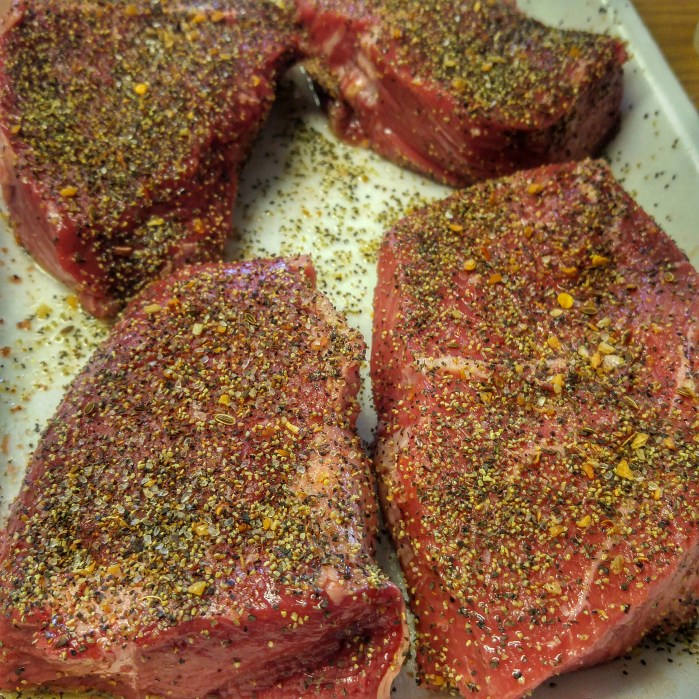
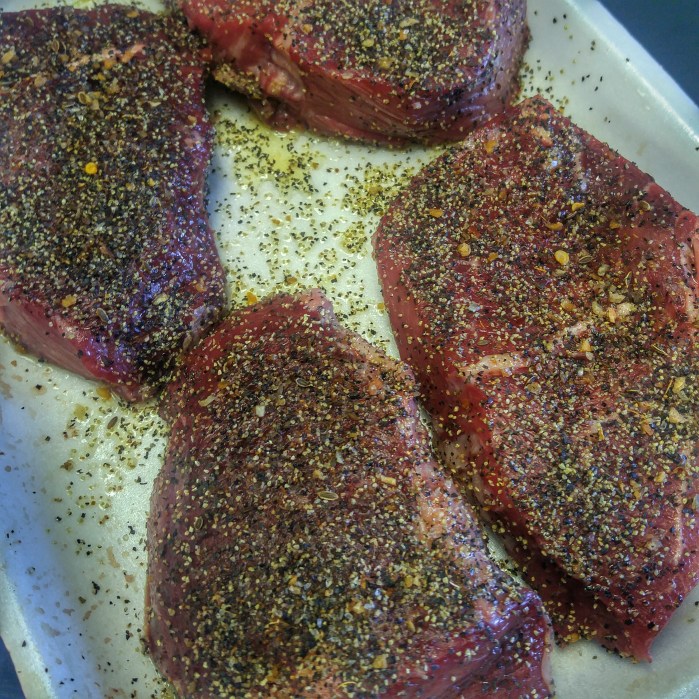
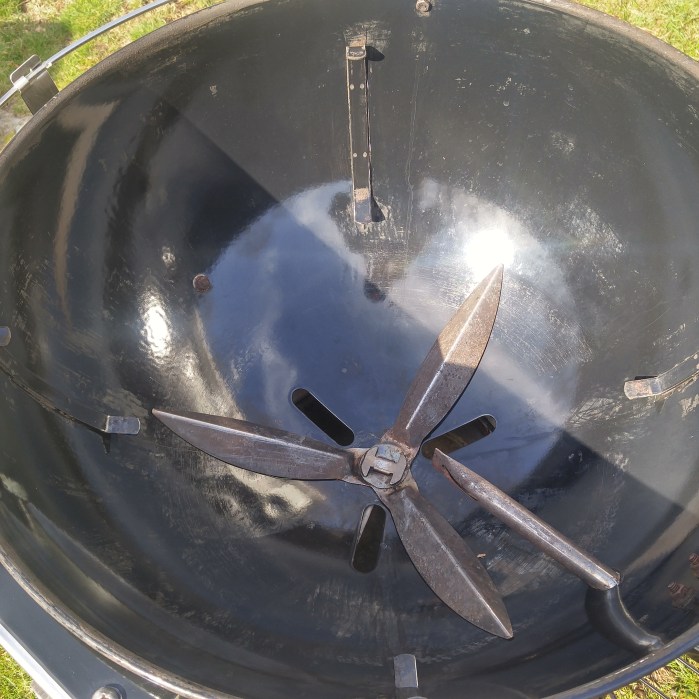
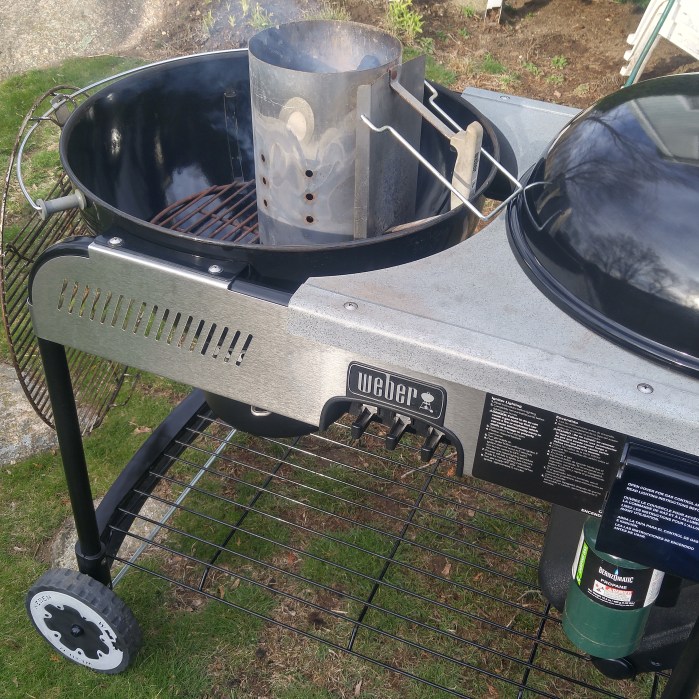
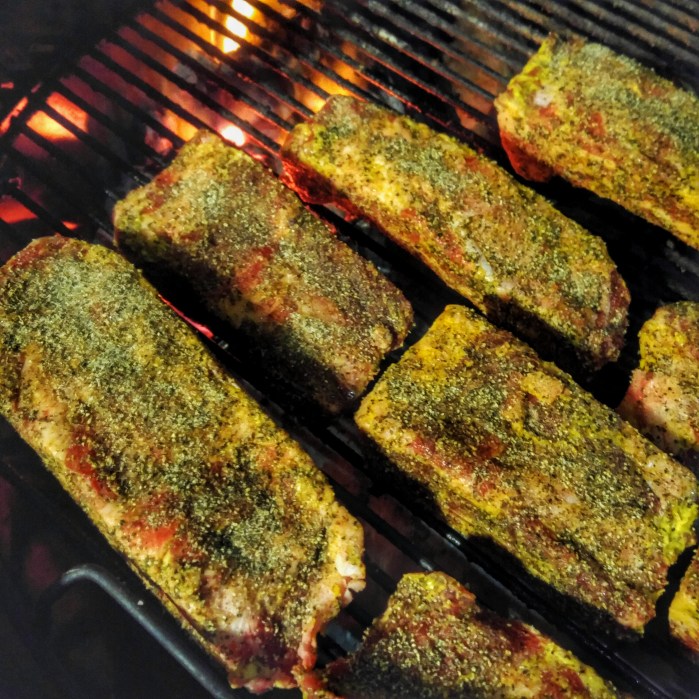
Set up the charcoal baskets on one side of the pit and got the coals going pretty good before I placed the Flank directly over the baskets with a chunk of mesquite for smoke.

20160519_190556_HDR-01

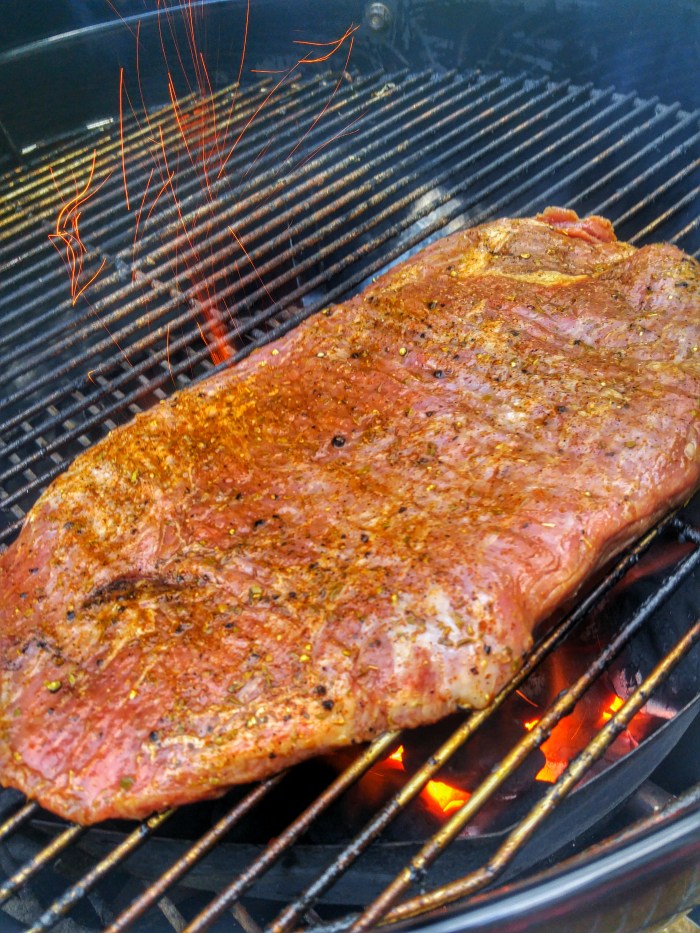
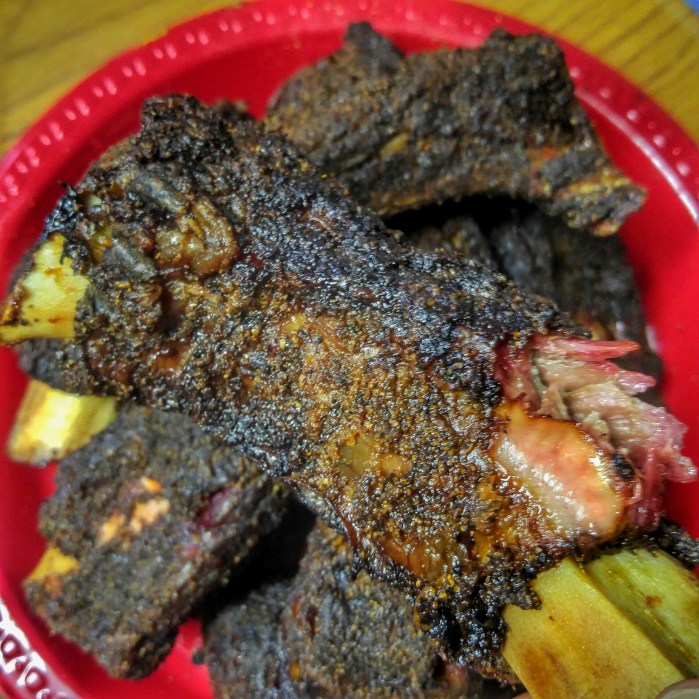
Flipped them over and brought them to 135 internal before pulling them off, tenting them under foil for 10 minutes and then cutting across the grain.

20160519_194228_HDR-01

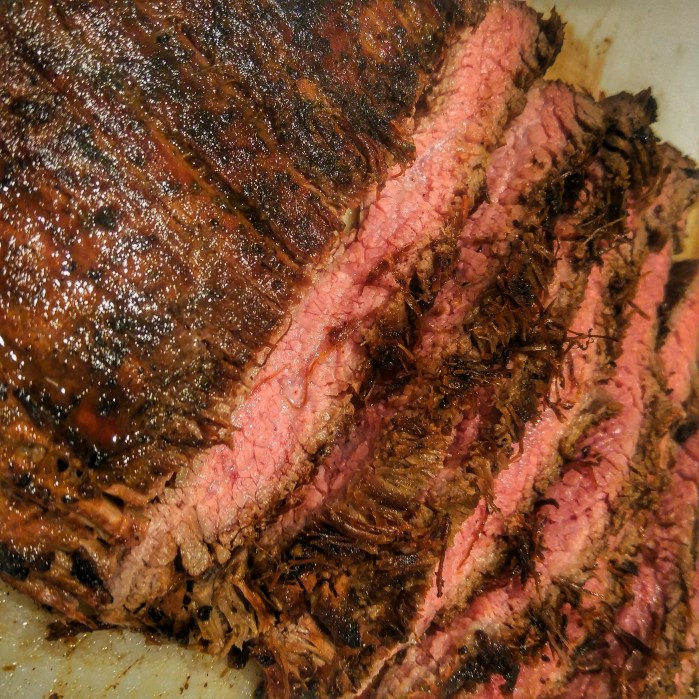
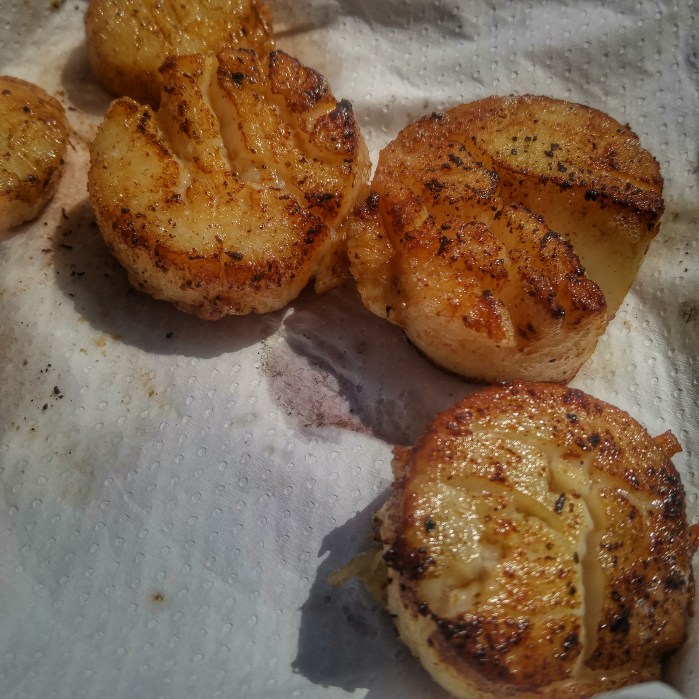
Here it is before I scooped on the avocado mixture that Kate made-

20160519_194349_HDR-01

Chicken wings on the @WeberGrills kettle @CaptJoeLobster

27005450901_7afdca92f3_c

Using 80% full Weber Rapidfire chimney of KBB in the charcoal baskets situated in the middle of the kettle.  Placed the wings around the edges for indirect high heat cooking.  Vents wide open with a chunk of hickory over the coals.

We will check em in 30 minutes.

Here’s they are in all their crispy on the outside-juicy on the inside goodness!

20160517_114358_HDR-0120160517_114405_HDR-01


Reverse Sear Technique For A Petite Sirloin On The @WeberGrills Kettle

So after perusing the offerings at The East Gloucester Stop and Shop Meat Department, the deals were a little thin outside of the petite sirloin for $3.87LB. Normally I’ll only buy a Ribeye or a Porterhouse but these petite sirloins had decent enough marbling (sirloins aren’t known to have the luxurious marbling that a Ribeye has), and they were cut about an inch and a half thick.

20160428_100025_hdr.jpg

So the plan was to smoke them on the Kettle around 225 degrees til they hit 130 internal and then take the lid off and sear the smoked sirloins over the coals to finish.

I took the sirloins out of the package, coated them with EVOO and then gave a coating of coarse salt, black pepper and Montreal Steak Seasoning and let them sit out to come up to room temperature while I prepped the kettle.

20160428_103306_hdr-01.jpeg20160428_120139_hdr-01.jpeg

The Weber Kettle was set up using the snake method of charcoal arrangement and I dumped about 8 semi lit coals on the left hand end of the trail of  charcoal looking to build the temps to 225.  Used one chunk of mesquite and a handful of cherry wood for smoke.

20160428_120430_hdr-01.jpeg

Once the probe read 130 internal temp, I took off the lid and placed two steaks at a time over the glowing orange coals for about 2 minutes on each side to sear them.

I was skeptical as to how they would turn out with such little fat compared to a Ribeye but they were fantastic.  Excellent flavor, cooked perfectly!

20160428_125433_hdr-01.jpeg

And if you’re asking about the veggies on the plate, well uhmmm, There are none!

Update 2010 @WeberGrills Brick Red Performer Restoration Project

Other than the cracked table I knew this Performer had good bones. She was pretty much scratch free, the bowl was regularly cleaned by the previous owner but she just needed to be scraped down and buffed up.
Before and after pics-

There was a little bit of surface rust on the wire shelf on the bottom .  When I was at the owners house I scratched at it with my fingernail and saw that it came right off so I knew it would clean up nicely.  The broken table surface was a bit of a concern but I knew where I could get one.
photogrid_1461793999270.jpg

Will you look at the inside of that bowl shine after an hour or so with the razor scraper and steel wool?

photogrid_1461786264045.jpg

After cleaning the bowl thoroughly, the lid got some love with some steel wool and soapy water.  Just like new! Before and after-

photogrid_1461793775595.jpg

The lid vent was a little dirty but again some dish soap on the steel wool did the trick-photogrid_1461786666516.jpg

Thanks to Weber Kettle Club Forum Member @TheDude for suggesting CLR cleaner to knock off the surface rust on the bottom wire rack shelf.  Again, just like new before and after-

photogrid_1461786451831.jpg

Big time thanks to all the Weber Kettle Club Members that have helped with suggestions and information.  This is a really fun group of people and make the hobby so enjoyable.


The New Project-2010 Brick Red Weber Performer With Gas Assist

2016-04-26 14.27.29

She’s got a cracked table which I’ll have to replace, a little dusty and just a tiny bit of surface rust that I’m confident will come off with some elbow grease, thanks to Weber Kettle Club Forum Member @TheDude ‘s suggestion of using CLR to knock off that surface rust.  I drove an hour and a half away to Rescue her.

The bowl, lid and grates are in excellent shape and with a little elbow grease they’ll shine up nicely.  The ash sweeps turn freely and the ash pan is free of pitting.

2016-04-26 14.27.36

There’s really not a ton to do other than clean her up and replace the table.  This is a $450 grill brand new.  With a couple hours of work I can’t wait to shine her up!

2016-04-26 14.27.462016-04-26 14.31.172016-04-26 17.03.34-12016-04-26 17.03.56

Day Boat Scallops Seared In A @LodgeCastIron Skillet On The @WeberGrills Kettle

Step one was to place the scallops on a paper towel to dry them off.
Then season them with a generous coating of Sea Salt.
Put a half a chimney of coals into the Weber Charcoal baskets and then get your Lodge skillet heated up.
Next put a couple of turns of EVOO and a couple of tablespoons of clarified butter in the skillet and place your scallops down flat onto the skillet surface.
20160425_141139_hdr-01.jpeg20160425_141147_hdr-01.jpeg

The key is to not move the scallops on the skillet to let them develop that golden  browning effect. Resist checking the bottom for at least two minutes.  Once you see good color, flip em over-

20160425_141646_hdr-01.jpeg20160425_141831_hdr-01.jpeg

Let them develop the same color on the other side.  The smaller ones will cook faster so if you need to, leave the larger scallops on for a minute longer.  (You could also cut them in half)

Buttery goodness!

20160425_142008_hdr-01.jpeg20160425_142023_hdr-01.jpeg

The Easiest Grilled Baked Potato Ever On The @WeberGrills Smokey Joe #bbq

image

So cheap, so delicious, so easy you gotta add it into your BBQ repertoire.

First Pierce the russet potatoes a bunch of times and toss them in the microwave for three minutes.  then flip them over and put them in for another three minutes.

Carefully take them out and use a paper towel or basting brush to brush on some EVOO.  Next crush some Atlantic Saltworks coarse salt on top(this will create a nice crust).

Fire up the pit and let the coals get good and hot vents wide open.

Tear off a piece of aluminum foil to place the potatoes on so they don’t burn and leave them on for about 45 minutes.

The outside skin will be nice and crispy and the inside fluffy just waiting to bathe in butter and/or sour cream and/or cheddar melting cheese and/or bacon bits and/or chopped up jalapenos and/or… you get the picture.

20160422_123652_hdr-01.jpeg


The 2009 @WeberGrills Performer Clean Up and First Cook #BBQ

First to scrape ‘er down with the razor blade
Before-wp-1459014319500.jpg

wp-1459456288153.jpgwp-1459456316077.jpg

wp-1459456267959.jpg

She was in pretty decent shape to begin with but the blacks were faded, there was cobwebs and the bowl, lid and ash pan were all encrusted in crud.

After a good scrape with the razor and scrub with the extra fine steel wool-

wp-1459456325701.jpgwp-1459456350165.jpgwp-1459458870935.jpg

Next to clean all the black trim including legs, wire grate shelf on the bottom and charcoal basket and then apply Back To Black to restore the original deep black luster.

wp-1459456344394.jpg

wp-1459460415386.jpgwp-1459456358938.jpgwp-1459456371648.jpg

All the aluminum was scrubbed with the extra fine steel wool as well.  I didn’t spend any time on the thermostatic table as it will be replaced with a newer metal style Performer table when it arrives.

Fired up the gas assist to light a chimney of charcoal. It was nice to not have to use paper or lighter cubes to get the chimney going.  Just placed it on top of the gas assist tube filled up the chimney and let it light the coals. After about three minutes the gas assist was turned off and the chimney dud the rest of the work.  Dumped the chimney into the Weber charcoal baskets and put them in the center.

wp-1459458875803.jpgwp-1459460418911.jpg

The grates that came with the Performer were already in decent shape but I gave them a quick scrub and oiled them down with Peanut oil before placing the rubbed chicken tenderloins offset the coal baskets around the perimeter of the bowl. Placed a small chunk of mesquite in the center for smoke.

When they hit 165 internal they got pulled off to eat.

wp-1459460422327.jpg

Waiting for the new style metal table to be delivered tomorrow and handle from Brian😀


Chicken Wings on the @WeberGrills Original Kettle Using Weber Charcoal Baskets and cooking offset is a crowd pleaser 100% of the time!

wings

Live Smoking- #Beef #Ribs Hit The Freshly Refurbished 2008 @webergrills One Touch Gold Kettle at 5:20AM @CaptJoeLobster #GloucesterMA #BBQ

4:40AM Light The Chimney with about 12 Kingsford briquettes and set up the pit for snake method smoking using mesquite chunks and cherry wood chips.

wp-1458902420929.jpg

Outside conditions 39 degrees with a light drizzle.

I’m trying a little something different as the beef ribs are so rich and I wanted to cut back on the salt so I put together a beef rub consisting of-

3 tbsp restaurant grind black pepper

1 tbsp onion powder

1 tbsp sugar

2 tsp granulated garlic

2 tsp ancho powder

1 tsp cayenne powder

At the dollar store I picked up this $1 sugar shaker to use to disperse the rub.

First a light slather of yellow mustard for the rub adhesive and then  I applied ground Himalayan salt to the ribs as if I was seasoning a steak ( a lot less salt than the 50/50 pepper salt ratio I was using before).  Once the salt was on I shook on the rub using the sugar shaker.

wp-1458902428244.jpgwp-1458902435088.jpgwp-1458902440139.jpg

5:20AM Ribs Hit The Kettle-

wp-1458903241472.jpgwp-1458903246265.jpg

6:57 Update: Temps have fluctuated from 250- 325.  I’m not sweating the temps, they’ll be done when they’re done.

9:40AM.  Probably the first time ever that I didn’t lift the lid once start to finish.  The temps within the first hour varied from 250-325 but after exactly two adjustments she settled into a much tighter range of 270-289.

wp-1458916863487.jpgwp-1458916868366.jpgwp-1458916872535.jpg

They were fantastic but probably could have benefited for spritzing at 20 minute intervals during the final hour.  I also will absolutely use this rub again as they had a much better pepper/salt flavor.